User’s Manual L350/L350D computers.toshiba-europe.
L350/L350D Copyright © 2008 by TOSHIBA Corporation. All rights reserved. Under the copyright laws, this manual cannot be reproduced in any form without the prior written permission of TOSHIBA. No patent liability is assumed, with respect to the use of the information contained herein.
L350/L350D DVD MovieFactory is a trademark of the Ulead Systems. Inc. Labelflash™ is a trademark of YAMAHA CORPORATION. Manufactured under license from Digital Theater Systems, Inc. U.S. Pat. No’s. 5,451,942; 5,956,674; 5,974,380; 5,978,762; 6,226,616; 6,487,535 and other U.S. and world-wide patents issued and pending. “DTS” and “DTS Digital Surround” are registered trademarks of Digital Theater Systems, Inc. Copyright 1996, 2003 Digital Theater Systems, Inc. All Rights Reserved.
L350/L350D ■ If you use an extension cable with your AC adaptor, ensure that the total ampere rating of the products plugged in to the extension cable does not exceed the ampere rating of the extension cable. ■ To remove power from the computer, turn it off, remove the battery, and disconnect the AC adaptor from the electrical outlet.
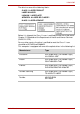
L350/L350D Network compatibility statement This product is designed to work with, and is compatible with the following networks. It has been tested to and found to conform with the additional requirements conditional in EG 201 121.
L350/L350D ENERGY STAR® Program Your computer model may be ENERGY STAR® Compliant. If the model you purchased is compliant, it is labeled with the ENERGY STAR® logo on the computer and the following information applies. TOSHIBA is a partner in the Environmental Protection Agency’s (EPA) ENERGY STAR® Program and has designed this computer to meet the latest ENERGY STAR® guidelines for energy efficiency.
L350/L350D The drive has one of the following labels: CLASS 1 LASER PRODUCT LASER KLASSE 1 LUOKAN 1 LASERLAITE APPAREIL A LASER DE CLASSE1 KLASS 1 LASER APPARAT Before it is shipped, the Class 1 Laser is certified to meet the United States Chapter 21 Standards of the Department of Health and Human Services (DHHS 21 CFR). For any other country, the drive is certified to meet the Class 1 Laser standards of IEC825 and EN60825.
L350/L350D Important notice Copyrighted works including, but not limited to, music, video, computer programs, databases are protected by copyright laws. Unless specifically permitted under applicable copyright laws, you cannot copy, modify, assign, transmit or otherwise dispose of any copyrighted work with the consent of the owner of the copyright. Please take notice that unauthorized copying, modification, assignment, transmission and disposition may be subject to claims for damages and penalties.
L350/L350D Table of Contents Preface General Precautions Chapter 1 Introduction Equipment checklist. . . . . . . . . . . . . . . . . . . . . . . . . . . . . . . . . . . . . . . 1-1 Features. . . . . . . . . . . . . . . . . . . . . . . . . . . . . . . . . . . . . . . . . . . . . . . . . 1-2 Special features . . . . . . . . . . . . . . . . . . . . . . . . . . . . . . . . . . . . . . . . . . 1-8 TOSHIBA Value Added Package . . . . . . . . . . . . . . . . . . . . . . . . . . . .
L350/L350D Using the touchpad . . . . . . . . . . . . . . . . . . . . . . . . . . . . . . . . . . . . . . . .4-1 Using optical disc drives . . . . . . . . . . . . . . . . . . . . . . . . . . . . . . . . . . . .4-2 Using TOSHIBA HD DVD PLAYER to enjoy HD DVDs (preinstalled with some models) . . . . . . . . . . . . . . . . . . . . . . . . . . .4-7 Using TOSHIBA HD DVD PLAYER . . . . . . . . . . . . . . . . . . . . . . . . . . .4-10 Using the computer in place of a HD DVD Player . . . . . . . . . . . . . . .
L350/L350D USB FDD Kit . . . . . . . . . . . . . . . . . . . . . . . . . . . . . . . . . . . . . . . . . . . . . 8-9 External monitor . . . . . . . . . . . . . . . . . . . . . . . . . . . . . . . . . . . . . . . . . . 8-9 HDMI . . . . . . . . . . . . . . . . . . . . . . . . . . . . . . . . . . . . . . . . . . . . . . . . . . 8-10 Security lock . . . . . . . . . . . . . . . . . . . . . . . . . . . . . . . . . . . . . . . . . . . . 8-11 Chapter 9 Troubleshooting Problem solving process . . . . . . . . . . .
L350/L350D xii User’s Manual
L350/L350D Preface Congratulations on your purchase of the TOSHIBA L350/L350D computer. This powerful, lightweight notebook computer is designed to provide years of reliable, high-performance computing. This manual tells how to set up and begin using your TOSHIBA L350/ L350D computer. It also provides detailed information on configuring your computer, basic operations and care, using optional devices and troubleshooting.
L350/L350D Chapter 6, Power and Power-up Modes, gives details on the computer’s power resources and battery save modes. Chapter 7, HW Setup and Passwords, explains how to configure the computer using the HW Setup program. It also tells how to set a password. Chapter 8, Optional Devices, describes the optional hardware available.
L350/L350D Display ABC Names of windows or icons or text generated by the computer that appear on its display screen are presented in the typeface you see to the left. Messages Messages are used in this manual to bring important information to your attention. Each type of message is identified as shown below. Pay attention! A caution informs you that improper use of equipment or failure to follow instructions may cause data loss or damage your equipment. Please read.
L350/L350D xvi User’s Manual
L350/L350D General Precautions TOSHIBA computers are designed to optimize safety, minimize strain and withstand the rigors of portability. However, certain precautions should be observed to further reduce the risk of personal injury or damage to the computer. Be certain to read the general precautions below and to note the cautions included in the text of the manual.
L350/L350D Heat injury ■ Avoid prolonged physical contact with the computer. If the computer is used for long periods, its surface can become very warm. While the temperature will not feel hot to the touch, if you maintain physical contact with the computer for a long time, for example if you rest the computer on your lap or if you keep your hands on the palm rest, your skin might suffer a low-heat injury.
L350/L350D Chapter 1 Introduction This chapter provides an equipment checklist, and it identifies the computer’s features, options and accessories. Some of the features described in this manual may not function properly if you use an operating system that was not preinstalled by TOSHIBA. Equipment checklist Carefully unpack your computer. Save the box and packaging materials for future use.
L350/L350D Documentation ■ TOSHIBA L350/L350D User’s Manual ■ TOSHIBA L350/L350D Quickstart ■ Instruction Manual for Safety and Comfort ■ Warranty information If any of the items are missing or damaged, contact your dealer immediately. Features This computer incorporates the following features and benefits: Processor Built-in Please visit your region’s website for the configuration details of the model that you have purchased.
L350/L350D If your computer is configured with two 2GB memory modules, the memory might be displayed as approximately 3GB only (depending on the computer's hardware specifications). This is correct because the operating system usually displays the available memory instead of the physical memory (RAM) built into the computer. Various system components (like the video adapter's GPU and PCI devices like Wireless LAN, etc.) require their own memory space.
L350/L350D DVD Super Multi (± R DL) drive 1-4 Some models are equipped with a full-size DVD Super Multi (± R DL) drive module that allows you to record data to rewritable CD/DVDs as well as run CD/DVDs without using an adaptor. It reads DVD-ROMs at maximum 8 speed and CD-ROMs at maximum 24 speed.
L350/L350D HD DVD-ROM drive Some models are equipped with a full-size HD DVD-ROM drive module that allows you to run CD/DVD/HD DVDs without using an adaptor. The drive reads DVD-ROMs at a maximum 8x speed, CD-ROMs at a maximum 24x speed, and HD DVDs at a maximum 1x speed. It writes CD-Rs at up to 16x speed, CD-RWs at up to 10x speed, DVD-Rs and DVD+Rs at up to 4x speed, DVD-RWs and DVD+RWs at up to 4x speed, DVD-R DL at up to 2x speed, DVD+R DL at up to 2.4x speed and DVD-RAM at up to 3x speed.
L350/L350D Pointing device Built-in A touchpad and control buttons in the palm rest enable control of the on-screen pointer. Power Battery pack The computer is powered by one rechargeable lithium-ion battery pack. RTC battery The internal RTC battery backs up the Real Time Clock (RTC) and calendar. AC adaptor The universal AC adaptor provides power to the system and recharges the batteries when they are low. It comes with a detachable power cord.
L350/L350D Multimedia Web camera (optional) Record/Send still or video images with this integrated web camera. (Provided with some models) Sound system Windows Sound System compatible sound system provides internal speaker as well as jacks for an external microphone and headphone. It also has a volume control dial. Communications User’s Manual LAN The computer is equipped with a LAN card that supports Ethernet LAN (10 Mbit/s, 10BASE-T) or Fast Ethernet LAN (100 Mbit/s, 100BASE-TX).
L350/L350D Security Security lock slot Connects a security lock to anchor the computer to a desk or other large object. Software Operating system Microsoft® Windows Vista™ is available. Refer to the preinstalled Software section at the front of this chapter. TOSHIBA Utilities A number of utilities and drivers are preinstalled to make your computer more convenient to use. Refer to the Utilities and applications section in this chapter.
L350/L350D User’s Manual Power-on password Two levels of password security, supervisor and user, are available to prevent unauthorized access to your computer. Instant security A hot key function blanks the screen and disables the computer providing data security. Intelligent power supply A microprocessor in the computer’s intelligent power supply detects the battery’s charge and calculates the remaining battery capacity.
L350/L350D Hibernation This feature allows you to turn off the power without exiting from your software. The contents of main memory are saved to the hard disk, when you turn on the power again, you can continue working right where you left off. Refer to the Turning off the power section in Chapter 3, Getting Started, for details Sleep If you have to interrupt your work, you can turn off the power without exiting from your software. Data is maintained in the computer’s main memory.
L350/L350D ■ When you start or resume your computer, the TOSHIBA Flash Cards may take a moment to become available and may display several times before completely activating. The hot key functions will be available once the TOSHIBA Flash Cards are completely active. ■ If your system is busy and you see a [Not Responding] message, allow TOSHIBA Flash Cards to completely activate before you continue to use the utility and hot keys.
L350/L350D 1-12 TOSHIBA Disc Creator You can create CD/DVDs in several formats including audio CDs that can be played on a standard stereo CD player and data CD/DVDs to store the files and folderson your hard disk drive. This software can be used on a model with CD-RW/DVD-ROM drive, DVD Super Multi (± R DL) drive, HD DVD-ROM and HD DVD-RW drive. You can boot TOSHIBA Disc Creator from the menu bar as follows.
L350/L350D Options You can add a number of options to make your computer even more powerful and convenient to use. The following options are available: User’s Manual Memory expansion Two memory expansion slots are available for installing 512 MB, 1024 MB or 2048 MB memory modules. The modules are PC2-5300, 200-pin, SO-DIMM (small-outline dual in-line memory module). Maximum system memory capacity and speed depend on the model you purchased.
L350/L350D 1-14 User’s Manual
L350/L350D Chapter 2 The Grand Tour This chapter identifies the various components of your computer. Become familiar with each component before you operate the computer. Front with the display closed The following figure shows the computer’s front with its display panel in the closed position.
L350/L350D 2-2 Multiple digital media card slot (optional) This slot allows you to easily transfer data from devices, such as digital camera and PDA, that use flash memory (SD/SDHC/MS/MS Pro/MMC memory cards)(Provided with some models). Display latch This latch secures the LCD panel in its closed position. Slide the latch to open the display. Microphone jack A standard 3.5 mm mini microphone jack enables connection of a monaural microphone or other device for audio input.
L350/L350D Left side The following figure shows the computer’s left side. LAN jack Express Card slot Fan vent External monitor port USB ports HDMI out port* *Depending on the model you purchased Figure 2-2 The left side of the computer External monitor port This 15-pin port allows you to connect an external monitor. Fan vent Provides air flow for the fan. Be careful not to block the fan vent. Also be careful to keep foreign objects out of the vents.
L350/L350D Universal serial bus (USB 2.0) ports The two universal serial bus (USB) ports comply with USB Serial 2.0 standards, which enables data transfer speeds 40 times faster than the USB 1.1 standards. (The ports also support USB 1.1) Keep foreign objects out of the USB connectors. A pin or similar object can damage the computer’s circuitry. Operation of all functions of all USB devices has not been confirmed. some functions might not execute properly.
L350/L350D Right side The following figure shows the computer’s right side. Security lock slot USB port Optical disc drive DC IN 19V Figure 2-3 The right side of the computer Universal serial bus (USB 2.0) port The universal serial bus (USB) port comply with USB Serial 2.0 standards, which enables data transfer speeds 40 times faster than the USB 1.1 standards. (The port also support USB 1.1) Keep foreign objects out of the USB connectors. A pin or similar object can damage the computer’s circuitry.
L350/L350D Back side The following figure shows the computer’s back side. Modem jack* *Depending on the model you purchased Figure 2-4 The computer’s back side Modem jack (optional) 2-6 In areas where an internal modem is installed as standard equipment, there is a modem jack that allows you to use a modular cable to connect the modem directly to a telephone line. The modem is not supported in some marketing regions.
L350/L350D Underside The following figure shows the underside of the computer. Make sure the display is closed before turning over your computer. Battery pack Battery release Latch Battery pack lock Memory module cover Figure 2-5 The underside of the computer User’s Manual Battery pack The battery pack powers the computer when the AC adaptor is not connected. The Batteries section in Chapter 6, Power and Power-up Modes, describes how to access the battery pack.
L350/L350D Front with the display open The following figure shows the front of the computer with the display open. To open the display, lift the display up and position the display at a comfortable viewing angle.
L350/L350D Touch pad Moves the pointer and selects or activates items on the screen. Can be set to perform other mouse functions, such as scrolling, selecting, and doubleclicking. Touch pad control buttons Function like the left and right buttons on an external mouse. System indicators Five LEDs allow you to monitor the DC IN, power status, main battery, disk and multiple digital media card. Details are in the system indicators section.
L350/L350D Function Buttons Six buttons are provided with some models. Available for use: Mute, CD/DVD/HD DVD, Play/Pause, Stop, Previous, Next. These buttons allow you to manage audio/video, run applications and access utilities. Refer to the Function Buttons section in Chapter 4, Operating Basics, for details. 2-10 Mute button Press this button to turn off the sound.
L350/L350D System indicators The following figure the system indicators, which light when various computer operations are in progress. Multiple digital media card hdd/odd DC IN Main battery Power Figure 2-7 System indicators User’s Manual DC IN The DC IN indicator glows green when DC power is supplied from the AC power adaptor. If the adaptor’s output voltage is abnormal or if the power supply malfunctions, this indicator shows no light.
L350/L350D Keyboard indicators The following figure shows the position of the CAPS LOCK indicator. When the CAPS LOCK indicator glows the keyboard is in all-caps mode. CAPS LOCK indicator Figure 2-8 CAPS LOCK indicator CAPS LOCK This indicator glows green when letter keys are locked into their uppercase format. Optical disc drives A DVD Super Multi (± R DL) drive or HD DVD-ROM drive is configured in your computer. When the computer is accessing a CD/DVD/HD DVD, an indicator on the drive glows.
L350/L350D Notes on use ■ Because HD DVD is a new format there is a possibility of new features being added at a later date. As such, it is important that the purchaser understands that software and other updates may be necessary after purchase. Please be sure to complete user registration in order to receive timely product updates. ■ This product can play existing DVD and CD formats, however, playback may not be possible with some software. This product cannot play Blu-ray DISC™ format software.
L350/L350D Region codes for DVD drives and media Optical disc drive and media are manufactured according to the specifications of six marketing regions. When you purchase DVD-Video, make sure it matches your drive, otherwise it will not play properly.
L350/L350D The read speed is slower at the center of a disc and faster at the outer edge.
L350/L350D AC adaptor The AC adaptor converts AC power to DC power and reduces the voltage supplied to the computer. It can automatically adjust to any voltage from 100 to 240 volts and to a frequency of either 50 or 60 hertz, enabling you to use the computer in almost any region. To recharge the battery, simply connect the AC adaptor to a power source and the computer. See Chapter 6 Power and Power-up Modes for details.
L350/L350D Chapter 3 Getting Started This chapter provides basic information to start using your computer. It covers the following topics: Be sure also to read Instruction Manual for Safety and Comfort. This guide, which is included with the computer, explains product liability.
L350/L350D Connecting the AC adaptor Attach the AC adaptor when you need to charge the battery or you want to operate from AC power. It is also the fastest way to get started, because the battery pack will need to be charged before you can operate from battery power. The AC adaptor can be connected to any power source supplying from 100 to 240 volts and 50 or 60 hertz. For details on using the AC adaptor to charge the battery pack, refer to Chapter 6, Power and Power-up Modes.
L350/L350D Opening the display The display panel can be rotated in a wide range of angles for optimal viewing. To open the display, slide the latch to the right side and lift the panel up to the best viewing angle. When you open the display, be sure to hold the base firmly and lift up the monitor slowly.
L350/L350D Starting up for the first time When you first turn on the power, the computer’s initial screen is the Microsoft® Windows Vista™ Startup Screen Logo. Follow the on-screen directions. Turning off the power The power can be turned off in one of three modes: shut down (Boot), hibernation mode or sleep mode. Shut down mode (Boot mode) When you turn off the power in shut down mode, no data is saved and the computer will boot to the operating system’s main screen. 1.
L350/L350D Benefits of hibernation mode The hibernation feature provides the following benefits: ■ Saves data to the hard disk when the computer automatically shuts down because of a low battery. For the computer to shut down in hibernation mode, the hibernation feature must be enabled in the Hibernate tab in Power Options. Otherwise, the computer will shut down in sleep mode. If battery power becomes depleted, data saved in sleep mode will be lost.
L350/L350D Sleep mode In sleep mode the power remains on, but the CPU and all other devices are in sleep mode. ■ Before entering sleep mode, be sure to save your data. ■ Do not install or remove a memory module while the computer is in sleep mode. The computer or the module could be damaged. ■ Do not remove the battery pack while the computer is in sleep mode (unless the computer is connected to an AC power source). Data in memory will be lost.
L350/L350D Restarting the computer Certain conditions require that you reset the computer, for example, if: ■ You change certain computer settings. ■ An error occurs and the computer does not respond to your keyboard commands. If you need to restart the computer, there are three ways this can be achieved: 1. Click Start then click the arrow button ( ) in the power management buttons ( ) and select Restart from the menu. 2.
L350/L350D 4. Follow the on-screen instructions. The Windows Vista® CompletePC Backup feature can be used on Windows Vista® Business Edition and Ultimate Edition. Restoring the pre-installed Software Depending on the model you purchased, different ways for restoring the pre-installed software are offered: ■ Creating optical Recovery Discs ■ Restoring the pre-installed software from your created Recovery Discs.
L350/L350D Please note that some of the above media may not be compatible with the optical disc drive installed into your computer. You should therefore verify the optical disc drive supports the blank media you have chosen before proceeding. 3. Turn on your computer and allow it to load the Windows Vista® operating system from the hard disk drive as normal. 4. Insert the first blank media into the optical disc drive tray. 5.
L350/L350D Restoring the pre-installed software from the Recovery hard disk drive On your Data drive you may find a folder “HDDRecovery”. This folder stores files which can be used to recover your system to the originally installed factory state. If you subsequently set up your hard disk drive again, do not change, delete or add partitions in a manner other than specified in the manual, otherwise you may find that space for the required software is not available.
L350/L350D Restoring the pre-installed software from the bundled Product Recovery DVD-ROM (optional) If the pre-installed files are damaged, use the Product Recovery DVD-ROM to restore them. To restore the operating system and all preinstalled software, follow the steps below. When the sound mute feature has been activated by pressing the FN + ESC key, be sure to disable this to allow sounds to be heard before starting the restore process. Please refer to Chapter 5, The Keyboard, for further details.
L350/L350D 3-12 User’s Manual
L350/L350D Chapter 4 Operating Basics This chapter gives information on basic operations including using the touchpad, optical disc drives, Audio/Video controls, the web camera, the microphone, the internal modem, wireless communication and LAN. It also provides tips on caring for your computer, and CD/DVD/HD DVDs. Using the touchpad To use the touchpad, simply touch and move your finger tip across it in the direction you want the on-screen pointer to go.
L350/L350D Using optical disc drives Operation is the same for all optical disc drives. The full-size drive provides high-performance execution of CD/DVD/HD DVDs-based programs. You can run CD/DVD/HD DVDs without an adaptor. When the computer is accessing a CD/DVD/HD DVDs, an indicator on the drive glows. ■ Use the TOSHIBA DVD PLAYER application to view DVD-Video discs.(DVD Super Multi (± R DL) drive model) ■ Use the TOSHIBA HD DVD PLAYER application to view DVD-Video discs or HD DVD-Video discs.
L350/L350D b. Pressing the eject button will not open the drawer when the drive’s power is off. If the power is off, you can open the drawer by inserting a slender object (about 15 mm) such as a straightened paper clip into the eject hole just to the right of the eject button. 15 mm Eject hole Diameter 1.0 mm Figure 4-3 Manual release with the eject hole 2. Grasp the drawer gently and pull until it is fully opened.
L350/L350D 3. Lay the CD/DVD/HD DVD, label side up, in the drawer. Figure 4-5 Inserting a CD/DVD/HD DVD When the drawer is fully opened, the edge of the computer will extend slightly over the CD/DVD/HD DVD tray. Therefore, you will need to turn the CD/DVD/HD DVD at an angle when you place it in the tray. After seating the CD/DVD/HD DVD, however, make sure it lies flat, as shown in above figure. ■ Do not touch the laser lens. Doing so could cause misalignment.
L350/L350D 5. Push the center of the drawer to close it. Press gently until it locks into place. If the CD/DVD/HD DVD is not seated properly when the drawer is closed, the CD/DVD/HD DVD might be damaged. Also, the drawer might not open fully when you press the eject button. Figure 4-6 Closing the drawer Removing discs To remove the CD/DVD/HD DVD, follow the steps below and refer to below figure. Do not press the eject button while the computer is accessing the drive.
L350/L350D 2. The CD/DVD/HD DVD extends slightly over the sides of the drawer so you can grasp it. Hold the CD/DVD/HD DVD gently and lift it out. Figure 4-7 Removing a CD/DVD/HD DVD 3. Push the center of the drawer to close it. Press gently until it locks into place. Function Buttons This section describes the button functions. Six buttons are provided with some models.
L350/L350D Using TOSHIBA HD DVD PLAYER to enjoy HD DVDs (preinstalled with some models) HD DVD playback restrictions HD DVD-ROM drive model allow users to enjoy the strong visuals of HD DVD Video. TOSHIBA HD DVD PLAYER software is provided for playback of HD DVD Video. Notes on use HD DVD playback ■ HD DVD is a new standard which makes use of new technologies. As such, there is a possibility of problems occurring related to connection, compatibility or operation with some discs and other digital devices.
L350/L350D When using ■ Frame dropping, audio skipping or out of synch audio and video may occur during playback of some HD DVD Video titles. ■ Close all other applications when using the TOSHIBA HD DVD PLAYER. Do not open any other applications or carry out any other operations during HD DVD playback. Playback may stop or not function properly in some situations. ■ Do not playback HD DVD discs Video while watching or recording television programs using other applications.
L350/L350D ■ When viewing on an external display or television, use a HDMI cable to connect the external device to the HDMI out port and change the display device before playing. The display device cannot be changed during playback. ■ HD DVD Video can only be displayed on the computer’s display panel or televisions connected to the computer’s HDMI out port. HD DVD Video cannot be displayed on televisions connected to the S-Video output connector or external displays connected to the RGB connector.
L350/L350D Using TOSHIBA HD DVD PLAYER Starting TOSHIBA HD DVD PLAYER 1. Use the following procedure to start TOSHIBA HD DVD PLAYER. Insert a HD DVD-Video in the HD DVD drive while Windows Vista™ is running. When a HD DVD-Video disc and a HD DVD (Twin format disc) are set in the HD DVD drive, the following application selection screen may appear. If this occurs, select Play HD DVD movie or Run the HD DVD Launcher, then click OK to launch the TOSHIBA HD DVD PLAYER.
L350/L350D ■ Only operation buttons (including remote controller and Front operation panels) which correspond to currently available and active features will be useable during HD DVD playback. ■ If the menu is opened in the Display Area using the Control window’s Top Menu or Menu buttons, touchpad and mouse menu operations may not be able to be used.
L350/L350D Settings Displays the Settings screen. Help Opens help. Minimize Minimizes the window of TOSHIBA HD DVD PLAYER. Exit Closes TOSHIBA HD DVD PLAYER. TOSHIBA HD DVD PLAYER control window The buttons on the panel are used to control playback of HD DVD-Video discs. Click the Display Area to display the Control window when it is hidden. Please refer to the following “TOSHIBA HD DVD PLAYER control window” section for more information.
L350/L350D Exit Closes TOSHIBA HD DVD PLAYER. Current position Displays the current position within the title on the bar icon. Volume control Adjusts the volume to the level selected by dragging the slider bar. Mute Mutes the sound when clicked. Clicking when the sound is muted returns the volume to the previous level. Multi audio channel output Switches between available multi audio channel, during playback of a DVD-VR. This function can be used during playback of a DVD-VR only.
L350/L350D One-touch skip Jumps forward by a specified amount of time and continues playback from that position. Slow motion Performs slow motion playback. Twin format disc (HD DVD selected) Sound Twin format disc (DVD selected) Angle Top Menu Subtitle Return Drive specification Repeat Title/Chapter search Menu Figure 4-13 TOSHIBA HD DVD PLAYER control window (3) Subtitle Switches between available subtitles.
L350/L350D Using the computer in place of a HD DVD Player Videos played using TOSHIBA HD DVD PLAYER included with the computer can be displayed on a television equipped with a HDMI input port. HD DVD-Video can only be displayed on the computer’s display panel or on a television connected to the HDMI out port. HD DVD-Video cannot be displayed on televisions connected to the S-Video out port or external displays connected to the RGB connector.
L350/L350D Switching between computer and television display The following method can be used to display HD DVD-Video. The display method can be changed by changing the display device setting. Configure the following settings to display HD DVD-Video on the television. If the following settings are not configured, HD DVD-Video will not be displayed on the television. Notes on operation ■ Change the display device setting before playing HD DVD-Video.
L350/L350D Writing CD/DVDs on DVD Super Multi (± R DL) drive/ HD DVD-ROM drive Some models are equipped with a full-size DVD Super Multi (± R DL ) drive or the HD DVD-ROM drive which can be used to write data to either CD-R/RW or DVD-R/-RW/+R/+RW/-RAM/+R DL/-R DL discs. The following applications for writing are supplied: TOSHIBA Disc Creator or Ulead DVD Movie Factory® for TOSHIBA, which is a product of Ulead Systems, Inc.
L350/L350D DVD-RW: DVD Specifications for DVD-RW Disc for General Version 1.2 MITSUBISHI KAGAKU MEDIA CO., LTD Victor Company of Japan, LTD DVD+RW: MITSUBISHI KAGAKU MEDIA CO., LTD DVD-RAM: DVD Specifications for DVD-RAM Disc for Version 2.0, Version 2.1 or Version 2.2 Matsushita Electric Industrial Co., Ltd. Hitachi Maxell Ltd. DVD+R DL: MITSUBISHI KAGAKU MEDIA CO., LTD. DVD-R DL: MITSUBISHI KAGAKU MEDIA CO., LTD. DVD-R for Labelflash™: FUJIFILM Corporation. DVD+R for Labelflash™: FUJIFILM Corporation.
L350/L350D ■ You can use DVD-RAM discs that can be removed from a cartridge and DVD-RAM discs designed without a cartridge. You cannot use a disc with a 2.6 GB single-sided capacity or 5.2 GB double-sided capacity. ■ Other DVD-ROM drives for computers or other DVD PLAYERS may not be able to read DVD-R/-R DL/-RW or DVD+R/+R DL/+RW discs. ■ Data written to a CD-R/DVD-R/DVD+R disc cannot be deleted either in whole or in part.
L350/L350D When writing or rewriting Please observe/consider the following when you write or rewrite to a CD-R/RW, DVD-R/-R DL/-RW/-RAM or DVD+R/+R DL/+RW disc. ■ Do not perform any of the following actions: ■ Change users in the Windows Vista™ operating system. ■ Operate the computer for any other function, including use of a mouse or touchpad, closing/opening the LCD panel. ■ Start a communication application such as a modem. ■ Apply impact or vibration to the PC.
L350/L350D TOSHIBA Disc Creator Note the following limitations when you use TOSHIBA Disc Creator: ■ DVD-Video cannot be created using TOSHIBA Disc Creator. ■ DVD-Audio cannot be created using TOSHIBA Disc Creator. ■ You cannot use TOSHIBA Disc Creator’s “Audio CD for Car or Home CD Player” function to record music to DVD-R, DVD-R DL,DVD-RW, DVD+R, DVD+R DL, DVD+RW, HD DVD-R or HD DVD-RW media.
L350/L350D Data verification To verify that data has been written or rewritten correctly to a data CD/DVD you should follow the steps below before you begin the write/rewrite process: 1. Display the setting dialog box by one of the following two steps: ■ Click the setting button ( ) for writing on the main toolbar in the Data CD/DVD mode. ■ Select Setting for writing -> Data CD/DVD in the Setting menu. 2. Mark the Verify written data check box. 3. Select File Open or Full Compare mode. 4.
L350/L350D How to make a DVD-Video Simplified steps for making a DVD-Video from video data captured from a DV-Camcorder: 1. Click Start -> All Programs -> DVD MovieFactory for TOSHIBA -> Ulead DVD MovieFactory for TOSHIBA Launcher to launch DVD MovieFactory. 2. Insert a DVD-RW or DVD+RW disc in Burner. 3. Click Video Disc -> Burn Video to Disc to launch Direct Recording dialog box, choose DVD-Video/+VR to invoke Straight Capture to Disc Page. 4. Choose DVD-Video format. 5. Choose the capture source is DV.
L350/L350D ■ Do not operate DVD MovieFactory immediately after turning on the computer. Please wait until all Disc Drive activity has stopped. ■ When recording to a DV-Camcorder, to ensure you capture all of your data, let the camcorder record for a few seconds before you begin recording your actual data. ■ CD recorder, JPEG functions, DVD-Audio, mini DVD and Video CD functions are not supported in this version. ■ While recording video to DVD, please close all other programs.
L350/L350D Media care This section provides tips on protecting data stored on your CD/DVD/HD DVD. Handle your media with care. The following simple precautions will increase the lifetime of your media and protect the data stored on them: CD/DVD/HD DVD 1. Store your CD/DVD/HD DVD in the container they came in to protect them and keep them clean. 2. Do not bend the CD/DVD/HD DVD. 3. Do not write on, apply a sticker to, or otherwise mark the surface of the CD/DVD/HD DVD that contains data. 4.
L350/L350D Using the software The web camera software is pre-configured to start when you turn on Windows Vista; if you need to restart it go to Start -> All Programs -> Camera Assistant Software -> Camera Assistant Software. Video recording Audio recording Capture still images Function Display window Camera resolution Effects Mute Figure 4-16 Using the Software 4-26 Capture Still Image Click to see a preview of the captured image; you can also e-mail the image.
L350/L350D Settings Chooses from the : Options tab to change the tool position; the Picture tab to select picture output options such as size, export file and saving location; the Video tab to choose output settings such as Frame Rate, Size, Compression and the file save path; the Audio Device, Compression,Volume and file save path. Help Displays the help files for the software.
L350/L350D To select a region, follow the steps below. 1. In Windows Vista™, click start, point to All Programs, point to TOSHIBA, point to Networking and click Modem Region Select. Do not use the Country/Region Select function in the Modem setup utility in the Control Panel if the function is available. If you change the Country/ Region in the Control Panel, the change may not take effect. 2. The Region Selection icon will appear in the Windows Task Bar.
L350/L350D The dialing properties dialog box will be displayed automatically after you select the region. Location list for region selection. A submenu appears displaying location information for telephony. Open dialog box, if the modem and Telephony Current Location region code do not match. A warning dialog box is displayed if current settings for region code and telephony location are incorrect. Modem Selection If the computer cannot recognize the internal modem, a dialog box is displayed.
L350/L350D If you use a storage device such as a DVD-ROM drive, CD-RW/DVD-ROM drive or HDD connected to a 16-bit PC card, you might experience the following modem problems: ■ Modem speed is slow or communication is interrupted. ■ Skips may occur in sound. Disconnecting To disconnect the internal modem cable, follow the steps below. 1. Pinch the lever on the connector in the telephone jack and pull out the connector. 2. Disconnect the cable from the computer in the same manner.
L350/L350D Security ■ Be sure to enable encryption function. Otherwise your computer will allow the illegal access by an outsider through wireless LAN to cause illegal instruction, eavesdropping, and loss or destruction of stored data. TOSHIBA strongly recommends the customer to enable the encryption function. ■ TOSHIBA is not liable for the eavesdropping of data due to the use of Wireless LAN and the damage thereof.
L350/L350D LAN The computer has built-in support for Ethernet LAN (10 megabits per second, 10BASE-T) or Fast Ethernet LAN (100 megabits per second, 100BASE-TX)(depending on model you purchased). This section describes how to connect/disconnect to a LAN. Do not install or remove an optional memory module while Wake-up on LAN is enabled. The Wake-up on LAN function consumes power even when the system is off. Leave the AC adaptor connected while using this feature.
L350/L350D Disconnecting LAN cable To disconnect the LAN cable, follow the steps below. Make sure the LAN active indicator (orange LED) is out before you disconnect the computer from the LAN. 1. Pinch the lever on the connector in the computer’s LAN jack and pull out the connector. 2. Disconnect the cable from the LAN hub in the same manner. Check with your LAN administrator before disconnecting from the hub.
L350/L350D Heat dispersal To protect from overheating, the CPU has an internal temperature sensor. If the computer’s internal temperature rises to a certain level, the cooling fan is turned on or the processing speed is lowered. You can select whether to control the CPU temperature by turning on the fan first, then if necessary, lowering the CPU speed. Or, by lowering the CPU speed first, then if necessary, turning on the fan. These functions are controlled within the Power Options.
L350/L350D Chapter 5 The Keyboard The number of keys on your keyboard depends on which country/region’s keyboard layout your computer is configured with. Keyboards for numerous languages are available. There are four types of keys: typewriter keys, function keys, soft keys, and Windows special keys. Typewriter keys The typewriter keys, produce the uppercase and lowercase letters, numbers, punctuation marks, and special symbols that appear on the screen.
L350/L350D Function keys: F1 … F9 The function keys, not to be confused with FN, are the 9 keys at the top of your keyboard. These keys are dark gray, but function differently from the other dark gray keys. F1 through F9 are called function keys because they execute programmed functions when pressed. Used in combination with the FN key, keys marked with icons execute specific functions on the computer. See the section, Soft keys: FN key combinations, in this chapter.
L350/L350D Sleep: Pressing FN + F3 switches the system to sleep mode. Hibernate: Pressing FN + F4 switches the system to hibernation mode. Output: Pressing FN + F5 changes the active display device. Brightness down: Pressing FN + F6 decreases the computer’s display panel brightness in individual steps. Brightness up: Pressing FN + F7 increases the computer’s display panel brightness in individual steps.
L350/L350D Zoom: Pressing FN + SPACE changes the display resolution. TOSHIBA zooming utility (reduce): Pressing FN + 1 reduces the icon size on the desktop or the font sizes within one of the supported application windows. TOSHIBA zooming utility (enlarge): Pressing FN + 2 enlarges the icon size on the desktop or the font sizes within one of the supported application windows.
L350/L350D Generating ASCII characters Not all ASCII characters can be generated using normal keyboard operation. But, you can generate these characters using their ASCII codes. With the overlay on: 1. Hold down ALT. 2. Using the overlay keys, type the ASCII code. 3. Release ALT, and the ASCII character appears on the display screen. With the overlay off: 1. Hold ALT + FN. 2. Using the overlay keys, type the ASCII code. 3. Release ALT + FN, and the ASCII character appears on the display screen.
L350/L350D 5-6 User’s Manual
L350/L350D Chapter 6 Power and Power-up Modes The computer’s power resources include the AC adaptor and an internal battery. This chapter gives details on making the most effective use of these resources including charging and changing batteries, tips for saving battery power, and power-up modes.
L350/L350D Power on AC adaptor not connected Battery charge is above low battery trigger point • Operates • LED: Battery off DC IN off Battery charge is below low battery trigger point • Operates • LED: Battery blinking orange DC IN off Battery charge is exhausted Computer goes into hibernation or shuts down (depending on the Toshiba power Management Utility Setting) No battery installed • No operation • LED: Battery off DC IN off Power off (no operation) Power indicators The Battery, DC IN and P
L350/L350D DC IN indicator Check the DC IN indicator to determine the power status with the AC adaptor connected. Green Indicates the AC adaptor is connected and supplying proper power to the computer. No light Under any other conditions, the indicator does not light. Power indicator Check the Power indicator to determine the power status of the computer the following indicator conditions should be noted: Green Indicates power is being supplied to the computer and the computer is turned on.
L350/L350D When the computer is powered off in hibernation and sleep mode, and the AC adaptor is not connected, the battery pack supply power to maintain data and programs in memory. If the battery pack is completely discharged, hibernation and sleep do not function and the computer loses all data in memory. The following message appears when you turn on the power: The firmware has detected that a CMOS battery fail occurred.
L350/L350D Care and use of the battery pack The battery pack is a vital component of portable computing. Taking proper care of it will help ensure longer operating time on battery power as well as a longer life for your battery pack. Follow the instructions in this section carefully to ensure safe operation and maximum performance. Safety precautions Mishandling of batteries can cause death, serious injury or property damage.
L350/L350D 8. Never expose the battery pack to abnormal shock, vibration or pressure. The battery pack’s internal protective device will fail, causing it to overheat, explode, ignite or leak caustic liquids possibly resulting in death or serious injury. 9. Never let a battery pack become wet. A wet battery pack will overheat, ignite or rupture possibly resulting in death or serious injury. Warning 1. Never allow caustic electrolyte fluid leaked from a battery pack to contact your eyes, skin or clothing.
L350/L350D 6. Be sure to monitor the remaining battery power. If the battery pack and real time clock battery discharge completely. Sleep and hibernation will not function and data in memory will be lose. Also, the computer might register an incorrect time and date. In this case, connect the AC adaptor to recharge the batteries. 7. Never install or remove the battery pack without first turning off the power and disconnecting the AC adaptor.
L350/L350D Time The following table shows the approximate time required to fully charge a discharged battery. Charging time (hours) Battery type Power on Power off Battery pack (6 cell) 8 hours or more 3 hours Battery pack (9 cell) 8 hours or more 4 hours RTC battery 24 hours 24 hours The charging time when the computer is on is affected by ambient temperature, the temperature of the computer and how you use the computer.
L350/L350D Monitoring battery capacity Remaining battery power can be monitored in Power Options. ■ Wait at least 16 seconds after turning on the computer before trying to monitor the remaining operating time. The computer needs this time to check the battery’s remaining capacity and to calculate the remaining operating time, based on the current power consumption rate and remaining battery capacity. The actual remaining operating time may differ slightly from the calculated time.
L350/L350D Retaining data with power off When you turn off your computer with fully charged batteries, the batteries retain data for the following approximate time periods.
L350/L350D Replacing the battery pack When the battery pack reaches the end of its operating life you will need to install a new one. If the Battery indicator flashes orange shortly after fully recharging the battery, the battery pack needs to be replaced. You might also replace a discharged battery pack with a charged spare when you are operating your computer away from an AC power source. This section explains how to remove and install battery packs.
L350/L350D 6. Slide the battery release latch to free the battery pack for removal, then lift up the battery pack. Battery Pack Figure 6-2 Removing the battery pack 7. Pull the battery pack forward to remove it. For environmental reasons, do not throw away a spent battery pack. Please return spent battery pack to your TOSHIBA dealer. Installing the battery pack To install a battery pack, follow the steps below.
L350/L350D Starting the computer by password If you have already registered a password, please enter the password manually to start the computer: To start up the computer with the user password, follow these steps: 1. Turn on the power as described in Chapter 3, Getting Started. The following message appears: Enter Current Password At this point, the hot keys FN + F1 to F9 do not work. They will function after you enter the password. 2. Enter the password. 3. Press ENTER.
L350/L350D System auto off This feature turns the system off automatically if it is not used for a set duration. The system shuts down in sleep mode or hibernation mode in windows.
L350/L350D Chapter 7 HW Setup and Passwords This chapter explains how to use TOSHIBA HW Setup program to configure your computer and how to set passwords. HW Setup TOSHIBA HW Setup allows you to configure settings for Display, CPU, Boot priority, Keyboard, USB, LAN, General and Password. If the supervisor password is set, access to the TOSHIBA HW Setup program can be prevented when the user password is used to log on to the computer.
L350/L350D General This window displays the BIOS version and contains two buttons: Default and About. Default Returns all HW Setup values to the factory settings. About Displays the HW Setup version. Setup This field displays the installed BIOS version and date. Password User Password This option allows you to set or reset the user password for power on. Not Registered Changes or remove the password. (Default) Registered Sets the password.
L350/L350D 3. Click the OK button. If the character string you enter matches the registered password, the password option is reset and the display changes to: Not registered If they do not match, the following message appears. You must repeat step 1. Incorrect Password!!! If you enter the password incorrectly three times in a row, the computer needs to be shut off You will not be able to access the password option in the HW Setup.
L350/L350D Boot Priority Boot Priority Options This option sets the priority for booting the computer. The Boot Priority Options setting will be like the following. ExpressCard HDD boot is not supported. To change the boot drive, follow the steps below. 1. Hold down F12 and boot the computer. 2. Use the up/down cursor keys to select boot device you want and press ENTER. ■ If a supervisor password is set, the menu above does not appear when you use the user password to start the computer.
L350/L350D USB Legacy USB Support Use this option to enable or disable USB Legacy Emulation. If your operating system does not support USB, you can still use a USB mouse and keyboard by setting the USB Legacy Emulation item to enabled. Enabled Enables the USB Legacy Emulation. (Default) Disabled Disables the USB Legacy Emulation. LAN Wake-up on LAN This feature lets the computer’s power be turned on when it receives a wake-up signal from the LAN. Enabled Enables the Wake-up on LAN.
L350/L350D 7-6 User’s Manual
L350/L350D Chapter 8 Optional Devices Optional devices can expand the computer’s capabilities and its versatility.
L350/L350D ExpressCard Installing an ExpressCard The ExpressCard slot is located on the left side of the computer. You can install one ExpressCard in the slot. Windows’ hot-install feature allows you to install ExpressCard while the computer’s power is on. Do not install an ExpressCard while the computer is in sleep or hibernation mode. Some cards might not work properly. To install an ExpressCard, follow the steps below. 1. Insert the ExpressCard. 2. Press gently to ensure a firm connection. 3.
L350/L350D Removing an ExpressCard To remove the ExpressCard, follow the steps below. 1. In Windows Vista™, open the Safely Remove Hardware icon on the system tray and disable the ExpressCard. 2. Press Eject button slightly to make the ExpressCard stretch out. 3. Grasp the ExpressCard and pull it out from the slot.
L350/L350D The Logo of SD Memory card is The Logo of SDHC Memory card is . . Installing a SD/SDHC/MS/MS Pro/MMC card To install the memory card, follow the steps below. 1. Insert the memory card. 2. Press gently to ensure a firm connection. Multiple Digital Media Card Slot SD/SDHC/MS/MS PRO/ MMC CARD* * The shape of the card depends on which type you purchased. Figure 8-3 Inserting the memory card ■ Keep foreign objects out of the multiple digital media card slot.
L350/L350D Removing a SD/SDHC/MS/MS Pro/MMC card To remove the memory card, follow the steps below. 1. In Windows Vista™, open the Safely Remove Hardware icon on the system tray and disable the inserted memory card. 2. Gently press the memory card inside the socket to eject it. 3. Grasp the card and remove it.
L350/L350D Memory expansion You can install additional memory in the computer’s memory module to increase the amount of RAM. Installing memory module To install a memory module, make sure the computer is in boot mode then: 1. Turn the computer off in boot mode. Refer to the Turning off the power section in Chapter 3. ■ If you use the computer for a long time, the memory modules will become hot. In this case, let the memory modules cool to room temperature before you replace them.
L350/L350D 6. Insert the memory module into the connector on the computer. Press the module carefully and firmly to ensure a solid connection. 7. Push the module down so that it lies flat and is secured by two latches. Do not touch the connectors on the memory module or on the computer. Debris on the connectors may cause memory access problems. Figure 8-6 Inserting the memory module Figure 8-7 Pushing the memory module down 8. Seat the cover and secure it with one screw. 9.
L350/L350D Removing memory module To remove the memory module, make sure the computer is in boot mode then: 1. Turn the computer off and remove all cables connected to the computer. ■ If you use the computer for a long time, the memory modules will become hot. In this case, let the memory modules cool to room temperature before you replace them. ■ Do not try to remove a memory module with the computer turned on or turned off in sleep and hibernation mode. You can damage the computer and the memory module.
L350/L350D Additional battery pack (6 Cell and 9 Cell) You can increase the portability of the computer with additional battery packs (6 Cell: PA3536U-1BRS/PA3536U-1BAS, 9 Cell: PA3537U-1BRS/ PA3537U-1BAS). If you’re away from an AC power source, you can replace a low battery with a fully charged one. See Chapter 6, Power and Power-up Modes.
L350/L350D If you set LCD+Analog RGB for the computer’s display, you must set the computer’s display resolution to the same as that of the external monitor or other device, such as a projector. HDMI Some models are equipped with HDMI out port than can send/receive video, audio and control signals by connecting with external display/audio devices. 1080p, 720p, 576p and 480p signal formats are supported, but actually available signal format depends on each HDMI devices.
L350/L350D Settings for audio on HDMI To set the audio device to use the HDMI, follow the steps below. 1. Click Start. 2. Click Control Panel. 3. Click Hardware and Sound. 4. Click Realtek HD Audio Manager. 5. Click Digital Output Device (HDMI). 6. Click the Set Default Device button. To set the audio device to use internal speaker, follow the steps below. 1. Click Start. 2. Click Control Panel. 3. Click Hardware and Sound. 4. Click Realtek HD Audio Manager. 5. Click Speakers. 6.
L350/L350D 8-12 User’s Manual
L350/L350D Chapter 9 Troubleshooting TOSHIBA designed the computer for durability. However, should problems occur, following the procedures in this chapter can help to determine the cause. All readers should become familiar with this chapter. Knowing what might go wrong can help prevent problems from occurring. Problem solving process Resolving problems will be much easier if you observe the following guidelines: ■ Stop immediately when you recognize a problem exists.
L350/L350D ■ Make sure all options are set properly in the setup program. ■ Check all cables. Are they correctly and firmly attached? Loose cables can cause signal errors. ■ Inspect all connecting cables for loose wires and all connectors for loose pins. ■ Check that your diskette is correctly inserted and that the diskette’s write protect tab is correctly set. Make notes of your observations and keep them in a permanent error log. This will help you describe your problems to your dealer.
L350/L350D Hardware and system checklist This section discusses problems caused by your computer’s hardware or attached peripherals.
L350/L350D Power When the computer is not plugged into an AC adaptor, the battery pack is the primary power source. However, your computer has a number of other power resources, including intelligent power supply and Real Time Clock battery. These resources are interrelated and any one could affect apparent power problems. This section provides check lists for AC adaptor and the main battery. If you cannot resolve a problem after following them, the cause could lie with another power resource.
L350/L350D Problem Procedure Battery doesn’t charge when the AC adaptor is attached (Battery indicator does not glow orange). If the battery is completely discharged, it will not begin charging immediately. Wait a few minutes. If the battery still does not charge, make sure the outlet is supplying power. Test it by plugging in an appliance. If it doesn’t work, try another power source Check whether the battery is hot or cold to the touch.
L350/L350D Keyboard Keyboard problems can be caused by your setup configuration. For more information refer to Chapter 5, The Keyboard and Chapter 7, HW Setup and Passwords. Problem Procedure Some letter keys produce numbers Check that the numeric keypad overlay is not selected. Press FN + F10 and try typing again. Output to screen is garbled Make sure the software you are using is not remapping the keyboard. Remapping involves reassigning the meaning of each key. See your software’s documentation.
L350/L350D Hard disk drive Problem Procedure Computer does not boot from hard disk drive Check if a diskette is in the diskette drive or a CD/DVD/HD DVD is in the optical disc drive. Remove any diskette and/or CD/DVD/HD DVD and check Boot priority. Refer to Chapter 7, Boot Priority section. There may be a problem with your operating system files. Refer to your OS documentation. Slow performance Your files may be fragmented. Run SCANDISK and defragmenter to check the condition of your files and disk.
L350/L350D Problem Procedure Some CD/DVDs run The software or hardware configuration may be correctly, but others do causing a problem. Make sure the hardware not configuration matches your software’s needs. Check the CD/DVD’s documentation. Check the type of CD/DVD you are using. Refer to Chapter 1, Introduction, for more information. Check the region code on the DVD. It must match that on the drive. Region codes are listed in the Optical disc drives section in Chapter 2, The Grand Tour,.
L350/L350D HD DVD-ROM drive For more information, refer to Chapter 4, Operating Basics,. Problem Procedure You cannot access a Make sure the drive’s drawer is securely closed. CD/DVD/HD DVD in the Press gently until it clicks into place. drive Open the drawer and make sure the CD/DVD/HD DVD is properly seated. It should lie flat with the label facing up. A foreign object in the drawer could block laser light from reading the CD, DVD or HD DVD. Make sure there is no obstruction. Remove any foreign object.
L350/L350D Problem Procedure Cannot write correctly If you have trouble writing, make sure you are observing the following precautions: ■ Use only media recommended by TOSHIBA ■ Do not use the mouse or keyboard during writing. ■ Use only the software supplied with the computer for recording. ■ Do not run or start other software during writing. ■ Do not jar the computer during writing. ■ Do not connect/disconnect external devices or install/remove internal cards during writing.
L350/L350D Problem Procedure Double-tapping does not work Try changing the double-click speed setting in the mouse control utility. 1. Open the Control Panel, select the Mouse icon and press ENTER. 2. Click the Buttons tab. 3. Set the double-click speed as instructed and click OK. The mouse pointer moves too fast or too slow Try changing the speed setting in the mouse control utility. 1. Open the Control Panel, select the Mouse icon and press ENTER. 2. Click the Pointer Option tab. 3.
L350/L350D USB mouse This section applies only with Windows Vista™ operating systems. Problem Procedure On-screen pointer does The system might be busy. If the pointer is not respond to mouse shaped as an hourglass, wait for it to resume its normal shape and try again to move it. operation Make sure the mouse is properly connected to the USB port. Double-clicking does not work Try changing the double-click sped setting in the mouse control utility 1.
L350/L350D SD/SDHC/MS/MS Pro/MMC card Refer also to Chapter 8, Optional Devices. Problem Procedure Memory card error occurs Reseat the memory card to make sure it is firmly connected. Check the card’s documentation. You cannot write to the Make sure the card is not write protected. memory card You cannot read a file Make sure the target file is on the memory card inserted in the slot. If problems persist, contact your dealer.
L350/L350D Sound system Problem Procedure No sound is heard Adjust the volume control dial. Check the software volume settings. Make sure the headphone connection is secure. Check Windows Device Manager. Make sure the sound function is enabled and that settings for I/ O address, Interrupt level and DMA are correct for your software and do not conflict with other hardware devices that you may have connected to the computer. If problems persist, contact your dealer.
L350/L350D Modem Problem Procedure Communication software can’t initialize modem Make sure the computer’s internal modem settings are correct. Refer to Phone and Modem Options in the Control Panel. You can hear a dial tone If the call is going through a PBX machine, make but can’t make a call sure the communication application’s tone dial detection feature is disabled. You can also use the ATX command.
L350/L350D Sleep/Hibernation Problem Procedure The system will not Is Windows Media Player open? The system enter sleep/hibernation might not enter sleep/hibernation, if Windows Media Player is either playing a selection or finished playing a selection. Close Windows Media Player before you select sleep/ hibernation. If problems persist, contact your dealer. LAN Problem Procedure Cannot access LAN Check for a firm cable connection between the LAN jack and the LAN HUB.
L350/L350D Recovery discs Problem Procedure The following message appears when executing Recovery Disc Creator. [The Recovery Disc Creator can not be launched because there is no recovery partition.] You will see this message if you have previously chosen to remove the partition and are trying to create Recovery Media. When there is no recovery partition, the Recovery Disc Creator cannot make Recovery Media.
L350/L350D 9-18 User’s Manual
L350/L350D Chapter 10 Disclaimers This chapter slates the Disclaimer(s) information applicable to TOSHIBA computers. CPU Central Processing Unit (CPU) Performance Disclaimer.
L350/L350D 64-Bit Computing. 64-bit processors are designed to take advantage of 32 and 64 bit computing. 64-Bit Computing requires that the following hardware and software requirements are met: ■ 64-bit Operating System ■ 64-bit CPU, Chipset and BIOS (Basic Input/Output System) ■ 64-bit Device drivers ■ 64-bit applications Certain device drivers and/or applications may not be compatible with a 64-bit CPU and therefore may not function properly.
L350/L350D HDD drive capacity 1 Gigabyte (GB) means 109 = 1,000,000,000 bytes using powers of 10. The computer operating system, however, reports storage capacity using powers of 2 for the definition of 1 GB = 230 = 1,073,741,824 bytes, and therefore shows less storage capacity. Available storage capacity will also be less if the product includes one or more pre-installed operating systems, such as Microsoft Windows and/or pre-installed software applications, or media content.
L350/L350D Copy protection Copy protection technology included in certain media may prevent or limit recording or viewing of the media. Images All images are simulated for purposes of illustration. LCD brightness and eye strain Your LCD display has a brightness approaching that of a TV device. We recommend that you adjust the brightness of your LCD to a comfortable level to prevent possible strain on your eyes.
L350/L350D Appendix A Specifications This appendix summarizes the computer’s technical specifications.
L350/L350D Built-in modem The ability of this feature is depending on the model you purchased. Network control unit (NCU) Type of NCU AA Type of line Telephone line (analog only) Type of dialing Pulse Tone Control command AT commands EIA-578 commands Monitor function Computer’s speaker Communication specifications A-2 Communication system Data: Fax: Full duplex Half duplex Communication protocol Data ITU-T-Rec (Former CCITT) Bell Fax ITU-T-Rec (Former CCITT) V.21/V.22/V.22bis/V.32 /V.
L350/L350D Appendix B Display Controller and Modes Display controller The display controller interprets software commands into hardware commands that turn particular pixels on or off. The controller is an advanced Video Graphics Array (VGA) that provides Super VGA (SVGA) and Extended Graphics Array (XGA) support for the internal LCD and external monitors. A high-resolution external monitor connected to the computer can display up to 2048 horizontal and 1536 vertical pixels at up to 16M colors.
L350/L350D Video modes The computer supports video modes defined in the table below. If your application offers a selection of mode numbers that do not match the numbers on the table, select a mode based on, resolution, number of colors and refresh rates.
L350/L350D Appendix C Wireless LAN This appendix is intended to help you get your Wireless LAN network up and running, with a minimum of parameters. Card specifications Form Factor ■ Mini Card Compatibility ■ IEEE 802.11 Standard for Wireless LANs ■ Wi-Fi (Wireless Fidelity) certified by the Wi-Fi Alliance. The ‘Wi-Fi CERTIFIED’ logo is a certification mark of the Wi-Fi Alliance.
L350/L350D R-F Frequency ■ Band 5 GHz (5150-5850 MHz) (Revision A, draft N) ■ Band 2.4 GHz (2400-2483.5 MHz) (Revision B, G, draft N) The range of the wireless signal is related to the transmit rate of the wireless communication. Communications at lower transmit range may travel larger distances. ■ The range of your wireless devices can be affected when the antennas are placed near metal surfaces and solid high-density materials.
L350/L350D Table Wireless IEEE 802.
L350/L350D C-4 User’s Manual
L350/L350D Appendix D AC Power Cord and Connectors The AC input plug of power cord must be compatible with various international AC power outlets. Power cords need to meet the local standards and the specifications listed as below: Length: Wire size: Current rating: Voltage rating: Minimum 1.7 meters Minimum 0.75 mm2 Minimum 2.
L350/L350D The following illustrations show the plug shapes for USA, Australia, Canada, United Kingdom, Europe, and China.
L350/L350D Appendix E If your computer is stolen Always take care of your computer and try to prevent it from being stolen. You are the owner of a valuable technical device, which may be highly attractive to thieves, so please do not leave it unattended in a public place. To further help protect against theft, security cables can be bought for use with your notebook when it is being used at home or in the office.
L350/L350D TOSHIBA Theft Registration Send to: Fax number: TOSHIBA Europe GmbH Technical Service and Support Leibnizstr. 2 93055 Regensburg Germany +49 (0) 941 7807 921 Country stolen: Machine type: (e.g. L350/L350D) Model number: (e.g. PPM70EYXT) Serial number: (e.g.
L350/L350D Glossary The terms in this glossary cover topics related to this manual. Alternate naming is included for reference.
L350/L350D FDD: floppy diskette drive FIR: fast infrared HDD: hard disk drive IDE: integrated drive electronics I/O: input/output IrDA: Infrared Data Association IRQ: interrupt request KB: kilobyte LCD: liquid crystal display LED: light emitting diode LSI: large scale integration MB: megabyte OCR: optical character recognition (reader) PCB: printed circuit board PCI: peripheral component interconnect RAM: random access memory RGB: red, green, and blue ROM: read only memory RTC: real time clock SCSI: small
L350/L350D alternating current (AC): Electric current that reverses its direction of flow at regular intervals. analog signal: A signal whose characteristics such as amplitude and frequency vary in proportion to (are an analog of) the value to be transmitted. Voice communications are analog signals. ANSI: American National Standards Institute. An organization established to adopt and define standards for a variety of technical disciplines.
L350/L350D buffer: The portion of the computer’s memory where data is temporarily stored. Buffers often compensate for differences in the rate of flow from one device to another. bus: An interface for transmission of signals, data or electric power. byte: The representation of a single character. A sequence of eight bits treated as a single unit; also the smallest addressable unit within the system. C cache memory: High speed memory which stores data that increases processor speed and data transfer rate.
L350/L350D compatibility: 1) The ability of one computer to accept and process data in the same manner as another computer without modifying the data or the media upon which it is being transferred. 2) the ability of one device to connect to or communicate with another system or component. components: Elements or parts (of a system) which make up the whole (system). Composite Video (YUV): A standard video signal used to transmit images, e.g. from a VCR to a TV.
L350/L350D delete: To remove data from a disk or other data storage device. Synonymous with erase. device driver: A program that controls communication between a specific peripheral device and the computer. The CONFIG.SYS file contains device drivers that MS-DOS loads when you turn the computer on. dialog box: A window that accepts user input to make system settings or record other information.
L350/L350D E echo: To send back a reflection of the transmitted data to the sending device. You can display the information on the screen, or output it to the printer, or both. When a computer receives back data it transmitted to a CRT (or other peripheral device) and then retransmits the data to printer, the printer is said to echo the CRT. erase: See delete. escape: 1) A code (ASCII code 27), signaling the computer that what follows are commands; used with peripheral devices such as printers and modems.
L350/L350D H hard disk: A non-removable disk usually referred to as drive C. The factory installs this disk and only a trained engineer can remove it for servicing. Also called fixed disk. hard disk drive (HDD): An electromechanical device that reads and writes a hard disk. See also hard disk. hardware: The physical electronic and mechanical components of a computer system: typically, the computer itself, external disk drives, etc. See also software and firmware.
L350/L350D IrDA 1.1: An industry standard that enables cableless infrared serial data transfer at speeds of up to 4 Mbps. J jumper: A small clip or wire that allows you to change the hardware characteristics by electrically connecting two points of a circuit. K K: Taken from the Greek word kilo, meaning 1000; often used as equivalent to 1024, or 2 raised to the 10th power. See also byte and kilobyte. KB: See kilobyte.
L350/L350D mode: A method of operation, for example, the Boot Mode, Sleep Mode or the Hibernation Mode. modem: Derived from modulator/demodulator, a device that converts (modulates) digital data for transmission over telephone lines and then converts modulated data (demodulates) to digital format where received. monitor: A device that uses rows and columns of pixels to display alphanumeric characters or graphic images. See also CRT.
L350/L350D parity: 1) The symmetrical relationship between two parameter values (integers) both of which are either on or off; odd or even; 0 or 1. 2) In serial communications, an error detection bit that is added to a group of data bits making the sum of the bits even or odd. Parity can be set to none, odd, or even. password: A unique string of characters used to identify a specific user. The computer provides various levels of password protection such as user and supervisor.
L350/L350D restart: Resetting a computer without turning it off (also called “warm boot” or “soft reset”). See also boot. RGB: Red, green and blue. A device that uses three input signals, each activating an electron gun for a primary additive color (red, green and blue) or port for using such a device. See also CRT. RJ11: A modular telephone jack. RJ45: A modular LAN jack. ROM: Read Only Memory: A nonvolatile memory chip manufactured to contain information that controls the computer’s basic operation.
L350/L350D T terminal: A typewriter-like keyboard and CRT display screen connected to the computer for data input/output. TFT display: A liquid crystal display (LCD) made from an array of liquid crystal cells using active-matrix technology with thin film transistor (TFT) to drive each cell. touchpad: A pointing device integrated into the TOSHIBA computer palm rest. TTL: Transistor-transistor logic. A logic circuit design that uses switching transistors for gates and storage.
L350/L350D Glossary-14 User’s Manual
L350/L350D Index A C AC adaptor, 1-6, 2-5, A-1 DC IN 19V port, 2-5 additional, 1-13, 8-9 connecting, 3-2 problems, 9-4 safety instructions, -iii, -xviii ASCII characters, 5-5 Auto power on, See Power Checklist equipment, 1-1 problems, 9-1, 9-3 Cleaning the computer, 4-33 COM port, 4-29 B Battery charging, 6-7 indicator, 2-11 life, 10-2 monitoring capacity, 6-9 real time clock, 6-4 Real Time Clock battery, 1-6 retention time, 6-10 types, 6-3 Battery pack, 1-6, 1-13, 6-3 additional, 8-9 extending battery
L350/L350D E ExpressCard, 1-6 location of slots, 2-3 overheating, -xviii problems, 9-12 using, 8-2 External monitor, 8-9 controller and modes, B-1 HW Setup, 7-3 port, 1-6 problems, 9-13 F FN + 1 (TOSHIBA zooming utility reduce), 5-4 FN + 2 (TOSHIBA zooming utility enlarge), 5-4 FN + ESC (sound mute), 5-2 FN + F1 (lock), 5-2 FN + F2 (power plan), 5-2 FN + F3 (sleep), 5-3 FN + F4 (hibernate), 5-3 FN + F5 (output), 5-3 FN + F6 (brightness down), 5-3 FN + F7 (brightness up), 5-3 FN + F8 (wireless), 5-3 FN + F
L350/L350D L LAN, 1-7, 4-32 cable types, 4-32 connecting, 4-32 disconnecting, 4-33 indicator, 4-32 Lock, security, See Security lock M Main battery, See Battery pack Memory, 1-2, 10-2 expansion, 1-13, 8-6 installing module, 8-6 removing module, 8-8 Microphone, 1-6 problems, 9-14 using, 4-27 Microprocessor, See Processor Modem, 1-7, 4-27, A-2 connecting, 4-29 disconnecting, 4-30 problems, 9-15 properties menu, 4-28 region selection, 4-27 Moving the computer, 4-33 Multiple digital media card slot using, 8-3
L350/L350D R T Real Time Clock battery, See Battery Recovery Discs, 3-9 Recovery hard disk drive, 3-8, 3-10 Restarting the computer, 3-7 TOSHIBA Assist, 1-11 TOSHIBA Disc Creator, 4-21 TOSHIBA PC Diagnostic Tool, 1-10 TOSHIBA support, 9-17 TOSHIBA Theft Registration, E-2 TOSHIBA zooming utility, 1-10 Touchpad using, 4-1 S Security lock attaching, 8-11 location, 2-5 using, 8-11 Sleep mode, 1-10 problems, 9-16 setting, 3-6 Sound system, 1-7 headphone, 1-6, 2-2 microphone, 2-2 speaker, 2-8 volume control,