
Air Cleaner User Manual
7. Select option 6, Fast IPL. Make sure this value is set to “enable”. If it is, press
“n”. If it is currently set to “disable,” select “y” to change it.
8. Type x to return to the “>” prompt.
9. Type x again to clear the screen.
10. Power on the system.
11. From the MAINTENANCE menu, select option 6, SYSTEM BOOT.
12. Select option 1, BOOT FROM NETWORK.
13. Press Enter at the language prompt for English. The BOOTP MAIN menu is
displayed.
14. Continue with “Initiating the Network Boot” on page B-4.
PCI-based (RSPC) RISC System/6000 (uni or multi-processor)
For PCI-based RISC System/6000 (RSPC) machines, booting from tape or network
is accomplished through the System Management Services (SMS). System
Management Services is included in the firmware of most models and is loaded
from diskette on other older models. System Management Services can be executed
using a graphical, icon-based, interface, or an ASCII, text-based, emulation. The
steps provided below are for the ASCII (text-based) interface.
Booting from a SysBack system backup tape, CD, or DVD
1. If the RSPC model does not include SMS in the firmware, insert the System
Management Services Diskette.
2. Power on the system.
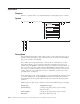
3. When the first screen appears (a picture is displayed and icons begin showing
at the bottom of the screen), press “F1” if you have a graphics console or“1” is
it is an ASCII console.
4. From the System Management Services menu, select Boot and press Enter.
5. Select the desired boot device (tape, CD, DVD) to be the first boot device but
placing a “1” next to it.
6. Select the option to “save” your selection.
7. Press the ESC key three times. The system should begin booting after the third
escape iteration.
8. Continue with “Completing the Boot Process” on page B-4.
Booting from a network boot server
1. If the RSPC model does not include SMS in the firmware, insert the System
Management Services Diskette.
2. Power on the system.
3. When the first screen appears (a picture is displayed and icons begin showing
at the bottom of the screen), press “F1” if you have a graphics console or“1” is
it is an ASCII console.
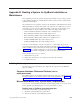
4. From the System Management Services menu, select Utilities and press Enter.
5. Select Remote Initial Program Load Setup (RIPL).
6. Select Set Address.
7. Fill out all fields, including the server IP address, gateway address (the client’s
gateway) and subnet mask (the client’s subnet mask).
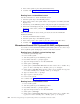
8. Select the option to “save” your selection.
9. Press the ESC key three times. This returns you to the main System
Management Services (SMS) menu.
10. Select Boot.
Appendix B. Booting a System for SysBack Installation or Maintenance B-3