IBM Tivoli Storage Manager for System Backup and Recovery Installation and User’s Guide Version 5 Release 6 GC32-9076-01
IBM Tivoli Storage Manager for System Backup and Recovery Installation and User’s Guide Version 5 Release 6 GC32-9076-01
Second Edition (April 2003) This edition notice applies to the IBM Tivoli Storage Manager for System Backup and Recovery Version 5 Release 6 (program number 5698-SYS) and to any subsequent releases until otherwise indicate in new editions or technical newsletters. This edition replaces GC32-9076-00. IBM Tivoli Storage Manager for System Backup and Recovery will be referred to as “SysBack” in certain text within this document.
Contents IBM Tivoli Storage Manager for System Backup and Recovery Overview . . . . vii About This Book. . . . . . . . . . . ix Who Should Read This Publication . IBM Tivoli Storage Manager for System Recovery Documentation . . . . . Conventions Used in This Book . . . Contacting Customer Support . . . . . . Backup . . . . . . . . . . . and . . . . . . ix ix ix ix Chapter 1. Installation . . . . . . . . 1-1 System Requirements . . . . . . . . . Hardware Requirements . . . . . . . Software Requirements .
Deleting an Exclude List File . . . . . . . . 9-5 Chapter 10. Recreating or Restoring from Backups . . . . . . . . . . . 10-1 Removing Volume Groups, Logical Volumes, and Filesystems . . . . . . . . . . . . . Recreating Volume Groups, Logical Volumes, and Filesystems . . . . . . . . . . . . . Understanding Incremental Restores . . . . Restoring Data from a Backup . . . . . . . 10-1 . 10-2 . 10-7 . 10-8 Chapter 11. Changing the Volume Group, Logical Volume and Filesystem Attributes . . . . . . . .
Creating a Bootable Tape (Without Data) . . . Creating a Bootable CD/DVD (Without Data) . Changing SysBack Tape Boot Defaults . . . . Changing SysBack CD/DVD Boot Defaults . . Changing the Read Permission on a Disk Image File . . . . . . . . . . . . . . . Creating or Editing an LVM Information File Creating a Custom Installation Diskette . . . Changing SysBack Program Defaults . . . . Backup Format Settings . . . . . . . End of Tape (EOT) Processing Options . . Error Handling Settings . . . . . . .
Appendix D. Creating Scripts for Customizing the System Backup and Install Process . . . . . . . . . . . D-1 Script Names . . . . Post-Installation Scripts . Sample Scripts . . . . . . . . . . . . . . . . . . . . . . . . . . . . . D-1 . D-3 . D-3 Appendix E. Device/System-Specific Information . . . . . . . . . . . . E-1 IBM 7208 8mm Tape Drives . . . . . . . IBM 3490, Magstar®, DLT and LTO Tape Drives Other Tape Drives . . . . . . . . . . . vi . E-1 E-1 . E-2 IBM 7331 8mm Tape Library . . . . .
IBM Tivoli Storage Manager for System Backup and Recovery Overview IBM Tivoli Storage Manager for System Backup and Recovery (also known as “SysBack”) provides system administrators and other system users with a simple, efficient way to backup and recover data from a command line or a SMIT menu-driven interface. SysBack lets you recover all or part of the system.
v Reinstall the system to its original device configuration, including the volume group and logical volume placement on disk and attached devices, using Full System (Installation) Image to the same or different system (also called “cloning”). v Install the system from local boot/installation media or from a TSM server. v Perform a network boot or installation to alleviate the need for local boot or installation media using SysBack functions or existing Network Installation Manager (NIM) resources.
About This Book This book contains information on configuring and using IBM Tivoli Storage Manager for System Backup and Recovery (also known as “SysBack”). The book contains instructions on using the System Management Interface Tool (SMIT) menus for performing backups as well as a commands reference to perform SysBack functions without the SMIT menus.
v International customers should consult the web site for customer support telephone numbers. v You can also review the IBM Software Support Guide which is available on our web site at: http://techsupport.services.ibm.com/guides/handbook.
Chapter 1. Installation To install IBM® Tivoli® Storage Manager for System Backup and Recovery, also know as, SysBack™, you must have the prerequisite software installed on your system. System Requirements Hardware Requirements SysBack supports the following hardware: v IBM Eserver pSeries™ and RS/6000® systems, including RS/6000 SP™ environments, and systems capable of the logical partitioning of AIX®.
v If you will be using the CD / DVD backup feature, please refer to Chapter 5, “Backups to CD or DVD”, on page 5-1 for additional requirements specific to this feature. Upgrading from System Backup and Recovery for AIX - SysBack If you are upgrading from System Backup and Recovery for AIX - SysBack™ versions 5.1.x, 5.2.x, 5.3.x, or 5.4.x, you will not need to uninstall it before installing the IBM Tivoli Storage Manager for System Backup and Recovery (SysBack) version 5.5 or 5.6 product.
Install and Update from LATEST Available Software Type or select values in entry fields. Press Enter AFTER making all desired changes.
1-4 IBM Tivoli Storage Manager for System Backup and Recovery: Installation and User’s Guide
Chapter 2. SMIT Overview This chapter provides information about the SMIT menu interface. SMIT is used for virtually all AIX system administrative tasks. Accessing the IBM Tivoli Storage Manager for System Backup and Recovery To access the System Backup & Recovery for AIX menus, type smit to access the System Management Interface Tool. After SysBack is installed, IBM Tivoli Storage Manager for System Backup and Recovery is displayed at the bottom of the main menu.
How the SysBack Menus are Organized The menus are organized by the type of backups that you can perform, followed by additional options used for configuring or customizing additional SysBack options. The SysBack Main Menu includes the following options: Backup & Recovery Options Use this option to display additional options for backing up, listing, verifying, or restoring files from a backup depending on the type of backup performed.
Configuration Options Move cursor to desired item and press Enter. Local User Access Remote Services Remote Command Access Virtual Devices Exclude Lists Network Boot/Install Configuration License Configuration F1=Help F9=Shell F2=Refresh F10=Exit F3=Cancel Enter=Do F8=Image Figure 2-3. Configuration Options The following options are available on this menu: Local User Access Provides backup permission to specific or all users on the system.
Tape Drives Move cursor to desired item and press Enter. List All Defined Tape Drives Configure a Defined Tape Drive Unconfigure an Available Tape Drive Change Tape Drive Characteristics Unload/Eject Tape from Drive F1=Help F9=Shell F2=Refresh F10=Exit F3=Cancel Enter=Do F8=Image Figure 2-4. Tape Drives Utilities This menu provides a list of miscellaneous options. The options on this menu might differ depending on your level of AIX installed and might change as new options are added to SysBack.
When you back up to a remote backup server, the backup options are determined by the Add or Change Client Host Access to this Server option executed on the server. If no directories are defined for disk image file backups, then no disk file options are provided. Figure 2-6 shows the backup options that might be included on the SMIT menu: Backup Options Move cursor to desired item and press Enter.
Tape Drive Name Tape drives on the remote machine. Only remote tape drives on hosts that have granted access to this host, as well as those that have been defined by the local host, are included on this selector screen. Virtual Device Name Virtual devices configured on the server. The virtual device description from the remote machine and the physical tape drive name(s) are shown.
You can later change this ID to any other value that might more accurately describe the backup contents. Although the filename in SMIT is displayed only as shown above, most backups actually create more than one file, each named as above, but with an additional extension. The first file has a “.TOC” extension, indicating the file is the table of contents of the backup. For a File/Directory backup, the “.TOC” file also contains the backup data, because there is always only one image in this backup.
Command Error section is always used to display error messages but is also often used for other output, such as file lists, status indicators, and so on. In the above example, a file/directory backup of the /home/data directory was performed. The user selected the progress indicator report output type during the backup, rather than the list of files.
ESTIMATED PROGRESS ---------------------------------------------------------% Complete | Elapsed Time | Megabytes | Kbytes/Sec ---------------------------------------------------------100 3 minutes of 3 170 of 170 913 Backup ended Thu Mar 20 02:25:46 1997 170 megabytes written to 1 volume. SMIT Help Screens You can obtain help information from any point within SMIT. If a menu selection is currently displayed, highlight a function and press F1 for information regarding the use of that function.
Backup Files or Directories Type or select values in entry fields. Press Enter AFTER making all desired changes. [Entry Fields] Hostname of server hambone.austin.ibm.com Device name /dev/rmt0 Report output type progress indicator + +--------------------------------------------------------------------------++ | SHOW COMMAND STRING |+ | | # | Press Enter or Cancel to return to the | | application.
Chapter 3. License Configuration To license your IBM Tivoli Storage Manager for System Backup and Recovery (SysBack) software, you must simply install the: v tivoli.tsm.client.sysback.license.rte v tivoli.tsm.client.sysback.license.cert filesets included on your product media in addition to the installation of the base tivoli.tsm.client.sysback.rte fileset. Special licensing measures apply for customers using SysBack versions 5.1 - 5.4. There are no license filesets for this version of SysBack.
3-2 IBM Tivoli Storage Manager for System Backup and Recovery: Installation and User’s Guide
Chapter 4. Performing Backups As soon as SysBack is installed, you can perform a backup to any local device or to the default SysBack backup image files directories. To access the Backup Options: 1. At a command line, type smit. 2. Select IBM Tivoli Storage Manager for System Backup and Recovery. 3. Select Backup & Recovery Options. You can also access this menu using the fastpath. To do this, type smit sb_backup at a command line.
level should be included in the backup. Specifying level 0 indicates that all files should be backed up. Level 0 is still considered an incremental level; it is the base for all incremental levels that follow. Any number of incremental levels from 0 through 9 can be used, but using too many levels can complicate the restore process.
For volume group incremental backups, an entire logical volume is included if any part of the logical volume has changed. If no data in the logical volume had changed, the logical volume is not included in the backup. Understanding Pull Backups Pull Backups help you centrally manage your backups by enabling you to initiate, and thereby control, backup operations from a single location.
1. From the Backup & Recovery Options menu, select Backup the System (Installation Image). Notes: a. You must be logged in to the system as a root user. b. At a command line, type smit sb_sysback. 2. If there are volume groups on the system other than rootvg, select the volume groups to include in the backup. From the list of volume groups, either select none (rootvg only) or highlight each additional volume group to include and press F7. Press Enter to continue. 3.
Backup the System Type or select values in entry fields. Press Enter AFTER making all desired changes. [Entry Fields] hambone.austin.ibm.com /sysback.
one–fourth of the file system is used. If this were the case with all file systems, the backup and installation would likely take longer than normal. v When installing or recreating volume groups or logical volumes from this backup, you cannot change the following attributes: – Any file system attributes – Logical volume name – Logical volume size – The volume group in which you want to create a logical volume Backup file ID Default=date/time (MMDDhhmm). Uniquely identifies the backup.
The first part of the selection is the platform type. The second part (/MP) indicates the kernel type. If the kernel type portion is omitted, a uniprocessor (single processor) kernel is assumed. Network install support to include Default=(Blank/None). If, after starting a system from this backup tape, you want the ability to perform a network installation (rather than installing from this backup), press F4 to display a list of supported network types and select one from the list.
User description Default=(Blank/None). Enter up to 60 characters of descriptive information to add to the volume label on the backup. Do not use single (’) or double (″) quotation marks in the description. Host read permission Default=all hosts. By default, all hosts with access to the system on which this file is written have permission to read, or restore from this image. Press Tab to limit read permission to the original host or the server on which the file is written.
used for an existing system backup, change this field to “yes” by pressing Tab. Doing so indicates that you want to overwrite the previous backup with this backup. After you begin this backup, the prior disk image files are removed and cannot be recovered. This field is displayed only when you back up to a disk image file. CD/DVD Media Size Specify the total size of the CD / DVD media in megabytes. If a backup image exceeds this length, it will be split.
does not apply to backups to tape or TSM virtual devices. Using this option also requires the use of the Media Available Space and CD/DVD Media Size options. Non-rootvg Volume Groups to include Default displays the volume groups previously selected, if any. You can add or delete volume groups from this list to include or exclude them from the backup. You can also press F4 to list the available volume groups and select from the list using F7. 5.
Note: Do not use this option to back up the files in the rootvg volume group. To create a backup of the rootvg volume group or all volume groups, which can be used to reinstall the system, use the Backup the System (Installation Image) option. If you use the Backup Volume Groups option to backup the rootvg volume group, you can restore individual files from the backup but cannot reinstall the system. Files, directories, or logical volumes contained in the exclude list are not included in the backup.
Backup a Volume Group Type or select values in entry fields. Press Enter AFTER making all desired changes.
necessary to specify a the hostname of a remote system not listed in the device selector dialog screen. This is useful when initiating a Pull Backup. Device name The device, if a tape drive or virtual device was selected. You may edit this field as necessary to specify a device on a remote system not listed in the device selector dialog screen. This is useful when initiating a Pull Backup. Images directory The directory name, if previously selected. You cannot change this field from this screen.
backup. If you select “yes”, all raw logical volumes are included on the backup unless you specifically excluded them in the exclude list. User description Default=(Blank/None). Enter up to 60 characters of descriptive information to add to the volume label on the backup. Do not use single (’) or double (″) quotation marks in the description. Host read permission Default=all hosts.
Preserve physical partition mapping? Default=no. Selecting “yes” to this option ensures that all logical volumes will be recreated from this backup using the same physical partitions that are currently allocated to them. Unless the logical volumes were originally created using physical partition maps, it is generally recommended that they not be recreated using the same partitions, because this preserves fragmentation that develops over time as logical volumes and file systems expand.
Note: If you are backing up to a tape drive, the tape will NOT be rewound upon completion of the backup. This enables you to perform additional backups (also without rewinding), thereby “stacking” the backups onto a single tape. Backing up File systems A file system backup can only be performed for mounted (active) file systems.
Backup a Filesystem Type or select values in entry fields. Press Enter AFTER making all desired changes.
may edit this field as necessary to specify a device on a remote system not listed in the device selector dialog screen. This is useful when initiating a Pull Backup. Images directory The directory name, if previously selected. You cannot change this field from this screen. Create a Power Backup? Default=no. Use Tab to change this field to “yes” if you want this backup to be a “Power” backup.
Tab to change the option. “yes” indicates that the data will be compressed before it is written to the backup media. Compressing the data usually increases backup performance and uses between 25 and 40% less space on the media. For best performance, do not select this option if the backup device provides its own hardware data compression. Compressing data with software uses considerably more CPU cycles to process the data. Incremental backup level (0=full) Default=(Blank/None).
backups on a tape that has been rewound or ejected. Also use this option when the system has been restarted or when the block size of the tape driver has been changed from the last backup. Buffer size (In Kbytes) Default=64. Changing this value either increases or decreases the amount of data that is written to the output device in a single I/O operation.
File system(s) (directory names) The file system mount points (directories) selected on the first selection screen, each separated by spaces. You can change the list by adding or removing file systems, or you can press F4 to list the mounted file systems on the system and use F7 to select one or more from the list. All file systems in this field, unless included in the exclude list, are included in this backup. Directory names should be specified relative to the root (/) directory. 5.
Backup a Logical Volume Type or select values in entry fields. Press Enter AFTER making all desired changes.
may edit this field as necessary to specify a device on a remote system not listed in the device selector dialog screen. This is useful when initiating a Pull Backup. Images directory The directory name, if previously selected. You cannot change this field from this screen. Backup file ID Default=date/time (MMDDhhmm). Uniquely identifies the backup. You can change this field to any value but it cannot contain single (’) or double (″) quotes. This field is active only when you back up to a disk image file.
tape, then select “no” to place this backup on the tape at the current location. This option is displayed only when you back up to a tape device. For a system backup, tape boot information is placed on the tape at the beginning of the first backup. This information is not placed on the tape for subsequent backups. Note: If this is the first backup to this tape, or if you have restarted the system, reinserted the tape, or changed the tape drive block size, you should select to rewind the tape.
Overwrite existing backup with same ID? Default=no. If the Backup File ID field contains a value already used for an existing system backup, change this field to “yes” by pressing Tab. Doing so indicates that you want to overwrite the previous backup with this backup. After you begin this backup, the prior disk image files are removed and cannot be recovered. This field is displayed only when you back up to a disk image file.
Unlike all other backup types, this type of backup contains no Logical Volume Manager (LVM) information. Therefore, you cannot use this backup, regardless of its contents, to recreate volume groups, logical volumes, or file systems. Using this backup option for backing up all files on the system (from the / directory) does not provide a backup that can be used to reinstall the system.
Backup Files or Directories Type or select values in entry fields. Press Enter AFTER making all desired changes.
a list of files as they are being backed up, or Tab once more to show “only errors” that occur during the backup. Compress data before writing to media? Default=“no” for tapes and “yes” for disk image backups. Press Tab to change the option. “yes” indicates that the data will be compressed before it is written to the backup media. Compressing the data usually increases backup performance and uses between 25 and 40% less space on the media.
not performed any of these functions will the tape be positioned correctly at the end of the previous backup image. Forward to End of Tape Before Starting Backup Forwards to the end of the last SysBack backup on the tape for all backup types. Use this option when stacking multiple backups on a tape that has been rewound or ejected. Also use this option when the system has been restarted or when the block size of the tape driver has been changed from the last backup. Buffer size (In Kbytes) Default=64.
Directory names must be in one of the following formats: v /directory/filename v /directory v ./filename v ./directory/filename v ./directory All files will be backed up relative to the root (/) directory by automatically inserting a period (.) at the beginning of each filename, if it does not already exist. Otherwise, they are backed up relative to their file system mount point. 4.
Additionally, SysBack requires that reverse name resolution be the same on both sides of the firewall. Let us assume the following information: System B = fruit, 9.19.125.19 If you were logged on to System A: root:systemB> host apple apple is 9.19.125.19 root:systemB> host 9.19.125.19 apple.dfw.ibm.com is 9.19.125.19 SysBack will think that apple and apple.dfw.ibm.com are two different hosts.
The easiest way to capture stdout and stderr is to append this string to the end of your backup command: > /tmp/backup.log 2>&1 By adding this string instead, you will generate a unique log name based on the date and time with each backup:> /tmp/backup.log$(date "+%m%d%H%M").
Chapter 5. Backups to CD or DVD You may create a full system (installation image) backup to a CD or DVD. Other SysBack backup types may not be performed to CD or DVD. The /usr/sbin/mksbcd command, or its respective SMIT menu, is used to initiate a full system backups to CD or DVD. Requirements SysBack’s CD and DVD backup feature has additional hardware and software requirements beyond the base product requirements. They are: Software v SysBack requires AIX (BOS) Version 4.3.0 or higher including AIX 5.
Note: SysBack supports any device supported that is support by AIX and does not require it’s own proprietary drivers or software to operate. For a list of the devices explicitly supported / tested by AIX, at your operating system level, please see the file: /usr/lpp/bos.sysmgt/README.oem_writers We have specifically tested at the following levels: v cdrecord 1.9.0.0 v cdrtools 1.10.
Limitations DVD Devices: AIX states that only the CHRP platform supports booting from DVD devices. We have tested booting a 7043-43P (RSPC) from DVD extensively in our testing. Therefore, we will support SysBack DVD boot and install for all SysBack product related issues. However, if the issue becomes an inherent incompatibility or functionality issue between the device, AIX, or rspc firmware that is not supported by the AIX or HW teams, then our support stops there.
DVD is not created using the usual /usr/sbin/sysback command. Instead, you will use the /usr/sbin/mksbcd command. This command has numerous options to customize it to the needs of your environment. Therefore, you may opt to use the SysBack SMIT Menus instead.
Table 5-1. Boot and Install Combinations Boot Device Install Device Post Install Device Support Device CD / DVD CD / DVD4 CD / DVD3 CD / DVD Tape CD / DVD3 CD / DVD Network CD / DVD3 Tape Tape CD / DVD Tape CD / DVD CD / DVD 1 Tape Network CD / DVD Network Network CD / DVD Network Network NIM LPPSOURCE2 Network Tape CD / DVD Network Tape NIM LPPSOURCE2 Network CD / DVD CD / DVD Network CD / DVD NIM LPPSOURCE 1.
install processing completed, and it is possible that you have the 3rd CD or DVD of a multivolume backup loaded. If you created the SysBack backup with the -s package_source_dir flag, this Post Install fileset support is located on the first CD or DVD of the backup series. Hence, you will be prompted to load the 1st CD or DVD from the backup series, or an AIX product CD.
the current platform type. For example: If you were creating this CD / DVD on an F50, it would be created to support the CHRP platform. If you are creating the CD / DVD to support this system and a second type of system, such as the default CHRP and also for an RSPC system, you would specify -G "chrp rspc" This option requires that all of the device and kernel support required to boot both platforms be installed onto the system creating the CD / DVD.
-s pkg_source_dir Specify the device or directory containing AIX device and/or kernel support filesets in the bffcreate format for use in either creating boot images or for use as Post Install Device support. This flag is required with the -G allflag and optional with any other -G flag combination. See the -G flag for additional details. The SMIT menu field equivalent to this flag is: Location of Software Packages to copy to CD/ DVD.
mksbcd command. However, it’s contents will be removed unless you specify the -R C flag. This flag is optional. The SMIT menu field equivalent to this flag is: File system to store CD / DVD file structure. -I cd_image Specify the name of an existing file system to be used in place of the default cd_image file system. You must ensure that there is enough space in this file system as outlined in the section entitled “Space” on page 5-2.
The SMIT menu field equivalent to this flag is: Build Temp Work Space(s) on. -H hostname Specify this option when performing backups to a remote CD / DVD device. This will create the backup_image, cd_fs, and cd_image file systems on the remote system. You may optionally use the -F vgname flag to specify which volume group on the remote system in which the 3 file systems will be created. The SMIT menu field equivalent to this flag is: Hostname of CD/DVD Server.
-g vginfo_file Specify the name of a previously created LVM information file customized for this backup. See the /usr/sbin/mkvginfo command in Appendix A, “Commands”, on page A-1for more information on customized LVM information files. This flag is optional.
The SMIT menu field equivalent to this flag is: "Report output type". -x Use this flag to display a progress indicator which shows the estimated total and elapsed time of the backup process. This flag is optional. The SMIT menu field equivalent to this flag is: Report output type. -X Use this flag to exclude user data logical volumes. System logical volumes such as boot, paging, and jfs logs will not be affected by this flag.
Chapter 6. Offline Mirror Backups SysBack reintroduces a new and enhanced SysBack Offline Mirror Backup capability. This feature had previously been available as a separate option for SysBack 4, but it is now included it at as a base function. Purpose Offline Mirror Backup allows you to split AIX mirrors. This allows user and system access to one mirror copy while SysBack accesses the inactive copy for backup operations.
Performing an Offline Mirror Backup The Offline Mirror Backup process is comprised of two pieces. This first piece is the Offline Mirror process which: v Splits the AIX mirrors v Calls the Backup Command File v Re synchronizes the AIX mirrors after completion of the Backup Command File. The second piece of the Offline Mirror Backup is the actual data backup process which is used to execute the backup.
Offline Mirror Backup Options Move cursor to desired item and press Enter. Maintain Backup Command Files Perform an Offline Mirror Backup Maintainance Utilities F1=Help F9=Shell F2=Refresh F10=Exit F3=Cancel Enter=Do F8=Image Figure 6-1. The Offline Mirror Backup Options Menu 4. Select Perform an Offline Mirror Backup and press Enter. 5. If there are predefined Backup Command File scripts, select the script to use for the backup on the Device Selector screen.
7. Once the backup command completes, you will be returned to the shell prompt. 8. Type the exit command to exit the shell. The Offline Mirror process will then begin to re synchronized the stale mirror partitions. Note: If you had specified a Backup Command File script, once the script exits, the Offline Mirror process will automatically continue with the mirror re synchronization.
v The temporary split file system mount points are unmounted and removed in reverse alphabetical order by mount point. This causes the underlying logical volumes to be automatically re synchronized. v All temporary work and status files are removed. Maintaining Backup Command Files SysBack provides a SMIT menu interface to assist you with creating your Backup Command Files. These files are simply backup scripts.
Maintain Backup Command Files Move cursor to desired item and press Enter. Create a Backup Command File Change a Backup Command File Remove a Backup Command File F1=Help F9=Shell F2=Refresh F10=Exit F3=Cancel Enter=Do F8=Image Figure 6-4. The Maintain Backup Command Files Menu 5. Select Create a Backup Command File and press Enter. The following screen will display: Create a Backup Command File Move cursor to desired item and press Enter.
Create a command file to: Backup the System Type or select values in entry fields. Press Enter AFTER making all desired changes.
You may attempt to re synchronize stale partitions with the /usr/sbin/syncvg command. However, SysBack also provides a SMIT menu interface to assist you with the execution of this command. To 1. 2. 3. synchronize stale partitions in a volume group: Log in as the root user. Type smitty sysback and press Enter. Select Offline Mirror Backup Options and press Enter. The following menu will display: Offline Mirror Backup Options Move cursor to desired item and press Enter.
Maintainance Utilities Move cursor to desired item and press Enter. Recover from System Failure during an Offline Mirror Backup Synchronize Stale Partitions for a Volume Group F1=Help F9=Shell F2=Refresh F10=Exit F3=Cancel Enter=Do F8=Image Figure 6-8. The Maintenance Utilities Menu 5. Select Synchronize Stale Partitions for a Volume Group and press Enter. The following menu will display: Synchronize Stale Partitions for a Volume Group Type or select values in entry fields.
Recover from a Failed or Aborted Offline Mirror Backup You need to recover when the Offline Mirror Backup process is interrupted and never completes. This could occur when someone or something killed the Offline Mirror backup process before completion. For example, you experienced a system crash while the backup process was running.
Maintainance Utilities Move cursor to desired item and press Enter. Recover from System Failure during an Offline Mirror Backup Synchronize Stale Partitions for a Volume Group F1=Help F9=Shell F2=Refresh F10=Exit F3=Cancel Enter=Do F8=Image Figure 6-11. The Maintenance Utilities Menu 5. Select Recover from a System Failure SysBack during an Offline Mirror Backup and press Enter.
-Q Specifying this option will initiate a validation process of the specified volume groups and logical volumes ensure that the AIX mirrors for these resources can actually be split. This process will generate output that includes the reasons why a specified resource may not have it’s AIX mirror split, as well as, indicating which of the specified resources did pass the validation process. Additionally, the Offline Mirror backup process will not execute, only validate.
It may be used in combination with the -F and -v flags only. This SMIT menu equivalent is the Recover from System Failure during an Offline Mirror Backup menu. Use this flag only when you receive the message There appears to be another sbom_backup process runnning! when attempting to initiate an Offline Mirror backup process. You will receive this message only when someone or something killed a previous Offline Mirror process.
3. Repeat step 2 for each volume group identified in step 1. Once you have obtained the above information, we are looking to identify any logical volume matching these traits: v Logical volume names like: lvnameL (capital letter L at the end of the logical volume name). For example: sblvL v Logical volume names like: lvnamecopy00 (the string copy00 at the end of the logical volume name). For example: sbfscopy00.
/sbom/sbfs/data/directory /sbom/sb1fs/data/directory Logical Volumes: sb1lvL sb2lvL To remove them in the correct order: # # # # # # # # # # unmount /sbom/sb1fs/data/directory unmount /sbom/sbfs/data/directory unmount /sbom/sb1fs unmount /sbom/sbfs rmfs /sbom/sb1fs/data/directory rmfs /sbom/sbfs/data/directory rmfs /sbom/sb1fs rmfs /sbom/sbfs chlvcopy -fB sb1lvL chlvcopy -fB sb2lvL Chapter 6.
6-16 IBM Tivoli Storage Manager for System Backup and Recovery: Installation and User’s Guide
Chapter 7. Local User Access When you install SysBack, all users on the local system are, by default, granted access to all backup devices on the system. They are also allowed to create backups in the default directory /usr/lpp/sysback/bf/local/all. The following options are used to change user access by adding or deleting the devices or directories that each user can access. To access the local device or directory access menu: 1. At a command line, type smit. 2.
Assume the following records exist: Users to allow Users to deny Devices Directories all greg peter bobby /dev/rmt0 vdev0 /usr/lpp/sysback/bf/local/all root all usr/lpp/sysback/bf/local/root alice /dev/rmt1 Based on the information above, the following statements are true: 1. Users greg, peter and bobby do not have backup access on this system because they are explicitly denied access under all users. You can only deny access to users when defining access for “all” other users.
The default entry is all. Press Enter to select this entry, change the entry to another user name, or press F4 to list user records previously configured and select a user from the list. The following screen shows the system default permission record for all users on the system: Add or Change User Device/Directory Access Type or select values in entry fields. Press Enter AFTER making all desired changes.
directory of /usr/lpp/sysback/bf/local/username. Highlight each entry you want to save and press F7. Press Enter to continue. When performing any SysBack backup, you are provided a directory backup option for each directory specified. The actual file created in the directory is named according to the information in Chapter 2, “SMIT Overview”, on page 2-1. Directory path for network install images Default=(blank/none).
If a record exists for “all” users, an option for “all” is displayed. If you remove the record for “all” users, all users except those with permission records explicitly defined for them will be denied access. 3. Press Enter to confirm your choice. Doing so removes the selected permission record from the file with no further prompts. Chapter 7.
7-6 IBM Tivoli Storage Manager for System Backup and Recovery: Installation and User’s Guide
Chapter 8. Remote Services Remote Services is an optional feature of SysBack that enables a host attached to a network using TCP/IP to read and write backups to and from either tape drives or disks attached to a remote host. This enables a single host to act as a backup server for other hosts on the network that do not have a local tape drive attached. With Remote Services, a backup server machine can enable specific hosts and users on those hosts to access the local devices or directories.
Server Options Move cursor to desired item and press Enter. Configure Remote Services Add or Change Client Host Access to this Server List Client Access Remove Client Access F1=Help F9=Shell F2=Refresh F10=Exit F3=Cancel Enter=Do F8=Image Figure 8-2. Server Options from the Remote Services Menu Client Options Move cursor to desired item and press Enter.
The following example describes the permission records and how they are interpreted. Note that this is a complex example. Ordinarily, records are defined for all hosts, or for each specific host, but not both.
The entry for network installation image directories applies only to either the root user, or all users if the root user is not explicitly defined. This entry determines the directory or directories from which the installation image files will be listed during a network installation operation.
the server, you must then use the option Add or Change List of Remote Backup Servers on the client to provide a remote backup option in SMIT. If you want to provide access to the server for all hosts on the network, you can define a single record that applies to all hosts. When doing so, you can exclude or deny access to specific hosts. You do this by providing a permission record for a host called “all”.
Add or Change Client Host Access to this Server Type or select values in entry fields. Press Enter AFTER making all desired changes.
perform backups to disk image files, enter the directory or directories, separated by spaces, that the user can back up to. Press F4 to display a list of backup image directories already selected, or the default directory of /usr/lpp/sysback/bf/local/username. Highlight each entry you want to save and press F7. Press Enter to continue. When performing any SysBack backup, you provided a directory backup option for each directory specified.
To remove a client permission record: 1. From the Server Options menu, select Remove Client Access. Note: From a command line, type smit sb_ucfgremaccess. A list of hosts with permission records currently defined is displayed. 2. Select a host from the list. If a record exists for “all” hosts, an option for “all” is also shown. If you select to remove the record for “all” hosts, all hosts except those with permission records explicitly defined for them are denied access. 3.
Hostname of server Default=(none/blank). Enter the name of the server to be provided a backup option or press F4 to list the servers previously added and select a server from the list. You can use either the full domain name or just the hostname, as long as the hostname can be resolved by itself. Show disk image file backup/restore options? Default=no. With this value set to “no”, no disk image file backup options are displayed for this server.
Listing Remote Backup Servers This option displays a list of all servers currently defined to this client. This list includes devices and directories accessible to this client, as defined on the server. To list the remote servers and accessible devices and directories, select List Remote Backup Servers from the Client Options menu or type smit sb_lsremserver at a command line. The list is displayed with no further prompts.
from the list. You can use either the full domain name or just the hostname, as long as the hostname can be resolved by itself.You may also specify the word ALL to indicate that you would like this action to be performed against all previously defined backup servers. Enable/Disable Remote Access Checking Specify to enable or disable the hostname of the system referenced by the Hostname of server (or all) field.
2. From the Remote Command Access Menu, select Configure Remote Services. Note: From a command line, type smit sb_cfgremsvs. 3. Press Enter at the Are you sure? prompt. 4. Select Add or Change Remote Command Access. Note: From a command line, type smit sb_accessadd. 5. Type the fully qualified path name to the desired backup command. The SysBack backup commands are located in Appendix A, “Commands”, on page A-1.
Chapter 9. Exclude Lists You might want to exclude certain files, directories, filesystems or logical volumes from a backup to reduce the time needed to make the backup and the amount of space on the backup media. If, for instance, you have a directory that contains only temporary files that are recreated each time an application is started, those files might be excluded from the backup to save time and space. Another example might be read-only data files used by an application that never change.
You can also access these menus using the fastpath. To do this, type smit sb_exclude at a command line. Exclude Lists Move cursor to desired item and press Enter. Add a File, Directory, or Logical Volume to Exclude List Display Current Exclude List Remove Entries from Exclude List Delete Exclude List File F1=Help F9=Shell F2=Refresh F10=Exit F3=Cancel Enter=Do F8=Image Figure 9-1.
Add a File, Directory, or Logical Volume to Exclude List Type or select values in entry fields. Press Enter AFTER making all desired changes. [Entry Fields] Exclude List File Name [] Default file is /usr/lpp/sysback/.exclude_list File or directory name to add [/tmp] OR Logical Volume name to add [] F1=Help F5=Reset F9=Shell F2=Refresh F6=Command F10=Exit F3=Cancel F7=Edit Enter=Do / / F4=List F8=Image Figure 9-2. The Add a File, Directory, or Logical Volume to Exclude List Menu 2.
root@lasher /usr/lpp/sysback>more .exclude_list @lv00 @sblv /lasher/data /home/* /tmp/*test* Listing Excluded Files or Directories To list all of the files, directories or logical volumes currently excluded from SysBack backups, select Display Current Exclude List from the Exclude Lists menu. You will be prompted for an exclude list file name to display. Enter the fully qualified path and file name to the file to display. If no file name is specified, the /usr/lpp/sysback/.
File or directory name to remove Default=blank. Enter the full pathname of a file or directory to remove or press F4 to list all currently excluded files and directories and select from the list. Logical Volume name to remove Default=(blank/none). Enter the name of a logical volume to remove from the exclude list or press F4 to display a list of previously excluded logical volumes and select from the list. 3. Press Enter.
9-6 IBM Tivoli Storage Manager for System Backup and Recovery: Installation and User’s Guide
Chapter 10. Recreating or Restoring from Backups There are many reasons to restore data from a backup. The data might have been corrupted due to improper user input or application errors, or the data might be inaccessible due to various hardware problems. If data was inadvertently deleted or corrupted by a user or application, you will probably need to restore the data from the backup. If a hardware failure occurred, you need to perform additional steps before you can restore the data.
The following information should be helpful for making the logical volume inactive based on its type: jfs This is the default logical volume. jfs indicates the logical volume is used for a journaled filesystem. If this is the case, refer to the instructions above for Filesystems. Otherwise, an unknown process on the system has the logical volume open. jfslog This is a logical volume used by filesystems in the volume group.
You do not have to use the backup media to recreate a volume group, logical volume or filesystem on the same system. You can use the media to perform the recreation on another system, thereby copying an environment from one system to another. Note that this option recreates the volume group, logical volumes, and filesystems, but cannot restore the data. You can use the Restore Data from a Backup option to restore data. To recreate one or more volume groups, logical volumes, or filesystems: 1.
Recreate a Volume Group from a Backup Type or select values in entry fields. Press Enter AFTER making all desired changes. Hostname of Server Device or file name TSM backup ID Edit the Volume Group info before proceeding? New Volume Group Name Volume Group(s) to create F1=Help F5=Reset F9=Shell F2=Refresh F6=Command F10=Exit [Entry Fields] hambone /sysback.images/chukra> yes [] [vg00] F3=Cancel F7=Edit Enter=Do + F4=List F8=Image Figure 10-1.
TSM Backup ID This option will only be displayed when the Device or file name is a TSM virtual device. The value for this field is propagated from a previous input screen and may not be changed. Edit the Logical Volume info before proceeding? Default=yes. This prompt is displayed only when selecting to recreate logical volumes or filesystems.
Although only the logical volume name is indicated here, if the logical volume contains a filesystem, the filesystem will be recreated. Note that information regarding the logical volumes to recreate must be contained on the backup media previously selected. Volume Group(s) to create This field is displayed only when selecting to recreate volume groups. This field will contain the names of the volume groups selected on the prior selection screen.
If there are no inconsistencies with the new system, you are asked: Are you sure you wish to create the volume group(s) (y/n)? or Are you sure you wish to create the logical volume(s) (y/n)? Answering “y” to this question recreates the volume groups or logical volumes as specified. When the process has completed, you are asked to press Enter to return to the SMIT screen.
Before a level (other than 0) is restored, any files that currently exist in the filesystems, but did not exist at the time the backup level was created, are removed from the filesystems. Restoring individual files or directories: You can restore individual files or directories from any incremental backup level. This is not considered an incremental restore, so it is not necessary to restore a level 0 backup first.
Expression) wild cards to restore a wildcard match of files. The filenames and the wildcard must be enclosed in double quotation marks (″) to avoid expansion by the user’s shell. For example, the search word “/home/j*” indicates to restore all directories and files that start with “/home/j” such as /home/john or /home/jenn.
Restore Data from a Backup Type or select values in entry fields. Press Enter AFTER making all desired changes. [Entry Fields] Hostname of server hambone Disk image file /sysback.images/chukra> TSM backup ID Restore data type Filesystem Report output type both + Device name for remote volume prompt [] Allow restore of system data? no + Allow restore of incremental backup? no + Recreate VG,LV, or filesystem before restoring? no + Restore non sparse files as non sparse (AIX 5.
Device name for remote volume prompt Default=(Blank/None). Enter a TTY, LFT or PTS device name to send the volume prompt to a specified device rather than to the current SMIT screen. If you are backing up to a remote host, the device name you specify is attached to the remote host. This field is displayed only when the backup device is a tape drive or virtual device. Examples of device names are /dev/tty0, /dev/lft0 and /dev/pts/5.
Note: This option only applies to backups being restored to systems running AIX 5.1 or later. Destination (if different) Default = blank. If you are restoring data to its original location, leave this field blank. To select an alternate “relative” logical volume or directory for the restored data, select one of the following: v For a file/directory backup, enter a new directory.
A wildcard restore specification such as this could restore files and directories like: /myfs/mydirectory/ my file name /myfs/mydirectory/my sub d&rectory/ spec#$@l file /yourfs/* A wildcard restore specification such as this could restore files and directories like: /yourfs/speci@l name/dir/dir /yourfs/dir name/file@ special Data to restore (of above type) Unless the backup is a file/directory backup and you select to restore all files and directories, this field contains the data to restore as selected
10-14 IBM Tivoli Storage Manager for System Backup and Recovery: Installation and User’s Guide
Chapter 11. Changing the Volume Group, Logical Volume and Filesystem Attributes This section describes the process for changing the volume group, logical volume, and filesystem attributes prior to creating (or recreating) a volume group, logical volume, or filesystem. The same instructions apply to the following SysBack processes: 1. Installation of a system from a SysBack system backup 2. Recreation of a volume group from a system or volume group backup 3.
2. The Select Physical Volumes for Volume Groups and Change Volume Group Attributes options are not displayed if you have chosen only to recreate specific logical volumes and filesystem from a backup. 3. The Advance Install Options menu is only displayed when this menu is invoked by the system installation process. Press Esc to return to the Main Menu if you are installing a system or to recreate volume groups, logical volumes, or filesystems on an active system.
+----------------------------------------------------------+ | Select Physical Volumes for "rootvg" Volume Group | +----------------------------------------------------------+ PVname Location Volume Group hdisk0 hdisk1 hdisk2 hdisk3 hdisk4 hdisk5 hdisk6 hdisk7 hdisk8 04-C0-00-4,0 rootvg 04-02-L sysbackvg 04-02-L sysbackvg 04-02-L (free) 04-02-L (free) 04-02-L adsmvg 04-02-L adsmvg 04-02-L adsmvg 04-02-L (free) Description 16 Bit SCSI SSA Logical SSA Logical SSA Logical SSA Logical SSA Logical SSA Logic
column then indicates (free) and the Currently Selected field is updated to reflect the new megabytes of disk space assigned to the volume group. To move a physical volume assigned to the selected volume group to a different volume group, remove the physical volume from the current volume group, return to the prior menu, then select the new volume group to which you want to add the physical volume. Press Esc to return to the Change Volume Group & Logical Volume Information menu.
+----------------------------------------------------------+ | Change "adsmvg" Volume Group Attributes | +----------------------------------------------------------+ Attribute Value Install Option Create Auto Varyon at System Startup? yes Physical Partition Size (MB) 8 Quorum Checking? yes Copies Not Set Concurrent-capable? no Auto-concurrent Varyon? *** Big Enabled Volume Group? no Factor Size? 1 Hot Spare? no Logical Track Group Size? 128 Auto-sync? no Filesystem Type? Not Set +--------------------------
Note: The maximum physical partition size varies by level of AIX installed at the time that the backup was created. If you change the current value, you will receive the following prompt: Changing the PP size requires the recalculations of all logical volume sizes. Some LVs may increase in size when using a larger PP size. Are you sure you want to change the PP size? (y/n) To not change the size, press “n”. Otherwise, press “y”.
Big Enabled Volume Group? Specify“ y” to create this volume group as a big enabled volume group which allows great than 32 disks to be assigned. The maximum number of volumes that may be assigned to this type of volume group is 128. Specify “n” if you do not want the volume group to be created as big enabled. Factor Size? Specify a value of 1, 2, or 3 for the volume group’s factor size. The factor size affects the number of physical partitions that may be in the volume group.
support each file system type included in the volume group provided that enough disk space is assigned that volume group. Note: If you set this option globally across the volume group, you may override this setting for any individual file system to utilize a different jfs type using theChange Filesystem Attributes menu. When all selections are complete, press Esc to return to the prior menu. Note: This option only applies to backups created on systems running AIX 5.1 or later.
The above screen shows each logical volume and the number of logical partitions, number of copies, stripe size and number of physical volumes currently assigned to the logical volume. Select a logical volume and press Enter.
+----------------------------------------------------------+ | Change Logical Volume Attributes | +----------------------------------------------------------+ LV Name hd5 loglv02 hd8 loglv00 hd6 sblv hd4 adsmlv hd1 lv03 lv00 lv04 VG Name rootvg adsmvg rootvg sysbackvg rootvg rootvg rootvg adsmvg rootvg sysbackvg sysbackvg sysbackvg Pri 03 04 04 04 10 20 20 20 20 20 20 20 LPs MinLPs Copies MountPoint 1 0 1 1 0 1 1 0 1 2 0 1 40 0 1 3 0 1 4 2 1 / 200 107 1 /adsmfs 2 1 1 /home 52 48 1 /home/sysback 50 48 1 /
contains the original size of the logical volume. This field does not reflect any changes, so you can always return to this value if you inadvertently change the size. The Minimum size indicates the recommended minimum size of a filesystem that is required to contain the filesystem data. The PVs selected field contains the number of physical volumes currently assigned to the volume group for this logical volume and to the logical volume itself.
You cannot change this field if you are installing the system from a power backup. If the logical volume contains a filesystem, the filesystem is created at the same size as the logical volume. Entering a size smaller than the minimum size displayed at the top of the screen might cause you to run out of filesystem space when restoring the data from the backup media. If you are installing a system, over-reducing the root (/) or /usr filesystems usually results in a system installation failure.
those specified above, can be changed to any desired value indicating the type of data contained in the logical volume. Outer edge middle center middle e m c im spindle Intra-policy The current intra-physical volume policy, a policy that determines the region of the physical volumes where the logical volume should be placed.
v If no physical volumes are selected for the logical volume: a maximum value spreads the logical volume across either all of the disks in the volume group or the value in the Maximum PVs field, whichever is less. A minimum value uses the first disk in the volume group unless it fills, in which case the next disk in the volume group is used for the remainder.
continue to be created in the general location as defined by the physical volume list, Intra-policy and Inter-policy. MWC? Indicates whether or not the mirror-write-consistency checking is in effect. If so, the volume group status area is updated when writes are performed to a mirrored logical partition. This status is then used, in the case of a disk or system failure, to ensure that all mirrored partitions are identical when the volume group is again varied on.
policy. All mirrors are written in parallel but always read from the first mirror if the first mirror is available. Note: This option only applies to backups created on systems running AIX 5.1 or later. pr (Parallel Round Robin) Specify this option to establish a parallel write round robin read.
+----------------------------------------------------------+ | Change Filesystem Attributes | +----------------------------------------------------------+ LV Name hd4 adsmlv hd1 lv03 lv00 lv04 hd3 hd2 instlv lv01 hd9var Mount Point / /adsmfs /home /home/sysback /home/sysback/build /netscape /tmp /usr /usr/sys/inst.images /usr1 /var Type jfs jfs jfs jfs jfs jfs2 jfs jfs jfs jfs2 jfs +------------------------------------------------------------------------------+ | Select a filesystem from the above list.
mount point was /home/files and the new mount point is to be /data/files, then a file previously called /home/files/userinfo is restored as /data/files/userinfo. If changed, the /etc/filesystems file is updated to reflect the new mount point for the filesystem so that all future attempts to mount the filesystem will do so to the new mount point. Fragment Size The current filesystem fragment size, or fragsize. You can indicate a new fragsize in bytes, and valid values are 512, 1024, 2048, and 4096.
Enabling this support does not affect I/O performance, but the filesystem cannot be remote mounted to another system that does not support this feature. To change the current value, enter “y” or “n” Allocation Group (AG) Size Indicates the current allocation group size. The allocation group is a grouping of inodes and disk blocks similar to BSD cylinder groups. This field appears only on AIX 4.2 or later systems. You can enter a new value in megabytes, which must be 8, 16, 32 or 64.
Advance Install Options This menu applies to AIX 5.1 and later systems. It will be invoked when you have selected to edit the LBM information when creating an LVM Information file, and during system installation.
Note: This option only applies to backups created on systems running AIX 5.1 or later. If you perform a backup of an AIX 5.1 system, and then change the file system type for rootvg to be different than the type originally backed up, it is highly recommended that you perform a new backup immediately following the system restore.
11-22 IBM Tivoli Storage Manager for System Backup and Recovery: Installation and User’s Guide
Chapter 12. System Installation and Maintenance A backup created using the System Backup option can be used to completely reinstall the original system from which it was made or to install other machines with the same or different hardware configurations. During the installation process, the following functions are provided: v The volume group, physical volumes, and logical volumes contained on the backup are compared with the current system hardware configuration.
the installation proceeds without any input from the user. This occurs if all required default information has been provided and the LVM information on the backup media is compatible with the system to be installed. If, for example, the prior physical volumes are not available or if there is not enough disk space on the client, errors occur, and the installation process defaults to a prompted installation as described in the remainder of this section.
After you have followed these instructions, the following SysBack Installation and Maintenance menu is displayed: +----------------------------------------------------------+ |IBM Tivoli Storage Manager for System Backup and Recovery | +----------------------------------------------------------+ +--------------------------------+ | Installation & Maintenance | | M A I N M E N U | +--------------------------------+ Change Installation Device Change Volume Group & Logical Volume Information Install the System
the next device in the list when prior reaches end of volume). For details on the use of virtual devices, refer to Chapter 21, “Virtual Devices”, on page 21-1. Important Note: If you are installing from a local parallel virtual device, meaning the backup was striped across multiple physical devices, you must select the same number of devices when performing the installation. You must also insert the tapes in the drives in the order they appear on the Installation Device menu.
+----------------------------------------------------------+ | Change Network Settings | +----------------------------------------------------------+ Client IP Address Server IP Address Gateway IP Address Subnet Mask 192.168.1.58 192.168.1.55 192.168.1.55 255.255.255.0 Ethernet Interface: ==> Standard Ethernet Interface IEEE 802.
+----------------------------------------------------------+ | Change Network Settings | +----------------------------------------------------------+ Client IP Address Server IP Address Gateway IP Address Subnet Mask 192.168.1.58 192.168.1.55 192.168.1.55 255.255.255.
Changing Volume Group & Logical Volume Information The SysBack installation process enables you to fully customize the sizes, locations, and other attributes for volume groups, logical volumes, and filesystems. If you are installing from a network tape drive, CD, or DVD, or a disk image file, the network installation server is contacted to obtain a list of tape drives, virtual devices, or disk image files available to this client.
+----------------------------------------------------------+ | Change Volume Group & Logical Volume Information | +----------------------------------------------------------+ Select Physical Volumes for Volume Groups Change Volume Group Attributes Select Physical Volumes for Logical Volumes Change Logical Volume Attributes Change Filesystem Attributes Change Physical Volume Attributes Advance Install Options +------------------------------------------------------------------------------+ | Hihglight the op
If no inconsistencies are found in the system configuration, preventing the installation from proceeding, a confirmation screen similar to the following example is displayed: +----------------------------------------------------------+ | Install the System | +----------------------------------------------------------+ +------------------------------------------------------------------------------+ | Verifying space requirements ..
9. If you are installing on a different machine than the original backup was made from and the original machine was configured on a network, you are asked if you want to remove the network configuration unless you pre configured this response in the Utilities menu. Details for this prompt are described in “Removing the Network Configuration” on page 12-11. 10. If a system key exists and is in the normal position, the system is rebooted automatically.
you would like to remove the product from the new partition, you may configure SysBack to do so using the Utilities menu option described in “Utilities Menu”of this chapter. Removing the Network Configuration If you are installing the machine from a backup that was made on a different machine and the original machine was configured on a network, the current network settings, including the hostname, IP address and netmask are restored as well.
+----------------------------------------------------------+ | Utilities Menu | +----------------------------------------------------------+ Start a Maintenance Shell Import the rootvg Volume Group Perform Recovery Installation Set Tape Backup Sequence Number to Install From Post Install Configuration Options Copy a System Dump +------------------------------------------------------------------------------+ | Select an option and press Enter.
After you have selected a rootvg volume group to import, you are asked: Mount filesystems after importing? Type y or n to indicate whether or not the filesystems in the rootvg volume group should be mounted after the volume group is imported. When performing some maintenance tasks, such as checking and repairing the root (/) or /usr filesystem, you would not want to mount the filesystems at this time.
Do you wish to view/change the logical volume or filesystem info? Type y or n to indicate if you want to view or change the attributes for the root (/) and /usr filesystems or logical volumes. This includes such attributes as the size and disk location of these logical volumes. This provides, for example, an effective tool for reducing the size of an over-expanded /usr filesystem without having to reinstall the entire operating system.
+----------------------------------------------------------+ | Post Install Configurations Options | +----------------------------------------------------------+ Remove SysBack Programs After Install Remove Network Settings After Install Install Additional Device Support +------------------------------------------------------------------------------+ | Select an option and press Enter | | | +------------------------------------------------------------------------------+ | Use ARROW/Tab keys to move, ENTER
+----------------------------------------------------------+ | Remove Network Settings After Install | +----------------------------------------------------------+ Do you wish to remove the network settings? +------------------------------------------------------------------------------+ | Y = Remove network settings. N = Don’t remove network settings.
Boot client was added regardless of whether this option is edited. For more information on configuring a NIM Resource Network Boot, see Chapter 13, “Network Boot/Installation Configuration”, on page 13-1. Device Support to Install This option tells SysBack how much to instal of what is contained in the media in the location specified by the Install Device option. The two options are: Minimum Selecting this option will install only those device support filesets identified by AIX when the system was booted.
maintenance shell after the dump copy completes, where you can perform other operating system commands or reboot the system. Rebooting the System Menu An option is provided on the Main Menu to Reboot the System if you choose not to reinstall the system at this time. You can reboot in normal mode if the system was previously installed and has not been overwritten. You can reboot in service mode to restart the installation process.
Chapter 13. Network Boot/Installation Configuration The Sysback Network Boot/Install Configuration options create and configure a host to provide boot and optional installation services to a client host over the network. The SysBack Network Boot functions use the BOOTP protocol to enable a client to communicate with the boot server. The client sends a BOOTP request across the network to a server.
5. SysBack must be installed on the boot server. Note: If filesets are installed specifically to support a boot client, the server must be rebooted and the network boot image updated or recreated before the client can successfully boot from the boot server. NIM Resource Boot The SysBack NIM Resource Boot method provides a mechanism for the user to use existing NIM SPOT and LPPSOURCE resources in combination with SysBack boot/installation operations.
To access the Classic Network Boot menus, select Classic Network Boot from the Network Boot/Install Configuration menu. Note: From a command line, type sb_netboot. Configuring or Updating a Network Boot Image The Network Boot Image exists on the Network Install Server, and is sent to the client system only upon request in order to boot the client system to the SysBack Installation and Maintenance Menus.
address, the server responds to a broadcast BOOTP request so the client system will not have to specify server information in the BOOTP menu. This option is not usually required by most systems. To add or change a network boot client: 1. From the Classic Network Boot Menu, select Add or Change a Network Book Client. Note: From a command line, type smit sb_cfgbootclient. 2. Type the client hostname of the machine that will be booted from this server. The client hostname must be resolvable by the server.
The type of architecture/platform and the processor type of the client to boot from the network install server. The default is the server’s platform and kernel type.
To set the Network Install Client Defaults: Note: You may also access this same menu by using the following SMIT paths: smitty sysback Sysback Program Defaults Change Sysback Program Defaults Change Sysback Tape Defaults Change Sysback CD/DVD Boot Defaults Set Network Install Defaults 1. From the Classic Network Boot Menu, select Set Network Install Client Defaults. Note: From a command line, type smit sb_cfginstclient. 2. Highlight the client and press Enter. 3. The following screen is displayed.
Debug Logging Indicates whether or not to turn on debug logging operations for troubleshooting network boot and installation problems. The default is “no”. Console Device Name Enter the name of the console device prior to installation to prevent displaying the prompt prior to the installation menus. The console device can be either an LFT (graphical display) or TTY (ascii display) device. Examples are /dev/1ft0 or /dev/tty0.
installed is not the first system backup on the tape, enter the backup sequence number. This number must be between 1 and the total number of system backups on the tape media. The default is “none/blank”. Remove SysBack from Foreign Client After Install Indicates whether or not to remove the SysBack program from the system after installation. Choose “yes” when you have not purchased a license for the client that will be installed. The default is “no”.
Ethernet Interface (if applicable) If the install server uses a different network adapter, and the network adapter is ethernet, select the correct interface type. If the boot server is also the installation server, do not set this option. The default is “none/blank”. Ethernet Connection Type If the install server uses a different network adapter, and the network adapter is ethernet, select the correct connection type. If the boot server is also the installation server, do not change this option.
be retained, enabling the client machine to boot from the server as needed for re-installation or to perform system maintenance. To remove a network boot client: 1. From the Classic Network Boot Menu, select Remove a Network Boot Client. Note: From a command line, type smit sb_ucfgbootclient. 2. Highlight the client and press Enter. 3. Once all entries are complete, press Enter to confirm selections and execute your choices.
3. The following screen is displayed. Install Sysback into Spot Resource Type or select values in entry fields. Press Enter AFTER making all desired changes. [Entry Fields] /usr/sys/inst.images [] [] no *INPUT device/directory for software *NIM SPOT Resource Name *NIM LPP Source Name OVERWRITE Same or newer version? F1=Help F5=Reset F9=Shell F2=Refresh F6=Command F10=Exit F3=Cancel F7=Edit Enter=Do + + + F4=List F8=Image Figure 13-3.
Querying for SysBack Installation in SPOT Resource This option can be used to determine if SysBack is installed in to a NIM SPOT resource and, if so, at what level. To query for installation: 1. From the NIM Resource Boot menu, select Query for SysBack Installation in SPOT Resource. Note: From the command line, type smit sb_querysb. 2. Press Enter. Adding or Changing a Network Boot Client This option configures a network boot client to be booted from the server.
NIM SPOT Resource Name The NIM SPOT name that SysBack will use to create the boot image for the client named above. Note: The requirements described in the NIM Resource Boot discussion in “Classic Network Boot and NIM Resource Boot” on page 13-1 must be followed. NIM LPP Source Name The NIM LPPSOURCE resource that SysBack uses to obtain necessary device support for the boot client when cloning from a backup image that does not contain the device support needed for this client. 4.
For a complete explanation on how to access and use this menu option, see Chapter 14, “RS/6000 Scalable POWERParallel Systems® (SP) Boot and Install Utilities”, on page 14-1.
Chapter 14. RS/6000 Scalable POWERParallel Systems® (SP) Boot and Install Utilities The RS/600® SP® systems, unlike the non-SP RS/6000 systems, have special requirements for installing and cloning. The RS/6000 SP System is comprised of a Control Workstation (CWS) and one or more nodes. Each node and the CWS are independent machines that work together using a complex system of network daemons, configuration files, and hardware.
How SysBack works with NIM on the SP System NIM, Network Installation Manager, is an AIX facility used for the installation and configuration of software through a network interface. SysBack Version 5 contains a new network boot/install configuration option that uses NIM Resources to provide the boot image and the location of device support when an image is cloned. SysBack can now use an existing, previously configured NIM SPOT and LPPSOURCE resource for installation.
Accessing the SP Boot and Install Options You can access the SP Boot and Install menu one of two ways. Option 1 1. From the SysBack Main Menu, select Configuration Options. Note: From a command line, type smit sb_config. 2. Select Network Boot/Install Configuration. Note: From a command line, type smit sb_netboot_choice. 3. Select Initiate SP Node Boot and Install. Note: From a command line, type smit sb_spboot. Option 2 1. From the SysBack Main Menu, select Backup & Recovery Options.
Unprompted and Prompted Installations SysBack installations are prompted by default. When booting to the SysBack Maintenance Menu to begin an installation, you can install from a different installation device, modify logical volume and volume group attributes, or access other utilities. See Chapter 12, “System Installation and Maintenance”, on page 12-1 for information on these options. SysBack also lets you define installation defaults to eliminate most prompts during installation.
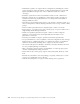
Chapter 15. Integrating to IBM Tivoli Storage Manager SysBack version 5.6 and later allows for the storage of backup objects into an IBM Tivoli Storage Manager server. Backups to a TSM server may be manipulated like any other SysBack backup. They may be listed, verified, restored, and used for system reinstallation. Combining the SysBack backup, restore, and network boot / install functions with a TSM server provides bare metal recovery capability for TSM configurations.
v AFS and DFS file system structures can not be recreated from backups. If the root user has the appropriate AFS or DFS permissions, then SysBack can backup the data. Note: The TSM Backup / Archive Client supports the backup of AFS and DFS file systems. v Compression should not be set from within the SysBack backup commands when the backup destination is a TSM server. Compression of data is controlled through TSM configuration options.
************************************************************************************ SErvername lasher_main NODename lasher COMMMethod TCPIP TCPPort 1500 TCPServeraddress tsmserver.your.domain.com PASSWORDAccess generate The following TSM Client Options are allowed with IBM Tivoli Storage Manager for System Backup and Recovery: v COMMMethod v COMMRESTARTDuration v COMMRESTARTInterval v COMPRESSAlways v COMPRESSIon v FROMNode v INCLexcl Note: Only 5 Include statements are supported in this file.
v DSMI_DIR - The path that contains the dsm.sys, dsmtca, and the en_US subdirectory. Setting this variable is not supported with SysBack. SysBack will always look to the default API installation directory of /usr/tivoli/tsm/client/api/bin to locate these items in order to allow the bare metal recovery functions. v DSMI_LOG - The path that points to the API error log. You may configure this variable to designate the location and filename of the API error log.
TSM Configuration Move cursor to desired item and press Enter. TSM Virtual Device Configuration TSM Backup Management Set TSM Network Install Client Defaults F1=Help F9=Shell F2=Refresh F10=Exit F3=Cancel Enter=Do F8=Image Figure 15-1. The TSM Configuration Menu 4. Select TSM Virtual Device Configuration and press Enter. The following screen is displayed: TSM Virtual Device Configuration Move cursor to desired item and press Enter.
Add TSM Virtual Device Type or select values in entry fields. Press Enter AFTER making all desired changes. [Entry Fields] lasher1_main [] TSM Server Name Client Node Password F1=Help F5=Reset F9=Shell F2=Refresh F6=Command F10=Exit F3=Cancel F7=Edit Enter=Do F4=List F8=Image Figure 15-3. The Add TSM Virtual Device Menu 7. Enter the password that corresponds to the node name defined in this server stanza in the Password field.
TSM Configuration Move cursor to desired item and press Enter. TSM Virtual Device Configuration TSM Backup Management Set TSM Network Install Client Defaults F1=Help F9=Shell F2=Refresh F10=Exit F3=Cancel Enter=Do F8=Image Figure 15-4. The TSM Configuration Menu 4. Select TSM Virtual Device Configuration and press Enter. The following screen is displayed TSM Virtual Device Configuration Move cursor to desired item and press Enter.
2. Type smitty sysback and press Enter. 3. Select TSM Configuration and press Enter. The following screen is displayed: TSM Configuration Move cursor to desired item and press Enter. TSM Virtual Device Configuration TSM Backup Management Set TSM Network Install Client Settings F1=Help F9=Shell F2=Refresh F10=Exit F3=Cancel Enter=Do F8=Image Figure 15-6. The TSM Configuration Menu 4. Select TSM Virtual Device Configuration and press Enter.
The following screen is displayed: CHange an Existing TSM Virtual Device Type or select values in entry fields. Press Enter AFTER making all desired changes. [Entry Fields] tsm0 [lasher1_main] [] TSM Virtual Device Name TSM Server Name Client Node Password F1=Help F5=Reset F9=Shell F2=Refresh F6=Command F10=Exit F3=Cancel F7=Edit Enter=Do + F4=List F8=Image Figure 15-8. The Change an Existing TSM Virtual Device Menu 7. Change the TSM server name listed in the TSM Server Name field if desired.
TSM Configuration Move cursor to desired item and press Enter. TSM Virtual Device Configuration TSM Backup Management Set TSM Network Install Client Defaults F1=Help F9=Shell F2=Refresh F10=Exit F3=Cancel Enter=Do F8=Image Figure 15-9. The TSM Configuration Menu 4. Select TSM Virtual Device Configuration and press Enter. The following screen will display: TSM Virtual Device Configuration Move cursor to desired item and press Enter.
Performing Backups to a TSM Server Initiating backups to a TSM server is just like performing any other SysBack backup. Backup operations are initiated by the standard backup commands. However, rather than specifying a directory, tape, or CD / DVD drive as the backup device, the TSM virtual device is specified. Some backup command options are not valid when used for backups to a TSM server. If specified, a warning message will be issued and the invalid option will be ignored.
TSM Configuration Move cursor to desired item and press Enter. TSM Virtual Device Configuration TSM Backup Management Set TSM Network Install Client Defaults F1=Help F9=Shell F2=Refresh F10=Exit F3=Cancel Enter=Do F8=Image Figure 15-11. The TSM Configuration Menu 4. Select TSM Backup Management and press Enter. The following screen will be displayed: TSM Backup Management Move cursor to desired item and press Enter.
Query TSM Backup Images Type or select values in entry fields. Press Enter AFTER making all desired changes. [Entry Fields] tsm0 All All [] TSM Virtual Device Name List Option Backup Type TSM Backup Image ID F1=Help F5=Reset F9=Shell F2=Refresh F6=Command F10=Exit F3=Cancel F7=Edit Enter=Do + + + F4=List F8=Image Figure 15-13.
inactive versions for each backup type. The number of inactive versions is determined by the backup copy group defined on the TSM server. For more information regarding active and inactive backup versioning, please refer to the IBM Tivoli Storage Manager for AIX: Administrator’s Guide (GC32-0768).
Name -------------------------------/TOC /hd4 /lv11 /hd3 /hd9var /sblv Size (MB) --------5 7 2 2 4 4 Querying Current Management Class Bindings You may query the current management class bindings from within SysBack. The management class bindings are obtained from the server name stanza in the dsm.sys file that is associated with the specified TSM virtual device. If no bindings are specified, the value “default” is returned. Note: SysBack automatically creates the necessary dsm.
TSM Backup Management Move cursor to desired item and press Enter. Query TSM Backup Images Query Current Management Bindings Remove a TSM Backup Image F1=Help F9=Shell F2=Refresh F10=Exit F3=Cancel Enter=Do F8=Image Figure 15-15. The TSM Backup Management Menu 5. Select Query Current Management Bindings and press Enter. 6. Highlight the virtual device to query at the Select a TSM Virtual Device dialog and press Enter.
Be aware that using the same TSM node name for both the TSM Backup / Archive Client client and the SysBack backup client will show different file space results than if they were separate. Please see the example below. tsm> query filespace Num Last Incr Date File Space Name ------------------------------ 1 00/00/00 00:00:00 /TSM4SBR 2 00/00/00 00:00:00 JFS /home/tempvg2fs1 Type ---API:TSMVFS All backups created with SysBack will have a file space type of API:TSMVFS and a file space name of /TSM4SBR.
Rebinding Backups Rebinding is a TSM term that refers to reassigning a backup to a different management class. When a backup type is rebound to a different management class, only the currently active backup, and all future backup operations after the management class is changed, will be rebound. For example, let us assume that you performed full system backups on Monday, Tuesday, and Wednesday using the default management class.
v When performing a SysBack Classic Network Boot, the TSM 32-bit API client and the tivoli.tivguid (prerequisite of the API client) filesets must be installed on to the network boot server. v When performing a SysBack NIM Resource Network Boot, the TSM 32-bit API client and tivoli.tivguid (prerequisite of the API client) filesets must be installed in to the NIM SPOT. Note: There is not a SysBack utility available for installing the TSM filesets into the NIM SPOT.
Note: The SysBack network boot client definition is based on the hostname of the client system. This may, or may not be, the same as the TSM client node name. The following screen is displayed: Set TSM Network Install Client Defaults Type or select values in entry fields. Press Enter AFTER making all desired changes.
which has client owner authority. In most cases, this was automatically created when you registered the node to the TSM server. Note: If you do not know either password, you will have to log on to the TSM server as an administrator and issue the command: update node your_nodename new_password. Then enter that new password into this field. TSM Network Device Name Specify the network device name to use for communications with the TSM server. For example: ent0.
+----------------------------------------------------------+ |IBM Tivoli Storage Manager for System Backup and Recovery | +----------------------------------------------------------+ +--------------------------------+ | Installation & Maintenence | | M A I N M E N U | +--------------------------------+ Change Installation Device Change Volume Group & Logical Volume Information Install the System with Current Settings Utilities Menu Reboot the System +---------------------------------------------------------
+----------------------------------------------------------+ | Change Network Interface | +----------------------------------------------------------+ Device ==>/dev/tok0 /dev/ent0 /dev/ent1 Description Location IBM PCI Tokenring Adapter (14101800 04-05 IBM PCI Ethernet Adapter (22100020) 04-B0 IBM 10/100 Mbps Ethernet PCI Adapte 04-04 +------------------------------------------------------------------------------+ | Select one network device or one or more tape devices.
Server IP Address (Required) Specify the IP address of the server system that will be used to reinstall this client. This should be the system running the TSM server that has the desired backup object to restore. If the boot server is the same as the installation server, do not change this value unless you have chosen a different network interface to perform the installation.
+----------------------------------------------------------+ | Tivoli Storage Manage for System Backup and Recovery | +----------------------------------------------------------+ Backup ID Ative Management Class Backup Date ==> 0.1345 Yes SystemBackupClass 01/19/03 11:56:00 0.1214 No SystemBackupClass 01/18/03 13:10:05 0.
Problem Determination Understanding basic SysBack and TSM problem determination tools may help you resolve minor problems without the need to contact support. In those situations where you would like to contact support for assistance, understanding the tools that support may ask you to use may be helpful as well. There are 3 primary items that you should monitor or review periodically to ensure that all of your backup processes are functioning properly.
Debug Options Occasionally, more detailed information is needed for diagnosis, these 4 primary options are available: v Putting the SysBack programs into debug v Putting SysBack TSM API programs into debug v Tracing the TSM API programs v Putting the installation process into debug Please contact support for detailed information with using any of these debug options. Interoperability with System Backup and Recovery for AIX - SysBack Versions 5.1 - 5.4 IBM Tivoli Storage Manager versions 5.5 or 5.
15-28 IBM Tivoli Storage Manager for System Backup and Recovery: Installation and User’s Guide
Chapter 16. Utilities The utilities menu contains options for performing special tasks, usually those used by advanced users or that are performed only periodically. To access the utilities menu: 1. At a command line, type smit. 2. From the SMIT menu, select IBM Tivoli Storage Manager for System Backup and Recovery. 3. Select Utilities. The Utilities menu is shown below.
To display the product history, select Display SysBack Product Install History from the Utilities menu. You can also create this list using the fastpath smit sb_showlevel at the command line. Printing or Displaying System Configuration Use the Print or Display System Configuration option to document the system configuration, including all information pertaining to the volume groups, physical volumes, logical volumes, and filesystems.
Physical Volume Information One record for each physical volume. Contains the physical volume location, size and a map of the regions on the disk where each logical volume resides. For example: PV Name Volume Group Location PVID MB PPs -------- ------------- ------------ ---------------- ----- -----hdisk0 rootvg 00-00-0S-0,0 00000218acd0f607 1002 250 LV Name PPs Region -------------------------------hd8 101 |....X.....| hd6 51-62 |..X.......| 73-96 |..XX......| hd4 3 |X.........| 102-103 |....X.....
You can also boot from a tape containing required device support software to perform a network installation from media on a remote server. In this case, you must explicitly indicate that the network support be included on the tape. When booting from tape to perform a network installation, the server on which the installation media is present does not need the device support installed to support the client, but the installation media itself must contain the required device support.
when you use a tape drive or virtual device. Change this field only if you are creating a backup that is to be installed (cloned) onto another platform type or to a machine running a different kernel. Press F4 to list the platforms/kernels for which tape boot support is installed on the system and select from the list.
2. On the Device Selector screen, highlight the device you want to use and press Enter. 3. The following screen is displayed: Create a Bootable CD/DVD (without data) Type or select values in entry fields. Press Enter AFTER making all desired changes. Device name Media Type? Media Size Platform type(s) for CD/DVD boot image Create the CD/DVD Now? Debug Output? HOST OPTIONS: Build Temp Work Space(s) on Hostname of CD/DVD Server SOFTWARE OPTIONS: Location of Software Packages to copy to CD/DVD.
the backup and CD / DVD creation to fail. Instead, it will cause the boot to fail when booting from a platform different than where the CD /DVD was created. Optionally using the Location of Software Packages to copy to CD/DVD field along with this option will allow you to place this device support for both platforms into the CD / DVD boot image and also allows it to be utilized as Post Install device support media.
Location of Software Packages to copy to CD/DVD. Specify the device or directory containing AIX device and/or kernel support filesets in the bffcreate format for use in either creating boot images or for use as Post Install Device support. This flag is required with the Platform type(s) for CD/DVD boot images set to all, and optional with any other combination. File with list of packages to copy to CD/DVD.
remove one or more of the default created file systems. Specify one or more of the following combinations: C Do not remove the cd_fs file system I cd_image file system Do not remove the This value may be specified as CI or C I. 4. Press Enter to begin creation of the bootable CD or DVD. Changing SysBack Tape Boot Defaults Use the Change SysBack Tape Boot Defaults menu to set tape boot defaults.
Change Sysback Tape Boot Defaults Type or select values in entry fields. Press Enter AFTER making all desired changes.
Non-rootvg Volume Group Option The default is set at Restore Rootvg Only. The following is a description of each option. Restore Rootvg Only Only the rootvg volume group will be created and restored from the media, even if there are other volume groups defined in the backup. At the end of the install only the rootvg will be defined. Restore All VGs All volume groups that are included on the backup media will be created and restored.
is created by AIX when the system was booted. This file is not always 100% accurate regarding what device support is needed as some devices return invalid installp package names rather than individual filesets. In most cases, however, this is a reliable alternative to pre-installing all device support filesets on to a system prior to creating the backup image. All Selecting this option tells SysBack to perform an install command against every item contained on the media in the specified location.
is included in the boot image. It is the file that is used during the boot and installation process that processes these specifications. This is similar to the Set Network Install Client Defaults menu for network boot or installation processes.
Console Device Name To prevent the prompt shown prior to the installation menus that determines which console to be used for the installation, you must enter the name of the console device here. This may be either an LFT (graphical display) or TTY (ascii display) device. Examples are /dev/1ft0 or /dev/tty0. If an LFT device exists on the client, it may also be selected by typing /dev/console. The default is none/blank. Note: You must select the display, even for a promptless install.
Sequence Number. This number must be between 1 and the total number of System Backups on the tape media. The default is none/blank. Remove Sysback from Foreign Client After Install This yes or no field indicates whether to remove the SysBack program from the system after an installation. This is useful when the user has not purchased a license for the client that will be installed. The default is no.
installation diskette. If it exists, this file will be executed at the end of the installation process before the system reboots. This can be used, for instance, to execute the sample script /usr/lpp/sysback/scripts/install.post_rmnet that removes the network configuration from the restored system data to prevent any prompts at the end of the SysBack installation process. LVM Information File Enter a filename to include an LVM information file on the customized installation diskette.
Change Read Permission on a Disk Image File Type or select values in entry fields. Press Enter AFTER making all desired changes. [Entry Fields] hambone.austin.ibm.com [/sysback.images/fatrat> +/ [fatrat] [root] all hosts + all users + [] Hostname (where file resides) * File Name Hostname (owner of file) User name (owner of file) Host read permission User read permission User description F1=Help F5=Reset F9=Shell F2=Refresh F6=Command F10=Exit F3=Cancel F7=Edit Enter=Do F4=List F8=Image Figure 16-6.
all hosts The file can be read by any host on the network. You can still limit access permission by the user name. User read permission Default=(current user read permission). Press Tab to change the field from its current value to a new value. The possible values are: this user only The file can only be read by the user who owns the file. The root user on the host that owns the file, or root on the server on which the file physically resides, can also access the file.
4. If you are creating a new file and you specified the system, power, or volume group backup type, select the volume group whose data is on the backup. To select a single volume, highlight the volume group and press Enter. To select multiple volume groups, highlight each volume group and press F7. When you have selected all entries, press Enter to continue. It is important to indicate in this field which volume groups are actually included on the backup.
2. The following screen is displayed: Create Custom Installation Diskette Type or select values in entry fields. Press Enter AFTER making all desired changes.
SysBack, that performs an automatic installation of device code from CD-ROM not already included in the system restored from the backup media. Filename of Post installation script Enter a filename to include a post installation script on the customized installation diskette. If it exists, this file will be executed at the end of the installation process before the system reboots. This can be used, for instance, to execute the sample script /usr/lpp/sysback/scripts/install.
Change Sysback Program Defaults Type or select values in entry fields. Press Enter AFTER making all desired changes. [MORE...4] Filesystem Data Backup Command [Entry Fields] Backup/Restore END OF TAPE (EOT) PROCESSING Program For EOT on Write Operations. Program For EOT on Read Operations. Email Address For EOT on Write Operations. Email Address For EOT on Read Operations.
The backup command, however, has changed over time in how it backs up and restores “sparse” files. A sparse file is a file in which blocks of data have been written non-sequentially, leaving unallocated blocks in the middle of a file. Previous levels of the backup command did not preserve this sparseness, and a sparse file, when restored, expands to include all blocks in the middle of the file, often causing a filesystem to inadvertently run out of space.
Both of these options assume that your e-mail address is valid and that your system is configured such that the e-mail can be sent. SysBack is sending the e-mail via the AIX mail command. It is the customer’s responsibility to properly configure their mail options. This might be useful when you would like and e-mail sent to a particular Computer Operator each time a tape needs to be changed, or simply for record keeping purposes. Email Address For EOT on Write Operations.
Note: The tapeutil command is a sample program that come with the IBM Atape.driver file set. This is the device driver that controls IBM Magstar® tape devices. This is not a SysBack command.
This field determines the maximum number of sync errors that can occur before the reading fails. The value of this field can be any number up to 32768. Using a value of zero (0) indicates that the reading should abort after the first sync error. Maximum number of retries on read errors Default=2000. When a read error occurs, by default SysBack attempts to reread the same buffer of data up to the number of times specified by this field.
Data buffer size Default=32768 (32 Kbytes). The size of the buffer of data that is written to the network socket in a single write operation. TCP Send Buffer size (in bytes) Default=16384 (16 Kbytes). The TCP “send buffer” size, equivalent to the tcp_sendspace parameter of the AIX “no” command. If the send buffer size is greater than 64 Kbytes, the RFC1323 TCP parameter, which is equivalent to the rfc1323 parameter of the AIX “no” command, is enabled automatically.
16-28 IBM Tivoli Storage Manager for System Backup and Recovery: Installation and User’s Guide
Chapter 17. Copying Backups to a New Media Type You can transfer a backup that exists in one media source to another. For example, if you normally perform up your SysBack System Installation Image backups to files on disk, but later need to make a bootable backup tape out of them, you would use the Device to Device Copy menus.
Copy Backup Disk Image or CD/DVD to Tape Type or select values in entry fields. Press Enter AFTER making all desired changes.
Report output type Specify whether to display a progress indicator during the copy process or to display errors only. Use Existing Boot image? Specify whether to use the existing boot image on the tape such as when transferring this backup image to a SysBack “Boot Only” tape. This may only be used with Full System backups. Note: This option should be set to “no” when you are also specifying Forward to End of Tape before starting copy? to “yes”.
You will be presented with the following menu: Copy Backup Tape or Virtual Device to Backup Disk Image Type or select values in entry fields. Press Enter AFTER making all desired changes.
Compress data before writing to output media? Specifying this option will cause the data to be compressed by this system prior to writing to the backup device. You should not compress data if the device you are writing to has built-in compression capability, unless you are writing the backup to a remote host and wish to send less data over the network. Note: Compressing the backup using software and device compression may cause the data to actually grow in size, as well as, to corrupt it.
Note: These utilities do not support backups stored in a TSM server, or using a TSM server as the output device. 1. Select the tape or virtual device where the backup is stored. 2. Select the tape or virtual device to use as the output device. You will be presented with the following menu: Copy Backup Tape to Backup Tape Type or select values in entry fields. Press Enter AFTER making all desired changes.
The default is 64k. The buffer size indicates the amount of data that is written to the output device in a single output operation. Using a buffer size that best optimizes a particular device can have significant performance advantages. Note: The larger the buffer size, the more memory will be used by the system during the operation. Compress data before writing to output media? Specifying this option will cause the data to be compressed by this system prior to writing to the backup device.
device before beginning this operation. This option would be used to stack multiple backups on to a single tape for example. Device name for remote volume prompt Specify this option when backing up to a remote or local server to indicate the name of a terminal device on which to display volume prompt messages for multi-volume operations. 3. Once you have entered your selections, press the Enter key to begin the process.
Chapter 18. Listing or Verifying Backups This chapter describes the steps for listing or verifying the contents of a SysBack backup. Listing Backup Contents Use this option to list the contents of any SysBack backup. This option shows the header information for the backup, a list of the logical volumes or filesystems included (except on file/directory backups), and optionally a complete list of files and directories on the backup.
selected on the prior device selector screen. You cannot change this field. Device name The device, if a tape drive or virtual device was selected. You cannot change this field from this screen. Backup sequence number Default=1. If the multiple backups were performed sequentially to the device, select the sequence number of the backup to list files for. This field is displayed only when you are listing the contents of a backup from a tape drive or virtual device. Default=yes.
Verifying Files on System Backup It is often a good idea to verify all of the data on a backup to ensure that the backup was written properly. For backups containing multiple data options, such as multiple volume groups or multiple filesystems, you can verify all or part of the backup. For instance, if you created a system backup containing multiple volume groups, you can verify one volume group, multiple volume groups, or all volume groups on the backup.
Verify a Backup Type or select values in entry fields. Press Enter AFTER making all desired changes. [Entry Fields] hambone.austin.ibm.com /dev/rmt0 Volume_Group both [] [rootvg] Hostname of server Device name Verify data type Report output type Device name for remote volume prompt Data to verify (of above type) F1=Help F5=Reset F9=Shell F2=Refresh F6=Command F10=Exit F3=Cancel F7=Edit Enter=Do + F4=List F8=Image Figure 18-2.
remote host. This field is displayed when the backup device is a tape drive or virtual device. Examples of device names are /dev/tty0, /dev/lft0 and /dev/pts/5. You can determine the terminal device name by typing tty at the command line on that device. Data to verify (of above type) Unless the backup is a file/directory Backup, this field contains the data to verify as selected on the prior screen.
18-6 IBM Tivoli Storage Manager for System Backup and Recovery: Installation and User’s Guide
Chapter 19. Activity Logging The SysBack log file provides a mechanism to track the completion status of backup, restore, and verify operations. The log can be used in conjunction with the progress indicator or file list options, which are used to monitor the ongoing status of backup, restore, and verify operations. The sysback log, implemented in a fixed size and in a circular manner, never grows beyond a specified size. This is called a “head and tail” log.
Change/Show Sysback Attributes Type or select values in entry fields. Press Enter AFTER making all desired changes. Sysback Log Filename Sysback Log Size F1=Help F5=Reset F9=Shell F2=Refresh F6=Command F10=Exit [Entry fields] [/var/adm/ras/sysback.log] [8192] F3=Cancel F7=Edit Enter=Do F4=List F8=Image Figure 19-1. The Change/Show SysBack Logging Attributes Menu The fields have the following definitions: SysBack Log Filename (Required) Specifies the fully-qualified path for the log location.
The format of the log entry is described below: Command The backup, restore, or verify command syntax executed. Date The date and time that the backup, restore, or verify command syntax executed. Error Information The last fatal error that caused an error in the backup, restore, or verify command. Status Described as SUCCESS, WARNING or FAILURE, indicating that the operation completed or failed. Chapter 19.
19-4 IBM Tivoli Storage Manager for System Backup and Recovery: Installation and User’s Guide
Chapter 20. Scheduled Backups and Scripts The SysBack Scripts and Scheduling functions provide a mechanism to automate common backup functions that require little or no user interaction. The SysBack Scripts functions help you build command syntax into a Korn Shell script that can be scheduled with SysBack. The SysBack Scheduling functions enable you to take these scripts and schedule them to run automatically at a specified time or interval.
Note: At a command line, type smit sb_script_c. 2. Select the type of backup script you want to create. The following choices are available: v Create a System Backup Script v Create a Volume Group Backup Script v Create a Filesystem Backup Script v Create a Logical Volume Backup Script v Create a File/Directory Backup Script Note: For this example, Create a System Backup Script is used. 3. On the Device Selector screen, highlight the device you want to use and press Enter. 4.
You can use any character or number, except for single (’) or double (″) quotation marks. Overwrite Existing Script (Optional) Determines whether or not to overwrite an existing backup script. The default is “No” Save Backup Output to a Log? Indicates to save backup output to a log by redirecting stdout and stderr. Location of Log File Specify the fully qualified path and filename to be used as the backup log file.
2. Select the script file you want to edit and press Enter. 3. The following vi help screen is displayed. This screen lists the actions you can perform, as well as the corresponding function key or key sequences. EDITOR HELP SCREEN You are about to enter the “vi” editor. If your terminal type provides function keys, the following function keys may be used for editing the file. The standard “vi” commands shown may also be used if function keys are not provided.
Creating a Backup Schedule Use the Create a Backup Schedule option to schedule an existing backup script. This script can be one created by SysBack or a user-defined script. The Create a Backup Schedule option provides a front-end to the AIX crontab and features a menu-based method for creating a schedule. To create a backup schedule: 1. From the Backup Schedules menu, select Create a Backup Schedule. Note: At a command line, type smit sb_sched_c. 2.
Month (optional) Specifies the starting month, a number between 1 and 12. Press F4 for a list of valid values. If this field is left blank, the schedule runs every month. WeekDay (optional) Specifies the day of the week, a number between 0 and 6, where 0 equals Sunday. Press F4 for a list of valid values. If both this field and the Day field are left blank, the schedule runs every day. Important Field Input Notes: a. Two numbers separated with a dash indicate an inclusive range.
4. Press Enter to commit the changes. Listing Backup Schedules To list existing backup schedules created by SysBack, select List Backup Schedules from the Backup Schedules menu. Note: From a command line, type smit sb_sched_l. The following is an example of the output produced. Command: /usr/lpp/sysback/sbscripts/file.lasher.2 ID: SB1 Description: Sample Test Schedule for host lasher Execution Time: -------------Every: 15th in the month(s) of June at 9:25 a.m.
20-8 IBM Tivoli Storage Manager for System Backup and Recovery: Installation and User’s Guide
Chapter 21. Virtual Devices A virtual device enables you to logically group multiple physical devices into a single “virtual” device for easier reference. For example, if you want to use three tape drives in parallel to perform your backups, you can configure those drives into a virtual device description. Therefore, each time you want to backup or restore from those parallel devices, you need to specify only the virtual device name.
Types of Virtual Devices SysBack uses the following types of virtual devices: Sequential A group of devices that are used sequentially, meaning that when one device reaches its capacity, the backup or restore automatically continues on the next device in the list. You can have up to eight sequential devices in the list. When the last device in the list reaches its capacity, the user is prompted to change the media in all of the devices before the backup can continue.
device reaches the end of media, the backup continues on the next device (volume two). When the last device in the list reaches the end of volume, the user is prompted to change the volume in all of the drives before the backup can continue. It is necessary to change volumes in all drives even if only one of the drives will be used before the backup completes. Parallel The volume number of the first drive begins with A1, the second drive, B1, and the third, C1.
Add a Virtual Device Type or select values in entry fields. Press Enter AFTER making all desired changes. [Entry Fields] Sequential [] no [/dev/rmt0 /dev/rmt1] * Write Policy Description Auto-loader/Auto-eject? * Device name(s) F1=Help F5=Reset F9=Shell F2=Refresh F6=Command F10=Exit F3=Cancel F7=Edit Enter=Do + + + F4=List F8=Image Figure 21-2. The Add a Virtual Device Menu 2. You can change the following fields from the screen above: Write policy Default=Sequential.
3. Press Enter to create the virtual device. The new virtual device name is generated and displayed on the screen. Repeat the above steps for each additional virtual device you want to add. Listing Virtual Devices To list all of the virtual devices currently defined, select List Virtual Devices from the Virtual Devices menu.
21-6 IBM Tivoli Storage Manager for System Backup and Recovery: Installation and User’s Guide
Chapter 22. Tape Drives This chapter contains information on performing various functions on tape drives. For virtual devices, some functions can be performed for all physical tape drives defined for the virtual device. Most of these tape drive options can be performed from other AIX system administration SMIT menus, but are provided within SysBack. To access the tape drive menus: 1. At a command line, type smit. 2. From the SMIT menu, select System Backup & Recovery for AIX. 3. Select Tape Drive Options.
Configuring a defined tape drive When a tape drive is either just turned on, reattached, or previously made unavailable, use this option to make the drive available for use. To configure a defined tape drive: 1. From the Tape Drive Options menu, select Configure a Defined Tape Drive. 2. From the list of defined tape drives, select the drive you want to configure and press Enter. If an error occurs, then the system is unable to detect the drive that it had previously defined.
Change / Show Characteristics of a Tape Drive Type or select values in entry fields. Press Enter AFTER making all desired changes. [Entry Fields] rmt0 8mm5gb scsi 5.
2. From the list of tape drives and virtual devices available to both the local and remote systems, select the device you want to eject and press Enter.
Appendix A. Commands © Copyright IBM Corp.
cfgremrootaccess Purpose Adds, removes, or lists commands enables for Remote Command Access. Syntax ]] cfgremrootaccess -h “host” -d “host” -l -c “command” -r ]^ Description The cfgremrootaccess command is used to configure a backup client to allow a server to remotely initiate its backups. This is called a “pull backup.” For example, A server contacts a client to start the backup; in response the client initiates the backup and sends the data to the server.
Examples 1. To allow the server sysback1.aix.dfw.ibm.com to contact this client to initiate a pull backup using the /usr/sbin/sysback command, type: cfgremrootaccess -c ’/usr/sbin/sysback’ -h ’sysback1.aix.dfw.ibm.com’ 2. To list all commands that are enabled for Remote Command Access and their respective hosts, type: cfgremrootaccess -l 3. To remove the access for the /usr/sbin/mkdirback command, to be remotely initiated, type: cfgremrootaccess -r -c ’/usr/sbin/mkdirback’ Files /usr/lpp/sysback/.
chimagefile Purpose Changes the permissions of an existing disk image backup file. Syntax ]] chimagefile -l -f ″filename″ ]^ -d ″description″ -h ″host″ -r host = h a user = u a -v -H ″hostname″ -u ″username″ Description When you perform a backup to a disk image file, you can set the read permission of the file to allow only the original host or original user to read from the file.
host_owner:user_owner:host_perm:user_perm:description This flag is normally used only by SMIT for querying the current values. –r host=“[h/a]” Changes the host read permission to the specified value. The possible values are h, indicating that only the host that owns the file can read it, or a, indicating that any host can read the file. The root user on the server where the file physically resides can also access the file. –r user=“[u/a]” Changes the user read permission to the specified value.
chinstclient Purpose Sets client defaults for use during a tape or network boot/installation process.
the installation menus appear after a network boot. Otherwise, the installation occurs after the network boot without prompting the user, as long as all required information for the user is also provided. -D Turns on debug logging operations for troubleshooting network boot and installation problems. -c “console device name” To prevent the prompt before installation that determines the console to be used for installation, enter the name of the console here.
-N “y|n” Indicates whether or not to remove network specific information required to configure the host to the network. This option is useful when the machine installed was cloned from a backup image of a machine that is still present on the network. The default is “n” or no. Note: This option has no effect when cloning images between partitions of the same LPAR Capable machine. -S “ip address” The address of the installation server.
-o Overrides the /etc/SDR_dest_info file from the boot server. If a system backup image was created on an SP node from a different SP complex, the /etc/SDR_dest_info file will refer to the wrong control workstation, and post-installation customization will fail. Specifying this options causes the correct file to be copied from the boot server before the pssp_script post-install script runs. Appendix A.
cfglocaccess Purpose Adds, lists, or removes local user access to backup devices and directories. Syntax ]] cfglocaccess -l -u ″user″ -r -d -f -b -l ]^ ″user″ ″device″ ″directory″ ″directory″ Description All users on the system are provided access to all of the backup devices on the system when SysBack is first installed. This is accomplished by providing a permission record for a user called all.
-i “directory” Specifies one or more directories, separated by spaces, to which the user can perform network installation image backups. This field applies only to the root user, because only the root user can create network installation image backups of volume groups. This flag applies only when you configure the root user or all users, if root is not specifically defined.
cfgremaccess Purpose Adds, lists, or removes remote host and user access to local backup devices and directories. Syntax ]] cfgremaccess -l -u ″user″ -r -d -D -f -b -l ]^ ″host″ ″user″ ″device″ ″directory″ ″directory″ Description Before any client host can perform a backup to a remote server, the server must enable permission to the client host and to the specific users on the client who will be performing the backup operations. The cfgremaccess command provides access to the specified hosts and users.
this directory or any of its subdirectories. A backup image file option for each directory supplied is displayed in SMIT when the user attempts to perform any backup, list, verify or restore operation. -d “host” Denies access to one or more specified hostnames. This flag is valid only when all is entered for the hostname (-h) parameter. -f “device” Specifies one or more devices to which the client hostname and username can perform regular image file backups.
cfgremaccess -l Files /usr/lpp/sysback/.remote_access List of hosts and users allowed or denied access to the local backup devices and directories for all SysBack backups. The format of the data in this file is very specific and should not be edited manually. Related Information The cfgremsvs and cfgremserver commands. “Adding or Changing the List of Remote Backup Servers” on page 8-8.
cfgremserver Purpose Defines, lists, or undefines servers the client can access. Syntax ]] cfgremserver -l -a -r -h hostname ]^ -f Description The cfgremserver command is used to either define or undefine a remote host that is to act as a server for the local host.
Files /usr/lpp/sysback/.servers List of servers for which to list SMIT backup options Related Information The cfgremsvs and chremaccess commands.
cfgremsvs Purpose Configures Remote Services. Syntax ]] cfgremsvs ]^ Description This command is used to configure Remote Backup Services for either a host that is to act as a backup server for other machines or on a client that requires access to backup devices located on another backup server. The command requires no arguments, and when executed, creates a new user ID “sbnet” in the staff group.
cfgvirdev Purpose Adds, lists, or removes virtual device descriptions. Syntax ]] cfgvirdev -l -r -a -s -p -c device ]^ -A -d ″description″ Description The cfgvirdev command is used to add, list, or remove a virtual device description from the system. A virtual device can have a write policy of either sequential, parallel or multi-copy. Refer to Chapter 21, “Virtual Devices”, on page 21-1 for a detailed description of each write policy.
-c When adding a virtual device, indicates a Multi-copy write-policy. -d “description” The description of the virtual device. This description is displayed on the SMIT screens when listing available backup and restore devices. Enclose this description in double quotation marks. -A Indicates an autoloader is attached to the physical devices. Examples 1. To create a sequential virtual device, using tape devices rmt0 and rmt1, type: cfgvirdev -as /dev/rmt0 /dev/rmt1 2.
chexcludelist Purpose Adds, removes, or lists files or directories in the exclude list file. Syntax ]] chexcludelist -l -r -a ″filename″ ″@LVname″ ″filename″ ″@LVname″ ]^ Description The chexcludelist command is used to either add or delete entries from the exclude list file. The exclude list file contains directories, individual filenames, or logical volume names that are to be excluded from all backups created with the SysBack commands.
Examples 1. To add the directory /tmp to the exclude list, type: chexcludelist -a /tmp 2. To exclude all files on the system ending with “.old”, type: chexcludelist -a ©/*.old© 3. To exclude logical volume userlv1 from volume group backups, type: chexcludelist -a @userlv1 4. To remove the file /home/test from the exclude list, type: chexcludelist -r /home/test 5. To list current excluded files and directories, type: chexcludelist -l Files /usr/lpp/sysback/.
editlvminfo Purpose Customizes an LVM information file. Syntax ]] editlvminfo -f ″filename″ ]^ Description The editlvminfo command reads the contents of the LVM information file, specified by the filename parameter and initializes the user interface used for changing the volume group, logical volume, and filesystem information within the file.
getlvminfo Purpose Displays Logical Volume Manager (LVM) information for volume groups, logical volumes, and physical volumes. Syntax ]] getlvminfo -V -l -P -G Option Option Option Option ]^ -V Option: -V ″VGname″ -c -d -i -l -q -x -A -S -1 -a -b -c -d -e -i -l -w -x -z -X -Z -1 -a -l -n -v -x -A -S -1 -p I -p N -p X -l Option: -l ″LVname″ -p -m -I -N -X -h -P Option: -P ″PVname″ -I -N -X -G Option: -G ″PVname″ -c -d -i -l -s -X -1 -p I -p N -p X -I -N Appendix A.
Description This command is used to display all available Logical Volume Manager information for volume groups, physical volumes, and logical volumes. It retrieves LVM information for all SysBack commands requiring LVM data. The getlvminfo command is faster and easier than using the standard AIX LVM commands and provides the information in a simple, reliable format. At least one argument is required.
–n With the -L flag, indicates the number of logical partitions (LPs) assigned to the logical volume. With the -P flag, displays the total physical partitions (PPs) available on the physical volume. –p With the -V or -G flag, displays the physical volumes in the volume group. With the -L flag, displays the physical volumes on which a logical volume resides. This flag cannot be used with the -m flag. –q Used with the -V flag to indicate whether or not quorum checking is enabled for a volume group.
volumes using the physical volume name (hdiskX) rather then the PVID. When displaying a list of volume groups using the -V flag, this flag displays the volume groups by name rather than VGID. –P “PVname” When used without specifying a physical volume name, this flag displays a list of physical volumes on the system. When a physical volume name is specified, this flag displays the attributes for the specified physical volume. –S With -V or -G flag, displays the physical partition size in megabytes.
lscfginfo Purpose Prints or displays a report of the Logical Volume Manager configuration. Syntax ]] lscfginfo -f ″filename″ -q ″queue″ ]^ Description This command prints, displays, or saves to file a report containing the system configuration. This includes all information pertaining to the volume groups, physical volumes, logical volumes, and filesystems. This report contains all of the key information that might be necessary for rebuilding various components of the system in case of system failures.
hd4 hd3 hd2 73-96 3 102-103 105-109 5-27 110-207 222-242 |..XX......| |X.........| |....X.....| |....X.....| |XX........| |....XXXXX.| |.........X| Filesystem information: Contains all filesystem attributes. Note that the “BF Spt” and “AG” Size fields are displayed only on AIX 4.2 or later systems.
mkdirback Purpose Backs up specified files or directories. Syntax ]] mkdirback -v -x -b -c -d -e -h -i -I -m -n -O -p -r -U ″size″ ″termdev″ ″description″ -f ″device″ -f ″directory″ -f ″file″ ] -I ″ID″ ″hostname″ “ID” ″days″ ″host″ ] directory or file ]^ Description The mkdirback command is used to back up specific files or directories. You must choose a starting directory to back up that directory and any sub-directories.
Unlike all other backup types, this type of backup contains no Logical Volume Manager (LVM) information. Therefore, it is not possible to use this backup, regardless of its contents, for recreating volume groups, logical volumes, and filesystems. Using this backup option for backing up all files on the system (from the / directory) cannot provide a backup that can be used to reinstall the system.
The backup system machine must have the Client Options of Remote Services configured to specify the backup destination machine as a backup host. You can do this with the Add or Change List of Remote Backup Servers option or the cfgremserver command. The backup system must also configure Remote Command Access to allow the initiator machine to pull the backup. Flags –b ″size″ Specifies the buffer size in K-bytes (1024-bytes).
This typically reduces size of backup between 25% and 40%. For increased performance, do not use this options when backing up to a device that provides hardware data compression. -O If a filename was specified as the output device and the filename already exists, overwrites the previous file with the new backup. -r user=[u|a] Specifies user read permission when backing up to a disk image file. “u” indicates only the specified user can read the file. “a” indicates that any user can read the file.
mkjfsback Purpose Performs a backup of one or more filesystems. Syntax ]] mkjfsback -v -x -b -c -d -e -h -i -l -M -n -O -p -r -U ″size″ ″termdev″ ″description″ -f ″device″ -f ″directory″ -f ″file″ ] -I ″ID″ ″hostname″ ″level″ ″readAccess″ ″host″ ] mount point ]^ Description The mkjfsback command is used to perform a backup of one or more filesystems. The mount point parameter, which is the directory name where each filesystem is mounted (such as /home), indicates the filesystems to include.
This command does not back up files, or files within directories, that are specified in the exclude list. See the chexcludelist command for information on creating exclude lists. The backup can also be performed as a “pull” backup to enable central management of backups. The machine that “pulls” the backup is called the “initiator,” while the machine that is backed up is called the “backup system.” The machine that receives the backup data is called the “destination system.
-e Forwards the tape to the end of the last Sysback backup. Used when stacking multiple backup images on a tape. -f “device, file or directory” Specifies the output device name, filename, or directory for the backup. The specified output option can be on the local system or server (if -h option provided). The device name can be a tape drive or virtual device name. If you specify a directory, you must also specify an ID using the -I flag.
-r host=[h|a] Specifies host read permission when backing up to a disk image file. “h” indicates only the specified host can read the file. “a” indicates that any host can read the file. -U “host” Name of the host to be backed up (such as the backup system). -v Specifies that file names should be listed on the screen as the files are being backed up. This flag cannot be used with the -x flag.
mklvback Purpose Performs a backup of logical volumes. Syntax ]] mklvback -b -c -d -e -g -h -i -I -M -n -O -p -r -U -v ″size″ ″termdev″ ″description″ -f ″device″ -f ″directory″ -f ″file″ -I ″ID″ LVname ]^ ″filename″ ″hostname″ “ID” ″readAccess″ ″host″ Description The mklvback command is used to back up data from one or more logical volumes. This option reads the entire logical volume, copying all “raw” data to the specified output device or file.
The backup can also be performed as a “pull” backup to enable central management of backups. The machine that “pulls” the backup is called the “initiator,” while the machine that is backed up is called the “backup system.” The machine that receives the backup data is called the “destination system.” The initiator is the machine where the mkdirback command is issued. The backup system is referenced in the command syntax by the -U “host” flag. The data destination system is referenced by the -h “host flag”.
specified output option can be on the local system or server (if -h option provided). The device name can be a tape drive or virtual device name. If you specify a directory, you must also specify an ID using the -I flag. -g “filename” Indicates the name of an LVM Information File previously created and customized for this backup. Refer to the mkvginfo and editlvminfo commands. -h “hostname” Name of the remote backup server host to receive the backup data (such as the data destination host).
recreated from this backup. Unless the logical volume was originally created using a physical partition map, it is generally recommended that it not be recreated using the same partitions, as this would preserve fragmentation that develops over time as logical volumes and filesystems are expanded. You can specify whether or not partition mapping will be used before recreating the logical volume. Examples 1.
mksbnetboot Purpose Creates or updates boot images on the server for booting network clients. Configures the server to enable network booting of client machines. Syntax ]] mksbnetboot -B -h ″hostname″ -a -d -g -s -u -S -T -k -n -I -D ]^ ″address″ ″net device″ ″gateway″ ″subnet″ ″server addr″ ″platform″ ″kernel″ ″NIM SPOT″ ″NIM LPPSOURCE″ Description The mksnetboot command configures network boot clients and the boot images required to boot them. Both NIM Resource and Classic methods are handled.
NIM Method: When you add a network boot client that uses NIM resources, the -d, -T, -k, -S, -s, -g, and -a flags are not valid. The information that would be contained in these flags is contained in the NIM resource definition for the client. The required flags to add a NIM Resource Network Boot client are -h, -n, and -l. Rebuilding Existing Network Boot Images If you update or install software on the boot source, you must also update the boot image.
-u Specifies that the hostname is to be unconfigured as a network boot client. -s “subnet” Subnet mask of the client. The default is 255.255.255.0. -B Specifies to update a network boot image. -n The name of the NIM spot. The –n flag implies NIM netboot mode and also requires the –n flag. Valid spot names can be discovered using the command lsnim –t spot. -l The name of the NIM lpp_source. The –l flag also requires the –n flag. Use the command lsnim –t spot to find valid lpp_source names.
/usr/lpp/sysback/netinst/boot A-44 Directory where the actual boot images are stored.
mkvgback Purpose Performs a backup of one or more volume groups. Syntax ]] mkvgback -v -x -b -c -d -e -g -h -i -I -l -m -M -n -O -p -r -U -X ″size″ ″termdev″ ″description″ -f ″device″ -f ″directory″ -f ″file″ ] -I ″ID″ ″filename″ ″hostname″ “ID” ″level″ ″days″ ″readAccess″ ″host″ ] VGname ]^ Description The mkvgback command is used to find and back up all files belonging to the specified volume group or groups. The backup can be performed to a tape drive, virtual device, or disk image file.
Files, or files within directories, that are specified in the exclude list will not be backed up with this command. See the chexcludelist command for information on creating exclude lists. The backup can also be performed as a “pull” backup to enable central management of backups. The machine that “pulls” the backup is called the “initiator,” while the machine that is backed up is called the “backup system.” The machine that receives the backup data is called the “destination system.
-e Forwards the tape to the end of the last Sysback backup. Used when stacking multiple backup images on a tape. -f “device, file or directory” Specifies the output device name, filename, or directory for the backup. The specified output option can be on the local system or server (if -h option provided). The device name can be a tape drive or virtual device name. If you specify a directory, you must also specify an ID using the -I flag.
-r host=[h|a] Specifies host read permission when backing up to a disk image file. “h” indicates only the specified host can read the file. “a” indicates that any host can read the file. -U “host” Name of the host to be backed up (such as the backup system). -v Specifies that file names should be listed on the screen as the files are being backed up. This flag cannot be used with the -x flag.
mkvginfo Purpose Generates information needed in recreating volume groups and logical volumes from backups. Syntax ]] mkvginfo -f -M -o ″filename″ -v VGname -l LVname ]^ Description The mkvginfo command is automatically executed by each SysBack backup command that stores LVM information on the backup. This information contains the volume group, logical volume, filesytem, and physical volume attributes that can be later used to recreate any of the preceding from the backup media.
Location Hdiskname Location Code (address) Hdisk Name (not used) Volume Groups (one record for each): VG Static Header vgname Volume Group name autoon Auto varyon at system startup? (Y/N) ppsize Physical partition (in MB) vgopt [C]reate/[I]mport/[X]Ignore quorum Are quoroms active? (Y/N) concurrent Concurrent-capable? (y/n) autoconc Auto-Concurrent Varyon? (y/n) pvlist List of physical volume IDs Logical Volumes (one record for each) LV Static Header priority (01=mapped, 02=striped, 03=boot, 04=jfslog, 10
Physical Partition Maps (one or more each logical volume – each not to exceed 50 PPs): PP Static Header lvname Logical Volume name ppno:ppvid Physical partition number: physical volume ID (one for each PP in the LV) Filesystem stanzas (one record for each): Stanza taken directly from /etc/filesystems file The information produced by this command is placed on the beginning of each backup and can be read from the backup using the sbread command with the -T flag.
Related Information The mkjfsback, mklvback, mkvgback, sysback, editlvminfo and sbread commands.
readsbheader Purpose Reads the header label on any SysBack backup. Syntax ]] readsbheader -c ″termdev″ -d -h ″hostname″ -i ″sequence″ -l -n -q -f ″device″ ]^ Description The readsbheader command can be used to read the header information on any SysBack backup. It can be used to list the general header information, the list of images (logical volumes and filesystems) included on the backup, and the list of files and directories included on the backup.
-n Indicates that tape drives should not be rewound prior to reading. This assumes that the tape drive is already positioned at the beginning of the backup to read. -q Indicates that no status messages should be displayed while searching and reading the backup media. Examples 1. To show the general header information on a backup in tape device /dev/rmt0, on host mars, type: readsbheader -f rmt0 -h mars 2.
remakevg Purpose Recreates one or more specified volume groups, logical volumes, or filesystems from LVM information contained on the backup media. Syntax ]] remakevg -c -E -n -h -i -L -q -V ″termdev″ -f ″device″ -v VGname -l LVname ]^ ″hostname″ ″sequence″ ″LVname″ ″VGname″ Description Use the remakevg command to recreate one or more volume groups, logical volumes, or filesystems using information contained on any backup type except for the file/directory backup.
display indicated by “termdev” (such as /dev/tty0 or /dev/lft0). If the -h “hostname” option is specified, this flag indicates the display on the remote host. -E Displays the user-interface menus to enable the LVM information to be changed before the volume groups, logical volumes, or filesystems are created. -f “device or file” Tape device, virtual device, or filename containing the backup. If a filename is specified, the information is read from the file on the disk with the “.TOC” extension.
3. To recreate the datavg1 and datavg2 volume groups from the backup on virtual device vdev0, enabling the user to change the LVM information prior to the creation, type: remakevg -Ev -f vdev0 datavg1 datavg2 Related Information The sysrestore command. Chapter 11, “Changing the Volume Group, Logical Volume and Filesystem Attributes”, on page 11-1. Appendix A.
sbalog Purpose Changes, lists, or displays the SysBack log. Syntax ]] sbalog -o -l -C -f ″path and filename″ -s ″size″ ]^ Description The SysBack log file provides a mechanism to track the completion status of SysBack backup, restore, and verify operations. For information about the SysBack log file, see Chapter 19, “Activity Logging”, on page 19-1. Flags -o Lists the contents of the SysBack log file. -l Displays the current size and location of the SysBack log file.
sbclient Purpose Performs all SysBack remote command execution. Syntax ]] sbclient -i hostname IPaddress command-argument ]^ Description The sbclient command is used to execute all remote commands in SysBack. It can be used only after Remote Services has been configured on the local and remote system using the cfgremsvs command, and the remote system has granted permission to the local user and host to perform remote commands using the cfgremaccess command.
CLIENT_HOST Hostname or full domain name (if required) of client host performing the command. CLIENT_HOSTPERM Indicates the hostname, as it appears in the .remote_access file, that granted permission to the client. This can be the client hostname, the full domain name of the client, or all. CLIENT_IDIRS Specifies one or more installation image directories, separated by colons, as defined in the .remote_access file, to which this host and user can read or write.
Related Information The cfgremsvs, cfgremaccess, sbread, sbwrite, and cat commands. Appendix A.
sbcomp and sbuncomp Purpose Compresses and decompresses data respectively. Syntax ]] sbcomp ]^ ]] sbuncomp ]^ Description The sbcomp command compresses data from standard input and sends the resulting compressed data to standard output. The sbuncomp command uncompresses data from standard input and sends the resulting decompressed data to standard output.
sbcron Purpose Adds, updates, lists, or removes a regularly scheduled command. Syntax ]] sbcron -n -u -r -l -m -h -d -M -w ″minutes″ ″hours″ ″day″ ″month″ ″weekday″ -I “ID#” -s ″script″ ] -D ″description″ ] ]^ Description The sbcron command is used to add, update, list, or remove a regularly scheduled command. Regularly scheduled commands are scheduled using one or more of the following flags: -m, -d, -M, or -w.
-l Lists all scheduled SysBack scripts. -m ″minutes″ Specifies the minutes for scheduling a script. Valid values are from 1 to 60. -h ″hours″ Specifies the hour for scheduling a script. Valid values are 0 to 23, where 0 is equal to 12:00 AM, and 23 is equal to 11:00 PM. -d ″days″ Specifies the day a script should be scheduled. Valid values are from 1 to 31. -M ″month″ Specifies the month a script should be scheduled. Valid values are from 1 to 12, where 1 is equal to January, and 12 is equal to December.
sbdevice Purpose Checks tape drive availability and controls tape movement. Syntax ]] sbdevice -b -B -e -f ″num″ -n -q -r -s -v -w device ]^ Description The sbdevice command is used to check the availability of the specified tape drive or drives and to perform other tape commands. Either tape drive names or a virtual device name can be specified for the device parameter. For tape devices, you only need to specify the base device name (for example, rmt0).
-s Checks if the tape drive is currently at the beginning of the tape. Return code of 0 indicates the tape is not rewound; 1 indicates the tape is rewound. -v Indicates that messages (such as “Rewinding /dev/rmt0 ...”) should be displayed as operations are performed on each tape drive. -w Indicates that the device or devices should be checked for write permission. For tapes, the write-protect switch is checked and an error is returned if it is set.
sbejecttape Purpose Used to eject either a local or remote tape drive or SysBack virtual device. Syntax ]] sbejecttape -f ″device″ -h ″hostname″ ]^ Description Use this command to eject a tape from a local or remote tape drive or from a SysBack virtual device. Flags -f ″device″ Specifies the output device name. The device can be a tape drive or a virtual device name and can be located on the local system or a server (if the -h flag is also used).
sbeot Purpose Forwards to the end of the data on a SysBack-created tape. Syntax ]] sbeot -f ″device″ -h ″hostname″ -q ]^ Description Use this command to forward to the end of the last backup on a tape created by one of the following SysBack commands: sysback, mkvgback, mkjfsback, mkdirback, mklvback. You can then append another SysBack backup to the end of the data on the tape. The following restrictions apply: v All the images on the tape must have been created by SysBack Version 4 or higher.
sbfwd Purpose Forward one or more tape devices to a specific image. Syntax ]] sbfwd -a -c ″termdev″ -v -p -s ″num″ device ]^ Description The sbfwd command is used to forward a specified number of images to a tape or tapes written with the sbwrite program. sbfwd is a low-level command called by the SysBack restore programs when multiple backups are appended to the same media.
Examples 1. To forward devices /dev/rmt0 and /dev/rmt1 in parallel to the third image (skipping 2 images), type: sbfwd -P -s2 rmt0 rmt1 2. To forward virtual device vdev0 to the next image, type: sbfwd -s1 vdev0 3.
sbread Purpose Reads data from all SysBack backup types. Syntax ]] sbread -a -c ″device″ -e -v -x -H -L -P -T device ]^ Description The sbread command is used to read a backup that was created using the sbwrite command. All SysBack backups are written to the media using sbwrite, and all SysBack restore programs use sbread to retrieve the data from the media.
is assumed you are to read the actual data from the backup image. You can compress data before writing to the media. If compressed data is written to the media, the data must be uncompressed before it is restored to disk. The SysBack backup programs compress data using sbcomp and also indicate to sbwrite that the backup is compressed by using the -p flag. Before reading a backup with sbread, you can query whether the data was compressed by reading the backup header (sbread -H).
2. To read the header (label) on device /dev/rmt1 and to not rewind after reading, type: sbread -H rmt0 3. To read the table of contents from the media, type: sbread -T rmt0 > /tmp/toc.out 4. To read the data contained in the parallel backup of /dev/rmt0 and /dev/rmt1, displaying the progress indicator as the backup is read, and sending the output to the AIX restore command to restore the data to the AIX filesystem, type: sbread -Px rmt0 rmt1 | restore -xvqf- Files /usr/lpp/sysback/.
sbscript Purpose Creates, updates, or removes a shell script containing the commands to execute. Syntax ]] sbscript ] -o -r -l -s ″scriptname″ ] -D ″description″ Command -c ″command″ ]^ Description Used to create, update, or remove a shell script containing one or more commands to execute. When creating or updating a script, you can type the command name or specify it using the -c flag. Flags -o Overwrites existing script name, if it exists. -r Removes script name, if it exists.
Script Name Description The file created from the above example would be as follows: system_backup System Backup To remove the script “wed.backup,” type: sbscript -r -s /user/lpp/sysback/sbscripts/wed.backup Appendix A.
sbspboot Purpose Initiates a NIM Resource Network Boot of an SP node. Syntax ]] sbspboot -d -n -c -c ″host″ ″spot name″ ″lppsource name″ ″display″ ]^ Description The sbspboot command is used to initiate a NIM Resource Network Boot of an SP node. Use this command instead of the Classic Network Boot method to ensure that the proper SP and PSSP specific scripts are executed. For more information about this command, see Chapter 13, “Network Boot/Installation Configuration”, on page 13-1.
sbspotcust Purpose Installs SysBack into a NIM SPOT resource. Syntax ]] sbspotcust ]^ -d ″devname″ ″dirname″ -l ″lppsource name″ -F -n ″spot name″ -q Description When performing a NIM Resource Network Boot, SysBack must be installed into the NIM SPOT resource in order for the SysBack programs to be available during a network boot.
sbspotcust -q -n spot_433 Return Codes 0 Successful update of the specified spot 1 Spot does not contain the SysBack filesets. 2 Spot does not contain SysBack filesets. 3 Image location is invalid or does not exist. 4 Invalid spot or lpp_source specification. 5 Update of specified spot failed. Related Information The mksbnetboot command.
sbtsmdevice Purpose This command creates, modifies, or removes a TSM virtual device. For more information on this topic, please refer to “Create the TSM Virtual Device” on page 15-4. ]] sbtsmdevice -a -c -r -l ]^ -a: -n “tsmvirdev” -s “tsmserver” -p “tsmpassord” -c Option: -n “tsmvirdev” -s “tsmserver” -p “tsmpassword” -r Option: -n “tsmvirdev” Flags -a Specifies to add a TSM virtual device. This flag requires the use of the -n ″tsmvirdev″, -s ″tsmserver″, and -p ″tsmpasswd″ flags.
Related Information The sbtsmlist, sbtsmnetcfg, , mkvgback, mklvback, mkjfsback, and mkdirback commands.
sbtsmlist Purpose This flag lists the current TSM management class bindings or backups stored in a TSM server. For more information on this topic, please refer to ″Querying Backups and TSM Management Classes in Chapter 15. ]] sbtsmlist -l -r -n “tsmvirdev” ]^ -l: -a -o -t “S|V|L|F|D” -g “backupID” -m -r Option: -g “backupID” Flags -r Indicates to remove the TSM backup ID specified with the -g ″backupID″ flag.
stanza in the dsm.sys file that is associated with the specified TSM virtual device. If no bindings are specified, the value “default” is returned. This flag is optional. -a Active backup versions are the most recent copy of a backup type stored in the TSM server. There can be only one active version per backup type. -o Open backups represent currently running backup processes, or partial backup images created by an abnormally terminated backup process.
sbtsmnetcfg Purpose This command sets the TSM Network Client Install Defaults. For more informational this topic, please refer to “Configuring Network Boot Options for a TSM Bare Metal Recovery” on page 15-18 ]] sbtsmnetcfg -h -n -d -r -E -e -p -P -s -g -S ]^ ″tsmnode″ ″networkdev″ ″ringspeed″ ″entif″ ″entcon″ “tsmport” “tsmpasswd” “serverIP” “gatewayIP” “submask” Flags -h ″hostname″ Specify the hostname of the system which was configured as a SysBack network boot client.
-a ″adminID″ Specify a TSM Admin ID that has client owner authority when the client node’s password is unknown. When specifying a value in the field, you must also specify the Admin’s password in the Password field rather than the client node password. This flag is optional. -P ″tsmpasswd″ Specify the TSM client password that is associated with the TSM Client Node Name value.
sbwrite Purpose Writes raw data to backup media. Syntax ]] sbwrite -S -P -C -a -b -B -c -d -e -i -n -p -r -R -s -t -T -v -x device ]^ ″size″ ″backend″ ″device″ ″description″ ″file″ ″contents″ ″read_access″ ″type″ ″file″ Description The sbwrite command reads data from standard input, adds a backup header, optional file list, and LVM information, and writes to single or multiple devices either sequentially, in parallel, or by creating multiple copies.
Unless you are using a virtual device name for the device parameter, specify either the -S flag (indicating sequential backups), the -P flag (indicating parallel backups) or -C flag (indicating multi-copy backups). Each of the backup types are described in Chapter 21, “Virtual Devices”, on page 21-1.
-b “size” Specifies the buffer size in K-bytes (1024-bytes). Changing this value either increases or decreases the amount of data that is written to the output device at one time. Some devices with small buffers might require you to reduce this value, while other devices with very large buffers can benefit from increased performance by increasing this value. If you are unsure, use the default value (64 Kbytes).
-r user=[u|a] Specifies user read permission when writing to a disk image file. “u” indicates only this user can read the file. “a” indicates any user can read the file. -r host=[h|a] Specifies host read permission when writing to a disk image file. “h” indicates only this host can read the file. “a” indicates any host can read the file. -R Indicates the file list and table of contents file, if any, are to be removed after the command is complete.
/usr/lpp/sysback/.remote_cmds Contains list of commands that can be remotely executed on the local system. Related Information The sbclient, sbcomp, sbuncomp, sbfwd and sbread commands. The AIX backup command. Appendix A.
sysback Purpose Backs up the entire system or specific volume groups for use in a system installation.
the server for use by this system using the cfgremaccess command, then you can also select a hostname using the -h option. The backup is then written to the device or filename on the specified server, provided the server has enabled this system access to the specified device or directory. The backup can also be performed as a “pull” backup to enable central management of backups. The machine that “pulls” the backup is called the “initiator,” while the machine that is backed up is called the “backup system.
Cloning Systems: A System backup created on one machine can be installed on another machine with a different processor, platform type, or other system devices. However, the machine being backed up must have installed all of the device support for the destination platform type, processor type, and other required devices.
This file is used by the installation process to regenerate the same volume group configuration. This step is ignored if the -g “filename” option was specified. 4. Places boot image and installation programs on the tape in separate images. This enables the installation process to be accessed by booting from the tape. This step is ignored if the backup media is not a tape. 5. The data for each filesystem and logical volume is written to the backup media, each in a separate backup image. 6.
-i Indicates to dynamically create a backup file IDD when writing backups to a disk image file. This flag supersedes the -I“ID” flag and is useful when scheduling a backup to disk image file. -I “ID” This option is used only if a directory is specified as the output device. The ID is included in the filename created to make it unique from other disk image file backups. If a backup in the same directory with this ID already exists, specify the -O flag to overwrite the previous backup.
-x Displays the progress indicator as the backup is being performed for each volume group. This flag cannot be used with the -v flag. -X Excludes all non-JFS (journaled filesystem) logical volumes, or “raw” logical volumes, from the backup. Examples 1. To generate a backup of the root volume group only, to the tape drive /dev/rmt0, displaying the progress indicator, type: sysback -nxf rmt0 Because the -n option is specified, the tape needs to be rewound.
sysrestore Purpose Restores or verifies data on any SysBack backup or lists backup type or contents. Syntax ]] sysrestore -f ″device or file″ ] -D -F -L -R -V -f -l -c -D -F -h -s -L -n -T -v -y -z ″termdev″ ″destination″ -v -x -t ] ″hostname″ ″sequence″ ″filelist and path″ data ]^ Description The sysrestore command is used to either verify or restore data from any type of backup created with SysBack. This command can also be used to list the backup type or the contents of the backup.
Logical volume logical volumes File/Directory directories, files When restoring a volume group, all logical volume and filesystem data within the volume group is restored. When restoring directories, all files within the directories are restored as well, even if the files are contained in different filesystems.
The -i “sequence” option is used to specify which backup to verify or restore when multiple backups are stacked onto the same tape or series of tapes. If this flag is specified, and the value is greater than 1, the tape or tapes will be automatically forwarded to the beginning of the desired backup before verifying or restoring data. The -F flag must be specified to allow restoration of system directories or files that are not ordinarily replaceable.
expansion by the user’s shell. For example, “/home/j*” would indicate to restore all directories and files that start with /home/j such as /home/john or /home/jenn. Flags -c “termdev” If the backup contains multiple tape volumes, the volume prompt is sent to the “termdev” device (such as /dev/tty0). If the -h hostname option is specified, this flag indicates the device on the remote host.
-y Indicates that an incremental restore can be performed. This flag is required if the backup is an incremental backup and restoring other than specific files or directories. -z “filelist and path” Specifies the path and name of a file containing a list of files to restore. Return Codes The sysrestore command returns a value, which can be queried with the $? shell variable, indicating the success or failure of the process as follows: 0 The process was completely successful.
Appendix B. Booting a System for SysBack Installation or Maintenance This appendix provides the specific step-by-step instructions for booting a system to the SysBack Installation and Maintenance menu, used to install a system from a SysBack system backup. The instructions for booting the system to the Installation and Maintenance menus differ depending on whether the system is booted from a bootable tape or from a network boot server, and also differ depending on the type of the machine to be booted.
3. Turn on the system or press the yellow button twice. 4. Continue with “Completing the Boot Process” on page B-4 . Booting from a network boot server Use these instructions to obtain the BOOTP screen: 1. Turn the system key to the SECURE position. 2. Turn on the power to the system. After a short sequence of numbers, the LED displays 200. 3. Turn the key to the SERVICE position and press the yellow reset button once. 4.
7. Select option 6, Fast IPL. Make sure this value is set to “enable”. If it is, press “n”. If it is currently set to “disable,” select “y” to change it. 8. Type x to return to the “>” prompt. 9. Type x again to clear the screen. 10. Power on the system. 11. From the MAINTENANCE menu, select option 6, SYSTEM BOOT. 12. Select option 1, BOOT FROM NETWORK. 13. Press Enter at the language prompt for English. The BOOTP MAIN menu is displayed. 14. Continue with “Initiating the Network Boot” on page B-4.
11. Select the network adapter to boot from which to boot by placing a“ 1” next to the entry. 12. Select the option to “save” your selection. 13. Press the ESC key three times. The system will begin to boot and the bootp and tftp process should begin. 14. Continue with “Completing the Boot Process”. Initiating the Network Boot From the BOOTP Main menu, use these steps to initiate a network boot: 1. Select option 1, Select BOOT1, Select BOOT (Startup) Device. 2.
IBM Tivoli Storage Manager for System Backup and Recovery Installation & Maintenance MAIN MENU Change Installation Device Change Volume Group & Logical Volume Information Install the System with Current Settings Utilities Menu Reboot the System +------------------------------------------------------------------------------+ | Installation Device: Network [ent0] | | | +------------------------------------------------------------------------------+ | Use ARROW or TAB keys to move and ENTER to Select.
c. When the first screen appears (a picture is displayed and icons begin showing at the bottom of the screen), press F4. d. From the System Management Services menu, select Utilities and press Enter. e. Select the Tools icon. f. Select Remote Initial Program Load Setup. g. Select Adapters. h. Select the network adapter the machine will boot from. i. Record the Adapter Hardware Address.
Appendix C. LEDS This chapter contains a list of the system LED codes that might appear when you boot or install from a SysBack System Backup. Many of the LED codes are for information only and usually occur when there is no system console available; others indicate an error in the boot or installation process. Many of the LED codes appear only during a no-prompt installation.
The cfgcon command failed because of missing device support for either the graphic adapter or standard I/O slot for ASCII monitors. You must install the appropriate device support on the system from which the backup tape was made, or install the appropriate device support on the network boot server, reboot the server, and remake the network boot image for the client.
604 Configuring the boot network 605 Invalid network boot device provided The boot server is likely missing device support for either the token-ring, ethernet, or FDDI adapter. You need to install the appropriate device support on the server system, reboot the server, and remake the network boot image for the client. 606 Configuring the boot network.
The route command failed to add the gateway address provided. Report the problem to your network service organization.
Appendix D. Creating Scripts for Customizing the System Backup and Install Process To add additional flexibility and automation to the backup and installation process for requirements specific to a particular customer environment, SysBack can call user-created shell scripts, if they exist, before and after the system backup and after completion of the installation process when installing from a system backup. These shell scripts can perform any function required and are executed with root user authority.
HOSTNAME Name of remote backup server, if any. /usr/lpp/sysback/scripts/fsback.post This script is executed at the end of the SMIT System Backup option or at the end of the sysback command. It is executed after all data is backed up for the root and other volume groups (if selected), but before the backup format is verified. Because the tape is left positioned at the end of the backup, this script might contain commands to append to the tape additional information that is not part of the system backup.
Post-Installation Scripts The post-installation scripts can perform any commands available to the restored system. They can also perform remote commands, but only to the server from which the system was installed. There are several environment variables available to the post-installation scripts. They are as follows: CLIENTIP IP address of the restored system, if installed from a network install server.
To enable this script, change the name to fsback.pre. install.postroot_hwmigrate This sample script allows you to install a system backup created on a different system onto a new machine, even though the new machine has different device support software requirements. The new system must be booted from media that contains the required base device support, but the source system from where the backup was created does need to have the software support pre-installed.
Appendix E. Device/System-Specific Information This chapter provides various notes and tips for using SysBack with various types of devices, networks, or systems. The devices described in this chapter are not the full list of devices supported by SysBack. The information provided here is specific to devices or systems commonly used with SysBack, in which the performance or usability might be impacted by the configuration of SysBack, the device, or the system itself.
imperative that this be done for certain IBM devices that use the Atape.driver to ensure proper SysBack function. Failure to do so can render your data unrecoverable. Any tapes previously created with “autoload=yes” should be tested for the ability to recover them. They can only be recovered by resetting “autoload=yes” since the tape was made that way.
IBM 7332 4mm Tape Library The 7332 is a low-cost tape drive providing fast 4mm tape write performance, while allowing unattended operation of a tape autoloader. When configured for use with SysBack, either 4 internal or 12 external tapes can be written to sequentially without user intervention. To do so, create a sequential virtual device containing the single 4mm tape drive and indicate that an autoloader is used.
the disk or disks appear to be missing. You can the use the Edit volume group and logical volume attributes option to re-select the drives for each volume group. IBM 7135 RAIDiant Array The IBM 7135 is not a supported boot device by AIX. During the SysBack system installation process, AIX recognizes the disks as “Other SCSI Disk”. AIX cannot, however, create a volume group on the disks at this time. The 7135 should be powered off or disconnected when using SysBack to install the system.
Appendix F. Accessibility Accessibility features help users with physical disabilities, such as restricted mobility or limited vision, to use software products successfully. The major accessibility features in this product enable users to do the following: v Use assistive technologies, such as screen-reader software and digital speech synthesizer, to hear what is displayed on the screen via the operating system command line interface available for this product.
F-2 IBM Tivoli Storage Manager for System Backup and Recovery: Installation and User’s Guide
Appendix G. Notices This information was developed for products and services offered in the U.S.A. IBM may not offer the products, services, or features discussed in this document in other countries. Consult your local IBM representative for information on the products and services currently available in your area. Any reference to an IBM product, program, or service is not intended to state or imply that only that IBM product, program, or service may be used.
Licensees of this program who wish to have information about it for the purpose of enabling: (i) the exchange of information between independently created programs and other programs (including this one) and (ii) the mutual use of the information which has been exchanged, should contact: IBM Corporation Information Enabling Requests Dept. M13 5600 Cottle Road San Jose, CA 95193-0001 U.S.A.
Trademarks The following terms are trademarks of International Business Machines Corporation in the United States or other countries or both: v AIX v Eserver v Enterprise Storage Server v IBM v IBMLink v v v v v v v v Magstar POWERparallel pSeries Redbooks RISC System/6000 RS/6000 Scalable POWERParallel Systems SP v SysBack v Tivoli EMC is a registered trademark of EMC Corporation Other company, product, and service names may be trademarks or service marks of others. Appendix G.
G-4 IBM Tivoli Storage Manager for System Backup and Recovery: Installation and User’s Guide
Printed in U.S.A.