ERserver iSeries Setting Up Your 0578, 5074, 5078 or 5079 Expansion Unit Version 5 SA41-5149-02
ERserver iSeries Setting Up Your 0578, 5074, 5078 or 5079 Expansion Unit Version 5 SA41-5149-02
Note Before using this information and the product it supports, be sure to read the information in “Safety and Environmental Notices” on page v and “Notices” on page 51. Third Edition (August 2002) This edition applies only to reduced instruction set computer (RISC)) systems. © Copyright International Business Machines Corporation 2000, 2002. All rights reserved. US Government Users Restricted Rights – Use, duplication or disclosure restricted by GSA ADP Schedule Contract with IBM Corp.
Contents Safety and Environmental Notices . . . v Danger Notices . . . . . . . Caution Notices . . . . . . . Laser Safety Information . . . Product Recycling and Disposal. Battery Return Program . . . Environmental Design . . . . . . . . . . . . . . . . . . . . . . . . . . . . . . . . . . . v . v . vi . vi . vi . vi About Setting up your 0578, 5074, 5078 or 5079 Expansion Unit (SA41–5149) . . vii Who should read this book . . . . . . . . . vii Prerequisite and related information . . . . . .
iv Setting up your 0578, 5074, 5078 or 5079 Expansion Unit V5R2
Safety and Environmental Notices Danger Notices A danger notice calls attention to a situation that is potentially lethal or extremely hazardous to people. DANGER An electrical outlet that is not correctly wired could place hazardous voltage on metal parts of the system or the products that attach to the system. It is the customer’s responsibility to ensure that the outlet is correctly wired and grounded to prevent an electrical shock.
Laser Compliance All Lasers are certified in the U.S. to conform to the requirements of DHHS 21 CFR Subchapter J for class 1 laser products. Outside the U.S., they are certified to be in compliance with the IEC 825 (first edition 1984) and as a class 1 laser product. Consult the label on each part for laser certification numbers and approval information. Laser Safety Information CAUTION: This product may contain a CD-ROM which is a class 1 laser product.
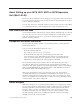
About Setting up your 0578, 5074, 5078 or 5079 Expansion Unit (SA41–5149) This book contains installation about setting up your expansion unit. You may elect to set up your new expansion unit yourself. It will take approximately one to three hours to install the hardware You also may elect not to install the expansion unit yourself. You may contact IBM or an authorized dealer to make arrangements for them to install it for a fee.
You can find more information on iSeries Navigator in the iSeries Information Center and at the following Web site: http://www.ibm.com/eserver/iseries/navigator/ How to send your comments Your feedback is important in helping to provide the most accurate and high-quality information. If you have any comments about this book or any other iSeries documentation, fill out the readers’ comment form at the back of this book.
Chapter 1. Preparing to set up your 5074 or 5079 Expansion Unit This chapter explains what you need to do before you set up your 5074 or 5079 Expansion Unit. This includes the following tasks: 1. Unpack your expansion unit (refer to the instructions for unpacking that came with your expansion unit). 2. Plan layouts for your cables. 3. Power down your system unit. Before you begin the installation process, carefully plan where you will install your new expansion unit.
Identifying HSL and SPCN Cables Use the following tables to identify your High Speed link (HSL) and System Power Control Network cables. Your system uses HSL cables to communicate with your expansion unit. Your system uses SPCN cables to control power to your expansion unit. Depending on your requirements, you might not have every HSL or SPCN cable listed below. Table 2.
Placing power cords for the 5079 You need to provide the appropriate receptacles for the power cords shipped with your 5079. The usable length of the upper unit power cord is 4 ft. (1.2 m) shorter than the length of the lower unit power cord. Redundant links A redundant link is a secondary HSL connection that your system can use if the primary link experiences a failure. You can create a redundant link configuration by connecting an extra HSL cable link between the expansion units and the system unit.
Figure 2. Planning for redundant link with two expansion units Figure 3.
Figure 4. Planning for redundant link with a expansion unit and 5078 Configuration rules When you set up your expansion unit, observe the rules in Table 4. Table 4. Configuration rules System or expansion unit Configuration rules General v When connecting HSL cables from the system unit to an expansion unit: – Connect the first HSL cable between connector A0 on the system unit (or the first available set of connectors) and connector 0 on your expansion unit.
Table 4. Configuration rules (continued) System or expansion unit Configuration rules iSeries 830 v The 830 can have a maximum of 13 expansion units on four HSL loops. v Connect HSL loops to the 830 in this order (see Appendix B, “Connector Locations” on page 35): 1. B0 and B1 2. C0 and C1 3. D0 and D1 4. A0 and A1 v Connectors A0 and A1, can have one 5074. v Connectors B0 and B1; C0 and C1; D0 and D1, can have up to four expansion units.
If you are setting up a 5074 Expansion Unit, go to Chapter 2, “Setting up your 5074 expansion unit” on page 9. If you are setting up a 5079 Expansion Unit, go to Chapter 4, “Setting up your 5079 Expansion Unit” on page 19. Chapter 1.
8 Setting up your 0578, 5074, 5078 or 5079 Expansion Unit V5R2
Chapter 2. Setting up your 5074 expansion unit This chapter describes how to set up your 5074 Expansion Unit. If you are setting up a 5079 Expansion Unit, go to Chapter 4, “Setting up your 5079 Expansion Unit” on page 19. If you have not powered down your system unit, go to “Powering down your iSeries system unit” on page 6. Once you have powered down your system unit, return here.
If you have just one set of HSL connectors on your system unit, they are labeled A0 and A1. If you have more than one set of HSL connectors on your system unit, the first set is labeled A0 and A1. The remaining HSL connectors are labeled alphabetically. For example, if you have an 830, there are four sets of HSL connectors on your system. They are labeled A0 and A1; B0 and B1; C0 and C1; D0 and D1. Unused HSL connectors are covered with metal clips. Remove the clips before you install the HSL cables. __ c.
Notes: 1. The graphics that follow designate the HSL connectors for the system unit as 0 and 1. These designations represent which set of connectors on your system unit the HSL loop is connected to (for example B0 and B1). 2. These procedures are intended as a guide. Some steps in the following procedures may vary depending on the number of HSL connectors you received in your order. Make sure that you follow the configurations rules in Table 4 on page 5.
Figure 7. 5078 connections __ 1. Remove or open the back cover from your 5074. See Appendix A, “Removing the back covers” on page 31 if you need instructions. __ 2. Connect the cables to the 5074. See Appendix B, “Connector Locations” on page 35 if you need information about finding connectors. __ a. Connect a new HSL cable to HSL connector 1. __ 3. __ 4. __ 5. __ 6. __ 7. __ b. Connect a new SPCN cable to connector J16. __ c. Connect the power cable. Do not plug into the wall outlet.
Connecting your 5074 to the middle of a loop Use this procedure if you are connecting your 5074 to the middle of a loop. In other words, you are connecting your 5074 between two other expansion units. Refer to these expansion units as unit X and unit Y as is shown in Figure 8 and Figure 9. Figure 8. HSL connections Figure 9. SPCN connections __ 1. Remove the back cover from unit X, unit Y, and your 5074. See Appendix A, “Removing the back covers” on page 31 if you need instructions. __ 2.
Connecting your 5074 to the end of a loop Use this procedure to connect your 5074 in the last position in a loop of expansion units. In this procedure you will connect your 5074 between your system unit and the expansion unit which is currently in the last position. Refer the expansion unit which is currently in the last position as unit Y as is shown in Figure 10 and Figure 11. Figure 10. HSL Connections Figure 11. SPCN Connections __ 1. Remove or open the back cover from your 5074.
Chapter 3. Setting up your 0578 expansion unit This chapter describes how to set up your 0578 Expansion Unit. If you have not powered down your system unit, go to “Powering down your iSeries system unit” on page 6. Once you have powered down your system unit, return here. Removing the covers See Appendix A, “Removing the back covers” on page 31 if you need help removing the covers on your expansion units or system unit.
__ 1. Locate available HSL connectors on your system unit. __ a. Remove or open the back cover for your system unit. See Appendix A, “Removing the back covers” on page 31 if you need instructions. __ b. Find the first set of unused HSL connectors on the back of your system unit (Appendix B, “Connector Locations” on page 35). If you have just one set of HSL connectors on your system unit, they are labeled A0 and A1.
__ h. Connect the SPCN cable to connector J15. __ i. Connect the power cable. Do not plug into the wall outlet. __ j. Close or replace the back cover to your 0578. __ 3. Connect the cables from your 0578 to your system unit. __ a. Connect the HSL cable that is labeled 0 to the corresponding HSL connector that you found in step 1c on page 16. __ b. Connect the HSL cable that you labeled 1 to the corresponding HSL connector that you found in step 1c on page 16. __ c.
18 Setting up your 0578, 5074, 5078 or 5079 Expansion Unit V5R2
Chapter 4. Setting up your 5079 Expansion Unit This chapter describes how to set up your 5079 Expansion Unit. If you are setting up a 5074 Expansion Unit go, to Chapter 2, “Setting up your 5074 expansion unit” on page 9. If you have not powered down your system unit, go to “Powering down your iSeries system unit” on page 6. Once you have powered down your system unit, return here.
Figure 12. HSL Connections Figure 13. SPCN Connections __ 1. Find the HSL cables and the SPCN cables in the information that is shipped with your expansion unit. You will use three HSL cables and two SPCN cables to perform this procedure. __ 2. Attach a label to each end of the cables. Label each of the cables as follows: __ a. Label the two ends of the first cable 0. __ b. Label one end of the second cable 0 and the other end 1. If you have different length cables, this cable should be the shortest one.
__ a. Remove or open the back cover on your system unit. See Appendix A, “Removing the back covers” on page 31 if you need instructions. __ b. Find the first set of available HSL connectors on the back of your system unit. If you have just one set of HSL connectors on your system unit, they are labeled A0 and A1. If you have more than one set of HSL connectors on your system unit, the first set is labeled A0 and A1. The remaining HSL connectors are labeled alphabetically.
Connecting your 5079 to another expansion unit This section contains instructions for connecting your 5079 expansion unit to a loop with other expansion units. You can only connect your 5079 with other expansion units that have HSL hardware. Your 5079 consists of two independent 5074 Expansion Units in a single frame. These procedures refer to the upper 5074 as 5079–002 and the lower 5074 as 5079–001. Notes: 1. The graphics that follow designate the HSL connectors for the system unit as 0 and 1.
Figure 15. SPCN connections __ 1. Open the back cover on your 5079. See Appendix A, “Removing the back covers” on page 31 if you need instructions. __ 2. Connect the cables to the 5079–002 (the upper unit). See Appendix B, “Connector Locations” on page 35 if you need information about finding connectors. __ a. Connect a new HSL cable to HSL connector 1. If you have different length cables, this cable should be the shortest one. __ b. Connect a new SPCN cable to connector J16. __ c. Connect the power cable.
__ 10. Connect the HSL cable from 5079–001 HSL connector 1 to HSL connector 0 on unit X. This cable should now run between 5079–001 and Unit X. __ 11. Connect the SPCN cable from 5079–001 connector J16 to connector J15 on unit X. This cable should now run between your 5079–001 and Unit X. __ 12. Install the covers on unit X, your 5079, and your system unit. __ 13. Go to Chapter 5, “Completing your installation” on page 27.
__ a. Connect a new HSL cable to HSL connector 1. If you have different length cables, this cable should be the shortest one. __ b. Connect a new SPCN cable to connector J16. __ c. Connect the power cable. Do not plug into the wall outlet. If your power cables for the 5079 are two different lengths, connect the longer cable to 5079–002. __ 6. Connect the cables to the 5079–001 (the lower unit). __ a. Connect the HSL cable that you installed in step 5a to HSL connector 0. __ b.
Figure 19. SPCN connections __ 1. Open the back cover on your 5079. See Appendix A, “Removing the back covers” on page 31 if you need instructions. __ 2. Connect the cables to 5079–002 (the upper unit). See Appendix B, “Connector Locations” on page 35 if you need information about finding connectors. __ a. Connect a new HSL cable to HSL connector 0. __ b. Connect a new HSL cable to HSL connector 1. If you have different length cables, this cable should be the shortest one. __ c.
Chapter 5. Completing your installation Perform the following steps to return complete your installation: __ 1. Make sure that you have reinstalled all of the covers on the following system components: __ a. iSeries system unit. __ b. All system expansion units. DANGER An electrical outlet that is not correctly wired could place hazardous voltage on metal parts of the system or the products that attach to the system.
__ g. Press the Enter push button on the control panel. __ h. Press the Mode Select button until the Normal indicator (OK) lights up. __ i. Press the Increment/Decrement push button until 01 appears in the Function/Data display. __ j. Press the Enter push button on the control panel. 01 B S should appear in the Function/Data display and OK is illuminated. If it does not, repeat steps 5a on page 27 through 5i. __ k. Go to step 6. __ 6. Power on your system unit by pushing the white power-on button.
Chapter 6. Verifying Your New Configuration Verify your new configuration by performing the following: __ 1. Type strsst on the command line. Press Enter. __ 2. Type your service tools userid and service tools password on the System Service Tools (SST) Sign On display. Press Enter. __ 3. Select Start a service tool from the Start a Service Tools display and press Enter. __ 4. Select Hardware service manager on the Start a Service Tool display. Press Enter. __ 5.
System Power Control Network Battery capacity test . . . . . . . : Enabled Type options, press Enter. 3=Write VPD 5=Display detail 7=Test battery interface Opt 3 Frame 01 01 03 03 02 02 Unit 0 1 0 1 0 1 Type .... .... .... .... 6=Display trace log Serial Number 00-00000 00-00000 00-00000 00-00000 00-00000 00-00000 Fault No No No No No No __ f. At the Write Vital Product Data (VPD) display enter the following information: __ 1) At the Type field enter 0578, 5074. 5078 or 5079.
Appendix A. Removing the back covers 5075 and 820 back cover Remove the back cover for the system unit by gripping the upper corners of the cover and pulling it up and toward you. Figure 20. Removing the 5075 and 820 back cover 5074, 830 and 890 back cover 1. Use the latch shown at A to open the back cover on your expansion unit. 2. If needed, use the latch shown at B to remove the back cover. Note: The 5074 and 830 back covers do not look the same. However, the procedure to open them is the same.
Figure 21. Removing the 5074 and 830 back cover 5079 and 840 back cover Open the back cover on your 5079 by pressing the latch at A .
Figure 22. Opening the 5079 and 840 back cover Appendix A.
Accessing units in a rack 1. Move to the back of the rack, press latch A , and open the back door of the rack.
Appendix B. Connector Locations 820 HSL connector locations Figure 23. 820 HSL connector locations © Copyright IBM Corp.
830 HSL connector locations Figure 24.
840 HSL connector locations Figure 25. 840 HSL connector locations Appendix B.
890 HSL connector locations Figure 26.
5079 connector locations Figure 27. 5079 connector locations Appendix B.
74 connector locations Figure 28.
5075 connector locations Figure 29. 5075 connector locations 5078 connector locations Figure 30. 5078 connector locations Appendix B.
42 Setting up your 0578, 5074, 5078 or 5079 Expansion Unit V5R2
Appendix C. System unit control panel 1. Go to the front of your iSeries system unit. Open the control panel door. 2. Before you can use F Increment/Decrement Buttons and G Enter Push button, you need to press H Mode Select to select manual mode K . You will use the push buttons on the control panel. Familiarize yourself with the control panel on your unit. A Power On Light v A blinking light indicates power to the unit. v A constant light indicates that the unit is up and working.
44 Setting up your 0578, 5074, 5078 or 5079 Expansion Unit V5R2
Appendix D. Cabling rules for systems with a migration unit or the 9079 and 9094 expansion unit If you already have a migration unit or a 9079 Expansion Unit set up on your system, there are special cabling rules that you must follow. On the table below, find your system unit and follow the rule that apply to your system unit. System unit Rule iSeries 820 v A 503x migration unit must be in the first position of the HSL loop if there are a total of three external units or fewer.
System unit Rule iSeries 890 v You can install up to two 5074s or one 5079 with a 9094 on the first loop (A0 and A1). v Set up the SPCN cable for your 5074 or 5079 in the same SPCN loop as the 9094. This is true even though you are connecting the 5074 or 5079 to a different HSL loop than the 9094. You can do this by connecting the SPCN cable from J15 of your new expansion unit to J16 of the 9094. See Figure 38 on page 49. Figure 31. HSL loop with 503x Figure 32.
Figure 33. HSL loop with four external units Figure 34. HSL loop with five external units Figure 35. HSL loop with two 5079s and a 503x Appendix D.
Figure 36. SPCN loop with 503x Figure 37.
Figure 38. HSL loop with 0578 Appendix D.
50 Setting up your 0578, 5074, 5078 or 5079 Expansion Unit V5R2
Notices This information was developed for products and services offered in the U.S.A. IBM may not offer the products, services, or features discussed in this document in other countries. Consult your local IBM representative for information on the products and services currently available in your area. Any reference to an IBM product, program, or service is not intended to state or imply that only that IBM product, program, or service may be used.
systems and there is no guarantee that these measurements will be the same on generally available systems. Furthermore, some measurement may have been estimated through extrapolation. Actual results may vary. Users of this document should verify the applicable data for their specific environment. Information concerning non-IBM products was obtained from the suppliers of those products, their published announcements or other publicly available sources.
C-bus is a trademark of Corollary, Inc. in the United States, other countries, or both. Java and all Java-based trademarks are trademarks of Sun Microsystems, Inc. in the United States, other countries, or both. Microsoft, Windows, Windows NT, and the Windows logo are trademarks of Microsoft Corporation in the United States, other countries, or both. PC Direct is a trademark of Ziff Communications Company in the United States, other countries, or both and is used by IBM Corporation under license.
Industry Canada Compliance Statement This Class A digital apparatus meets the requirements of the Canadian Interference-Causing Equipment Regulations. Avis de conformité à la réglementation d’Industrie Canada Cet appareil numérique de la classe A respecte toutes les exigences du Règlement sur le matériel brouilleur du Canada.
This device complies with Part 15 of the FCC Rules. Operation is subject to the following two conditions: (1) this device may not cause harmful interferences, and (2) this device must accept any interferences received, including interference that may cause undesired operation.
56 Setting up your 0578, 5074, 5078 or 5079 Expansion Unit V5R2
Readers’ Comments — We’d Like to Hear from You iSeries Setting Up Your 0578, 5074, 5078 or 5079 Expansion Unit Version 5 Publication No.
SA41-5149-02 ___________________________________________________________________________________________________ Readers’ Comments — We’d Like to Hear from You Cut or Fold Along Line _ _ _ _ _ _ _Fold _ _ _and _ _ _Tape _ _ _ _ _ _ _ _ _ _ _ _ _ _ _ _ _ _ _ _ _ _ _ _ _ _ _Please _ _ _ _ _do _ _not _ _ staple _ _ _ _ _ _ _ _ _ _ _ _ _ _ _ _ _ _ _ _ _ _ _ _ _ _ _ _ _Fold _ _ _and _ _ Tape ______ NO POSTAGE NECESSARY IF MAILED IN THE UNITED STATES BUSINESS REPLY MAIL FIRST-CLASS MAIL PERMIT NO.
Printed in U.S.A.