
- IBM switch Users and Maintenance Guide

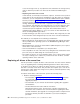


1. Read the documentation that comes with the hard disk drive.
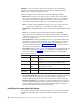
2. Check for Fault LEDs shown in Figure 62. If any amber LEDs are lit, see
Chapter 6, “Hardware maintenance,” on page 111.
3. Determine the bay into which you want to install the drive.
4. Remove the blank tray:
Note: To locate blank drives, look at the Activity LEDs on the front of the
storage system. An active drive will have a green light on or flashing. A
blank drive will not have any active lights.
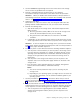
a. Release the latch on the drive CRU by pinching together the blue line on the
tray latch and the finger hole on the tray handle, as shown by the arrow in
Figure 62.
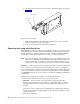
b. Pull the handle on the tray out so that it is in the open position to release
the drive CRU, and then pull the blank tray out of the bay.
c. Save the blank tray for later use.
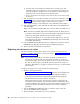
5.
Install the hard disk drive:
Note: The hard disk drive comes installed in a drive tray. Do not attempt to
detach the drive from the tray.
a. Release the latch on the drive CRU by pinching together the blue line on the
tray latch and the finger hole on the tray handle.
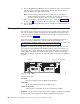
Activity LED
Fault LED
General system
error LED
Power-on LED
LatchTray handle
f10ug053
Figure 62. Hot-swap hard disk drive LEDs
Chapter 5. Installing and replacing components 81