
User guide


68
7. Speci¿ cations
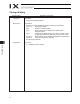
Wiring/Piping Diagram (Arm Length: 300/350)
Notes
(1) The actual layout of board connectors varies from this drawing.
(2) Since the brake power circuit is provided on the primary side (high-voltage side), a dedicated 24 V power supply is
required for this circuit. The 24 V power supply for I/O circuits used on the secondary side (low-voltage side) cannot be
shared.
(3) To operate the alarm LED, the user must provide a circuit that uses the controller I/O output signal.
Controller
Brake power
terminals
User wiring
terminals
Inside base
Flexible
cable
Inside arm 2
Cable fix cap
(Capcon)
M cable (outside robot)
PG
ca
ble
(ou
tsid
e
rob
ot)
BK power cable (outside robot)
U cable (outside robot)
Servo motor for
axis 1 (arm 1)
FG (To base)
A
ir joint, red (4)
PG cable (inside robot)
M cable (inside robot)
U cable (inside robot)
D-sub connector for user wiring (15-pin, socket)
Brake-release switch for axes 3/4 (Z/R-axes)
Air joint, white (4)
Air joint, black (4)
PG cable (outside robot)
Servo motor for
axis 2 (arm 2)
Servo motor with brake
for axis 3 (Z-axis)
Servo motor with brake
for axis 4 (R-axis)
FG (to D-sub housing)
Alarm LED
Air joiznt, black ( 4)
Air joint, red ( 4)
A
ir joint, white ( 4)
Electromagnetic
brake for axis 4
(R-axis)
Board
PG
ca
ble
(ou
tsid
e
rob
ot)
7.4 Wiring Diagram