User Manual Satellite IP Modem Revision K
Copyright 2005 Hughes Network Systems, LLC All rights reserved. This publication and its contents are proprietary to Hughes Network Systems LLC. No part of this publication may be reproduced in any form or by any means without the written permission of Hughes Network Systems, LLC, 11717 Exploration Lane, Germantown, Maryland 20876. Hughes Network Systems, LLC has made every effort to ensure the correctness and completeness of the material in this document.
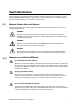
SAFETY INFORMATION For your safety and protection, read this entire user manual before you attempt to use the Regional BGAN Satellite IP Modem. In particular, read this safety section carefully. Keep this safety information where you can refer to it if necessary. WARNING SYMBOLS USED IN THIS MANUAL This section introduces the various types of warnings used in this document to alert you to possible safety hazards. WARNING Potential radio Frequency (RF) hazard.
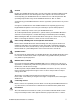
General Handle your Satellite IP Modem with care. The enclosure is weather resistant per IEC 60529 IP44; however do not submerge the unit or expose it to severe rain storms. Avoid exposing your Satellite IP Modem to extreme hot or cold temperatures. The operating temperature range of the Satellite IP Modem is -10ºC to +55ºC. Avoid placing your Satellite IP Modem close to cigarettes, open flames or any source of heat.
pacemaker and who want to use a Satellite IP Modem should seek the advice of their cardiologist. If, as a pacemaker user, you are still concerned about interaction with the Satellite IP Modem, we suggest you follow these guidelines: Maintain a distance of 15 cm between the Satellite IP Modem and your pacemaker; Maintain a distance of one meter away from the front of the Satellite IP Modem’s antenna; Refer to your pacemaker product literature for information on your particular device.
TABLE OF CONTENTS SAFETY INFORMATION ...............................................................................................................................I WARNING SYMBOLS USED IN THIS MANUAL ..........................................................................................................I WARNINGS FOR THE SATELLITE IP MODEM ............................................................................................................I TABLE OF CONTENTS ......................................
Pointing ............................................................................................................................................... 25 Security Management ...................................................................................................................... 26 Home................................................................................................................................................... 27 Status Window..............................................
INTRODUCTION Your Inmarsat Regional BGAN Satellite IP Modem provides portable, high-speed data communications via satellite. Using “Always On” technology you can remain connected to the Internet while only sending or receiving the data that you need at speeds of up to 144kbits/s, just as if you were sitting at your office desk. The Satellite IP Modem works with your computer using one of three common networking connections: Universal Serial Bus (USB), Ethernet or Bluetooth™ wireless technology.
Phase 2 Coverage Area with I4 Satellites The coverage map shows the region where satellite coverage is possible with the two new Inmarsat I4 satellites. Note that the actual ability to get Regional BGAN service in this coverage area is dependent upon a variety of factors, including licensing conditions, and the figure does not represent a guarantee of service in any particular location (contact your Service Provider for the latest information on service coverage).
FIRST TIME SET-UP This section guides you through the process of setting up and configuring your Satellite IP Modem for the first time. The steps presented should be followed in the order given. When you are finished, your computer and Modem will both be set up and ready to use. Regional BGAN Satellite IP Modem UNPACKING Unpack the modem and accessory box items.
MINIMUM SYSTEM REQUIREMENTS AND SOFTWARE INSTALLATION ; You must have a desktop or laptop Personal Computer (PC) running one of the following supported operating systems: Windows® NT 4.0 (service pack 3) Windows 98 second edition Windows 2000 Windows ME Windows XP Macintosh OS X v10.1 or later ; Your PC must have a CD-ROM drive in order to run the software installation programme. ; The computer must also have one of the following supported Internet browsers.
SATELLITE IP MODEM SOFTWARE INSTALLATION Insert the installation CD into the CD-ROM drive of your PC or Macintosh computer to initiate the software installation. If the programme does not automatically begin, use your Windows® Explorer utility to find setup.exe on the installation CD. Double-click that programme to start the installation process. Follow the steps provided by the Installation Wizard.
LAUNCH PAD -- QUICKSTART WIZARD Desktop Icon The Satellite IP Modem Launch Pad menu is displayed once you complete the installation steps and click the Installation Wizard Finish button with Start the Launch Pad enabled. Alternately, the Launch Pad can be started by double-clicking on the Satellite IP Modem desktop icon. Choose View QuickStart Wizard from the Launch Pad menu. This option leads you through the steps necessary to connect your Satellite IP Modem with the BGAN network.
STEP 1: UNPACK THE SATELLITE IP MODEM 1. Unpack the modem and accessories. power adapter, USB and Ethernet with the modem. Battery, AC mains cables are included 2. Your service provider will have configuration instructions separately. provided a SIM and 3. Insert SIM in SIM holder, then insert the SIM shown below. holder into the modem as STEP 2: UNPACK THE SATELLITE IP MODEM – POWER 4. Insert Battery after the SIM has been installed. 5. Plug in Power cable and charge the battery for 3 hours.
STEP 3: CONNECTING THE SATELLITE IP MODEM TO YOUR PC 1. Place Satellite IP Modem outside on a flat surface with a clear view of the sky. 2. Power up Satellite IP Modem by pressing the Power button. 3. Choose one of the following options to connect your PC to the Satellite IP Modem: USB Ethernet Bluetooth IMPORTANT: You must disconnect any existing LAN connections on your PC before proceeding with installation. You must verify that the proxy server settings in your browser are disabled.
STEP 4: CONNECTING USING ETHERNET 1. Connect the blue Ethernet cable to your laptop’s network interface and insert the other end of the connector into the Satellite IP Modem. 2. To check the active interface, press and hold the SELECT button for a few seconds. If the Ethernet light flashes red then Ethernet is already selected. If not, press the SELECT button once or twice as needed to change the selection to Ethernet.
STEP 5: GPS LOCATION 1. The Satellite IP Modem is now attempting to locate itself using GPS. This may take up to five minutes. It is important that the Satellite IP Modem is placed away from buildings, trees and other obstacles that might block a clear view of the sky. Wait – Power light alternating red / amber Proceed – Power light alternating green / amber 2. When the power light changes from a red/amber flash to an amber/green flash proceed to the next step.
STEP 7: ROUGH POINTING TO SATELLITE Use the following instructions to initiate the rough pointing sequence. Please obtain a current GPS Fix before starting the rough pointing sequence. With the modem software installed, the antenna pointing screen will show which Inmarsat 4 satellite is in view.
Note: If you are in an overlap region of the satellite’s coverage, the pointing screen will show two satellites, two compass directions, and two antenna angles. Antenna Pointing Screen – Satellite Overlap Region Try pointing to the IOR satellite first and check the signal quality meter as you point the antenna following Steps 7-8. Do not exit antenna pointing at this point in time. Next try pointing to the AOR satellite and again check the signal quality meter as you point the antenna following Steps 7-8.
R-BGAN Satellite IP Modem User Manual 13
R-BGAN Satellite IP Modem User Manual 14
STEP 8: FINE POINTING TO THE SATELLITE Use the following instructions to fine point the antenna.
R-BGAN Satellite IP Modem User Manual 16
STEP 9: EXITING POINTING MODE Use the following instructions to complete the connection of your Satellite IP Modem to the Internet. Your service provider may have supplied additional instructions for configuring your Satellite IP Modem along with your SIM card. If provided, please refer to the configuration instructions and make the required changes now. If you are unable to successfully connect to the Internet, please see the troubleshooting section of the Regional BGAN Satellite IP Modem User Manual.
QUICK REFERENCE This section serves as a reference guide, identifying the key operational aspects of using the Regional BGAN system, the Controls and Indicators on the Satellite IP Modem and the functions of the Launch Pad software. GLOBAL POSITIONING SYSTEM OPERATION Your Satellite IP Modem contains an integrated Global Positioning System (GPS) receiver that is used to provide location information to the Regional BGAN system.
ANTENNA POINTING Establishing a new connection requires the careful orientation of the Satellite IP Modem towards the Regional BGAN Satellite. The more precise this alignment, the faster your data will be able to travel over the network. To ensure precise alignment, the pointing operation is divided into a rough pointing operation followed by a fine pointing operation. To assist in rough Satellite IP Modem orientation, the stored GPS location is used to obtain your location relative to the satellite.
CONTROLS AND INDICATORS The figures below illustrate where the Control Buttons and Lights are located on the Satellite IP Modem and the functions of each. POWER BUTTON The Power Button turns the Satellite IP Modem power on and off. To turn on the Regional BGAN Satellite IP Modem, push the Power button down until the Power Light illuminates. To turn off the Satellite IP Modem, push the Power button down until the Power Light darkens (at least two seconds). The Modem will shut off a few seconds later.
SELECT BUTTON The Select Button controls the selection of the interface between your computer and the Satellite IP Modem. All Operational Modes: Pressing and holding this button down for two seconds will display the current selected interface and battery state.
SATELLITE IP MODEM ANTENNA PROTRACTOR When you are positioning the antenna during the Antenna Pointing process, the protractor provides the current angle of the antenna so that you can adjust it to the Antenna Angle specified on the pointing screen. COMPASS Reference the compass during the Antenna Pointing process to get the correct Compass Direction needed for the antenna. The illustration shows an example of a South-West orientation.
LAUNCH PAD The Satellite IP Modem Launch Pad menu will appear after you have completed the installation steps and clicked the Finish or Done button on the last Installation panel. Alternately the Launch Pad can be started by a double click on the Satellite IP Modem desktop icon. VIEW QUICKSTART WIZARD The QuickStart Wizard is always there to guide you through the Satellite IP Modem setup procedures.
R-BGAN Satellite IP Modem User Manual 24
CONTROL PAD The Control Pad is used for Satellite IP Modem administration. For the Control Pad to execute correctly, you must have your computer properly connected to the Satellite IP Modem and have a supported web browser that is java-enabled. ; Note Selecting the Apply Button implements any modifications you make on the Control Pad screens, and selecting the Cancel Button undoes any current (not yet applied) modifications.
; If Antenna Pointing is disabled, the Pointing Screen will be bypassed. See the Advanced Settings section for additional information. Note Follow the directions in the QuickStart Wizard for using this screen while going through the Pointing process. GPS Validity: Invalid, Stored or Valid. See the Global Positioning System Operation section for more details on GPS. Point Antenna to These Settings: Compass Direction and Antenna Angle to help orient the Satellite IP Modem toward the satellite.
Security Code Enable: If this box is not checked, there is no prompt for a Security Code after you invoke Control Pad. If this box is checked, a prompt displays for the Security Code entry each time you run the Control Pad with a different SIM than the one that was in the Modem when the Security Code was enabled. By default, the Security Code is not enabled.
have fresh information, press the reload button on your browser to update the page display. ; Note The Signal Quality status is a different measure of the received satellite signal than the Signal Strength status shown on the pointing screen. Seeing differences between these two levels is normal and not an indication of a problem with your Satellite IP Modem. Battery Level: Displayed on all Control Pad screens, this bar graphs provides an indication of remaining battery capacity.
Status Window This window gives you a summary of current Satellite IP Modem system configuration and performance. When the Status Window is open, its information is updated every minute. If you are running on battery power, this will reduce the available operating time. Network Status: Available or Unavailable. If the status is Available then the Satellite IP Modem is ready to send and receive your data over the network.
Red: almost fully discharged Amber: charging under external power GPS Antenna: Internal or External. Fault Status: Any current system faults or errors.
NETWORK SETTINGS After executing the necessary QuickStart Wizard steps to set up and configure the Satellite IP Modem, you must select the Network Settings screen to complete your network configuration. On this screen, you enter the appropriate Domain Name Service (DNS) and the Access Point Name (APN) information given to you by your Service Provider. ; Notes Your Service Provider may have already performed this configuration step for you.
the network. This setting is the default. If this box is checked, the Modem uses the IP address you enter in the Static Public Network IP Address field that follows. You should only check this box and enter an IP address if directed to do so by your Service Provider. DNS Host 1: Primary Host Domain Name Service (DNS) Address. An IP address is required in this field and will be supplied by your Service Provider. DNS Host 2: Secondary Host DNS Address.
Enable Antenna Pointing Display: This checkbox determines whether the Pointing Display comes up each time the Satellite IP Modem is booted. If the Modem is not moved between sessions, this option can be deselected to bypass the pointing state upon power up. However, if the Satellite IP Modem is moved, antenna pointing must be enabled to ensure optimum data throughput and performance.
then back on so that the new settings can take effect. USER OPTIONS The User Options screen allows you to monitor data usage. Data Usage Monitor: Click on this link or choose the Data Usage option on the menu if you would like to view estimates of your data usage. Data usage figures are obtained by counting the bytes in the IP packets received by and sent from the R-BGAN terminal. You can view both “per session” and “lifetime” data usage counts.
The Bluetooth control software on your computer must allow the direct entry of DNS information. Please consult your Bluetooth device vendor to confirm that DNS entry is possible with your device. Ensure that your Bluetooth device supports LAN access profile. For configuration of LAN access profile please refer to your Bluetooth device user manual. Bluetooth Device Address: System-assigned, display-only. Bluetooth Device Name: The default name is “Regional BGAN Satellite IP Modem.
PROPERTIES The Properties screen displays a summary of current communications parameter settings. Current Settings: Software Version, IOR and AOR Information Versions, Interface Mode, Public Network IP Address, Private Satellite Modem IP Address, APN Value, Satellite Modem International Mobile Equipment Identity (IMEI), Satellite Modem Media Access Control (MAC) Address and Closed User Group ID. RESTORE FACTORY DEFAULTS The Restore Factory Defaults screen is a subset of Properties.
Once connected to the Internet, choose the Upgrade Satellite IP Modem option from the Launch Pad. The upgrade programme first checks if your computer has a copy of the Satellite IP Modem software – the Local Copy. ; Each time you upgrade the Satellite IP Modem, a local copy of the software is placed on your computer. Note NO LOCAL COPY PRESENT If no local copy is present on your computer, the upgrade programme connects to the Internet.
upgrades, click on Options and select Check for Upgrade. If an upgrade is available, you are prompted to download the upgrade to your computer. Once the upgrade has been downloaded, the Upgrader will show the new software version in the New Software Version box. If the Satellite IP Modem was used to access the Internet, you do not need to disconnect. If you are not ready to complete the upgrade by connecting the Satellite IP Modem to your computer, you can close the Upgrader and complete the upgrade later.
LEASE USER GROUP (LUG) OPERATION The LUG operation mode allows the User to subscribe to and receive a dedicated sub-band resource from the network. Please ask your Service Provider for details regarding subscription and cost of this service. This feature is controlled by the SIM card.
UPGRADE SYSTEM INFORMATION On occasion, the user is requested by the Fault Status display or their Service Provider to update the System Information version. The Launch Pad provides an option to upgrade the System Information version. In order to upgrade the System Information version you must first connect to the Internet using the Satellite IP Modem, dial-up, or LAN connection. Once connected to the Internet, choose the Upgrade System Information option from the Launch Pad.
The upgrade program then launches the System Information Upgrader to install the new versions on the Satellite IP Modem. The Upgrader shows you the PC versions and the Modem versions currently installed on the satellite IP Modem. If the PC versions are newer (higher numbered version) than the installed Modem versions, click the Upgrade button. The Upgrader then completes the upgrade process. Caution: Do Not interrupt the upgrade process.
TROUBLESHOOTING This section details the following: Some general hardware and software problems you may encounter in the installation and operation of the Satellite IP Modem along with the possible source of these problems and how to correct them. System fault codes and descriptions reported to you by the Satellite IP Modem on the Control Pad screens, along with their possible causes and solutions.
Problem Possible Cause The browser may not be correctly configured. Action For Netscape, go to Advanced Preferences and select ‘Direct connection to the Internet’. For Microsoft Internet Explorer, select Tools / Internet Options / Connections / LAN Settings and uncheck the box labelled ‘Use a proxy server for your LAN’. YOU MAY NEED TO RECHECK THIS BOX UPON RETURNING TO YOUR OTHER INTERNET CONNECTION. The Control Pad appears to “lock up” after it has been successfully launched.
Problem Possible Cause Action pointing screen does not change when moving the antenna. Rough pointing not completed correctly. Follow the instructions in the QuickStart Wizard to correctly complete rough pointing The Satellite IP Modem cannot find the satellite. No signal or weak signal. Make sure no obstruction is blocking the satellite signal. Make sure that the Modem has a clear view of the sky in the direction of the satellite. Be aware that window glass may reduce the signal level.
Problem Possible Cause Action Satellite IP Modem stops sending data even with good network connection and sufficiently charged battery. The indicator lights blink red. Modem/battery is overheated. Let the Modem/battery cool down. Wait until the Indicator Lights stop blinking red to continue. The Satellite IP Modem cannot enter antenna pointing mode while you are trying to reposition the antenna. Antenna pointing mode cannot be accessed without power cycling the Modem.
FAULT CODES Number and Description 1 SIM card is not installed. Power down, install SIM card properly and try again. Cause Absence or incorrect installation of the SIM card. Solution SIM card may not be present. Remove the SIM boot according to the instructions in the User Manual and verify that the SIM card is present. SIM card may be inserted incorrectly. Remove SIM card and make sure it is inserted according to the instructions in the User Manual. SIM card may be damaged.
Number and Description Cause Solution your Service Provider if damaged. SIM card contacts may be dirty. Clean the SIM card contacts with a dry cloth. If problem continues, replace SIM card with a known good SIM card. If problem persists, return the unit to your Service Provider for service. 6 A required data field is missing from the SIM card. Please contact your Service Provider. Absence of a required data field on the SIM card.
Number and Description Cause Solution failed. Please contact your Service Provider. authorised for service. Provider should check the subscription entries in the Home Location Registry. 15 Network connection Network connection failure because the service option is not supported. Contact your Service Provider to regain authorised service. The Service Provider should check the subscription entries in the Home Location Registry.
Number and Description 25 Network connection Cause Internal software error. Power down the Satellite IP Modem and try again. If the problem continues, contact your Service Provider. SIM card may have been programmed incorrectly. SIM card was incorrectly programmed. The SIM card must be replaced by another from your Service Provider. Internal software error. Power down the Satellite IP Modem and try again. If the problem continues, contact your Service Provider.
Number and Description Cause Solution rebooting the UT with latest System Information file(s) and valid GPS fix please contact your Service Provider. 101 This user was detached by the network. Trying to reattach… 103 Network connection failure – PLMN is not allowed. Reacquiring connection. 104 Network connection failure - LA is not allowed. Reacquiring connection… 105 Network connection failure – Roaming is not allowed. Reacquiring connection.
Number and Description Cause Solution available - Invalid position. Reacquiring connection… position is not valid. fix. If the problem continues, contact your Service Provider. 113 Network service is not Network connection failure because the of an invalid GPS position. Verify that the Modem has an open view of the sky to get a GPS fix. If the problem continues, contact your Service Provider. The GPS fix does not match the selected Routing Area Information (RAI).
Number and Description Cause correct and the problem continues, contact your Service Provider. ID/Password and try again. 123 Network connection Solution Network connection failure because the requested QoS was rejected by the Network. Modify the QoS settings and try again. If the problem continues, set all QoS settings to the default values and try again. If the problem continues with the default values, contact your Service Provider.
Number and Description Cause for selected LAI. Reacquiring connection... Global beam 135 Stand-by-mode – Power saving mode is active Normal operation will resume automatically when sending or receiving data” R-BGAN Satellite IP Modem User Manual Solution If the problem continues after rebooting the UT with latest System Information file(s) and valid GPS fix please contact your Service Provider. This is only a UT status report.
GLOSSARY APN: Access Point Name. APNs can be assigned to each external network interface to allow communications among multiple Internet Service Providers (ISPs). If use of multiple ISPs is required in your network, on the Satellite IP Modem Control Pad Network Settings screen you can enable APN and enter the value supplied by your Service Provider.
DHCP: Dynamic Host Configuration Protocol. DHCP is a communications protocol that lets network administrators manage centrally and automate the assignment of IP addresses in an organization's network. Using the Internet Protocol, each machine that can connect to the Internet needs a unique IP address. You must make sure that the Windows network settings on your PC are set to allow the network to choose IP settings automatically.
Launch Pad: The Satellite IP Modem Launch Pad, displayed on your computer, is a list of options that allow you to set up or modify Modem network and communications parameters, monitor Modem system performance, and upgrade Modem software. Normal Operational Mode: In this mode, the Satellite IP Modem is connected to your network, allowing you to perform standard system activities such as Internet browsing. The other mode of Modem operation is Pointing Mode.
NOTES R-BGAN Satellite IP Modem User Manual 57