
Installation Instructions


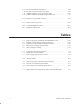
Table Of Contents
- Title page
- Contents
- About this manual
- Safety information
- Ch 1 - Introduction
- Ch 2 - Adding cards to the Controller
- Unpacking the System Controller
- Unpacking the picocells
- System Controller card configuration
- Adding cards to the System Controller (first steps)
- Jumper and DIP switch settings
- Attaching bus cables
- Adding cards to the System Controller (final steps)
- Configuring Controller cards
- Verifying the card configuration
- Ch 3 - Installing the Controller
- Ch 4 - Verifying the Controller configuration
- Ch 5 - Configuring the router
- Ch 6 - Testing picocells
- Ch 7 - Installing picocells
- Ch 8 - Connecting to external equipment
- Ch 9 - System testing
- Ch 10 - Installation inspection
- Ch 11 - Provisioning
- Ch 12 - Remote Client
- Ch 13 - Troubleshooting
- Ch 14 - Maintaining Quad T1 cards
- App A - Specifications
- App B - Standards compliance information
- App C - Part numbers
- App D - Updates and backups
- Index

1026209–0001 Revision B ix
Figures
1-1 System Controller 1–1. . . . . . . . . . . . . . . . . . . . . . . . . . . . . . . . . . . . . . . .
1-2 AIReach OS block diagram 1–2. . . . . . . . . . . . . . . . . . . . . . . . . . . . . . . .
1-3 Example of full rack mount 1–4. . . . . . . . . . . . . . . . . . . . . . . . . . . . . . . .
1-4 System Controller front panel 1–5. . . . . . . . . . . . . . . . . . . . . . . . . . . . . .
1-5 Flow chart: AIReach OS major installation and test tasks 1–9. . . . . . . . .
2-1 Unpacking the System Controller 2–3. . . . . . . . . . . . . . . . . . . . . . . . . . .
2-2 Unpacking the picocell 2–5. . . . . . . . . . . . . . . . . . . . . . . . . . . . . . . . . . . .
2-3 Unlocking the mounting plate from the picocell 2–6. . . . . . . . . . . . . . . .
2-4 Recording and entering serial number from each picocell 2–7. . . . . . . . .
2-5 Slot label on rear of System Controller 2–8. . . . . . . . . . . . . . . . . . . . . . .
2-6 Slot assignments: System Controller standard configuration 2–9. . . . . . .
2-7 Slot assignments: System Controller fully loaded configuration 2–10. . . .
2-8 Removing the System Controller cover 2–11. . . . . . . . . . . . . . . . . . . . . . .
2-9 DIP switches on Quad T1 card 2–13. . . . . . . . . . . . . . . . . . . . . . . . . . . . . .
2-10 H.100 bus termination 2–14. . . . . . . . . . . . . . . . . . . . . . . . . . . . . . . . . . .
2-11 Jumpers and address switch on TX2000 cards 2–15. . . . . . . . . . . . . . . . .
2-12 Conference card jumpers and address switch 2–18. . . . . . . . . . . . . . . . . .
2-15 SBC jumper and DIP switch locations 2–20. . . . . . . . . . . . . . . . . . . . . . .
2-16 H.100 and MVIP bus cables 2–23. . . . . . . . . . . . . . . . . . . . . . . . . . . . . . .
3-1 System Controller and associated components in a 19–inch rack 3–3. . .
3-2 Installing the chassis 3–4. . . . . . . . . . . . . . . . . . . . . . . . . . . . . . . . . . . . . .
3-3 System Controller connectors 3–5. . . . . . . . . . . . . . . . . . . . . . . . . . . . . . .
4-1 Recording and entering serial number from the picocell 4–15. . . . . . . . . .
5-1 AIReach OS IS–41 gateway network diagram 5–2. . . . . . . . . . . . . . . . . .
5-2 Typical AIReach OS IS–41 gateway network diagram 5–5. . . . . . . . . . .
6-1 Picocell connection for testing 6–3. . . . . . . . . . . . . . . . . . . . . . . . . . . . . .
6-2 Ports on Quad T1 card 6–4. . . . . . . . . . . . . . . . . . . . . . . . . . . . . . . . . . . .
6-3 LEDs on front of picocell 6–5. . . . . . . . . . . . . . . . . . . . . . . . . . . . . . . . . .
6-4 LEDs on Quad T1 card 6–7. . . . . . . . . . . . . . . . . . . . . . . . . . . . . . . . . . . .
6-5 Picocell slot numbers 6–24. . . . . . . . . . . . . . . . . . . . . . . . . . . . . . . . . . . . .
7-1 Placing the mounting plate to allow proper clearance 7–2. . . . . . . . . . . .
7-2 Position of the picocell on the mounting plate 7–3. . . . . . . . . . . . . . . . . .
7-3 Attaching the picocell mounting plate to wood or metal studs 7–5. . . . .
7-4 Attaching the picocell mounting plate – concrete, block, wallboard 7–6.
7-5 Cabling the picocell 7–9. . . . . . . . . . . . . . . . . . . . . . . . . . . . . . . . . . . . . .
7-6 T1 cable and power connections at the picocell 7–10. . . . . . . . . . . . . . . . .
7-7 T1 cabling for standalone and daisy–chained picocells 7–11. . . . . . . . . . .
7-8 Mounting the picocell 7–13. . . . . . . . . . . . . . . . . . . . . . . . . . . . . . . . . . . . .