
Installation Instructions
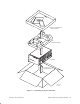
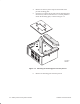
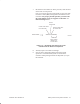
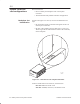
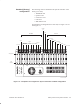
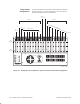
Table Of Contents
- Title page
- Contents
- About this manual
- Safety information
- Ch 1 - Introduction
- Ch 2 - Adding cards to the Controller
- Unpacking the System Controller
- Unpacking the picocells
- System Controller card configuration
- Adding cards to the System Controller (first steps)
- Jumper and DIP switch settings
- Attaching bus cables
- Adding cards to the System Controller (final steps)
- Configuring Controller cards
- Verifying the card configuration
- Ch 3 - Installing the Controller
- Ch 4 - Verifying the Controller configuration
- Ch 5 - Configuring the router
- Ch 6 - Testing picocells
- Ch 7 - Installing picocells
- Ch 8 - Connecting to external equipment
- Ch 9 - System testing
- Ch 10 - Installation inspection
- Ch 11 - Provisioning
- Ch 12 - Remote Client
- Ch 13 - Troubleshooting
- Ch 14 - Maintaining Quad T1 cards
- App A - Specifications
- App B - Standards compliance information
- App C - Part numbers
- App D - Updates and backups
- Index

1026209–0001 Revision B
Adding cards to the System Controller 2–7
7. Record the serial numbers of all the picocells, from the label
on the back of each picocell.
Later you enter the picocell serial number as part of the base
transceiver station (BTS) configuration information for the
Controller. For proper picocell operation, you must enter
the serial number exactly as it appears on the label—as
indicated in figure 2-4.
AVPU-D--02025234
T0001001
Include 1 dash
the revision letter.
before
Include 2 dashes
the revision letter.
after
Picocell
revision letter
Enter all 8
digits, including
leading zeros,
as on the label.
Serial number
Figure 2-4 Recording and entering the serial
number from the back of each picocell
8. Visually inspect all contents for damage.
9. Save the boxes and packing material until the system
operation is verified and the system is released to the
customer. When packing materials are disposed of, recycle
the materials.