
Installation Instructions
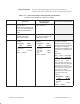
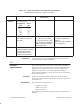
Table Of Contents
- Title page
- Contents
- About this manual
- Safety information
- Ch 1 - Introduction
- Ch 2 - Adding cards to the Controller
- Unpacking the System Controller
- Unpacking the picocells
- System Controller card configuration
- Adding cards to the System Controller (first steps)
- Jumper and DIP switch settings
- Attaching bus cables
- Adding cards to the System Controller (final steps)
- Configuring Controller cards
- Verifying the card configuration
- Ch 3 - Installing the Controller
- Ch 4 - Verifying the Controller configuration
- Ch 5 - Configuring the router
- Ch 6 - Testing picocells
- Ch 7 - Installing picocells
- Ch 8 - Connecting to external equipment
- Ch 9 - System testing
- Ch 10 - Installation inspection
- Ch 11 - Provisioning
- Ch 12 - Remote Client
- Ch 13 - Troubleshooting
- Ch 14 - Maintaining Quad T1 cards
- App A - Specifications
- App B - Standards compliance information
- App C - Part numbers
- App D - Updates and backups
- Index

1026209–0001 Revision B 14–8 Maintaining Quad T1 card
Configuring the T1 Quad card
1. Launch the AROSHWCfg utility by double–clicking on the
AROSHWCf . . . (hardware configuration) icon:
2. Stop all AROS processes: Click Shutdown AROS and then
click Yes when prompted, “Do you really want to quit?”
3. The AROSHWCfg window lists the Quad T1 boards.
4. In the AROSHWCfg window, select the card that has been
moved by clicking on the PC slot number; then click Delete
to remove the card.
5. Click Add to add the moved card, in its new location, back
into the system.
6. In the configuration box that appears, click Find Next T1
Card.
The system should automatically locate the new T1 card.
7. If the new card is not found:
a. Open a Command Prompt window by clicking
Start → Programs → Command Prompt
b. Enter
blocate <Enter>.
The system displays a list of all cards. Locate the new
board by finding the PCI bus / PCI slot number
combination that is not listed in the AROSHWCfg
window.
c. Enter the PCI bus and PCI slot numbers in the New
Card window.
8. Enter the new PC slot number.
The Find Next T1 Card function automatically enters the
card type (Quad T1) and the new PCI bus and PCI slot
number.
9. Exit the AROSHWCfg the utility: Click Accept and then
OK.
10. Reboot the Controller: Click Start → Shut Down, select
Restart the computer?, and click Yes .
11. After all processes on the Controller have started, verify
that the new card is operational by checking the state of any
BTSs connected to the card and any PBX connections to the
card.
For details, see steps 19 and 20 on page 14–4.