
Installation Instructions
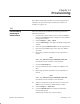
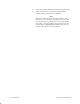
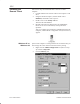
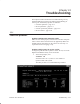
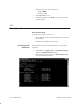
Table Of Contents
- Title page
- Contents
- About this manual
- Safety information
- Ch 1 - Introduction
- Ch 2 - Adding cards to the Controller
- Unpacking the System Controller
- Unpacking the picocells
- System Controller card configuration
- Adding cards to the System Controller (first steps)
- Jumper and DIP switch settings
- Attaching bus cables
- Adding cards to the System Controller (final steps)
- Configuring Controller cards
- Verifying the card configuration
- Ch 3 - Installing the Controller
- Ch 4 - Verifying the Controller configuration
- Ch 5 - Configuring the router
- Ch 6 - Testing picocells
- Ch 7 - Installing picocells
- Ch 8 - Connecting to external equipment
- Ch 9 - System testing
- Ch 10 - Installation inspection
- Ch 11 - Provisioning
- Ch 12 - Remote Client
- Ch 13 - Troubleshooting
- Ch 14 - Maintaining Quad T1 cards
- App A - Specifications
- App B - Standards compliance information
- App C - Part numbers
- App D - Updates and backups
- Index

1026209–0001 Revision B 12–2 Remote Client
Follow these steps to install the Remote Client on a remote
computer:
1. Load the AIReach OS software CD into the computer’s CD
drive.
2. Using the Windows Explorer, find the folder called
GUIInst, and double–click to open it.
3. Double–click on the setup.exe file.
This starts the InstallShield.
4. Read the instruction file displayed by the InstallShield;
follow the on–screen instructions; and respond to the
questions.
After you complete the installation, InstallShield reboots the
computer, and the AROS Configuration icon (shown below)
appears.
If the remote computer is running Windows 95 or Windows 98, you
must change the GUI’s initial environment memory setting:
1. Right–click the AROS Configuration icon (shown in step
4), and select Properties.
2. Click the Memory tab.
12.2
Installing the
Remote Client
Windows 95 or
Windows 98