
Installation Instructions

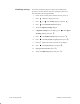

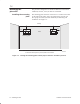
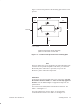
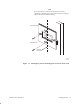
Table Of Contents
- Title page
- Contents
- About this manual
- Safety information
- Ch 1 - Introduction
- Ch 2 - Adding cards to the Controller
- Unpacking the System Controller
- Unpacking the picocells
- System Controller card configuration
- Adding cards to the System Controller (first steps)
- Jumper and DIP switch settings
- Attaching bus cables
- Adding cards to the System Controller (final steps)
- Configuring Controller cards
- Verifying the card configuration
- Ch 3 - Installing the Controller
- Ch 4 - Verifying the Controller configuration
- Ch 5 - Configuring the router
- Ch 6 - Testing picocells
- Ch 7 - Installing picocells
- Ch 8 - Connecting to external equipment
- Ch 9 - System testing
- Ch 10 - Installation inspection
- Ch 11 - Provisioning
- Ch 12 - Remote Client
- Ch 13 - Troubleshooting
- Ch 14 - Maintaining Quad T1 cards
- App A - Specifications
- App B - Standards compliance information
- App C - Part numbers
- App D - Updates and backups
- Index

1026209–0001 Revision B
Installing picocell 7–1
Chapter 7
Installing picocells
This chapter describes how to install a picocell at the permanent
site. It includes the following sections:
• Preparing for picocell installation – page 7–1
• Mounting the picocells – page 7–2
• Installing and connecting picocells – page 7–7
• Performing the frequency band scan – page 7–18
Install the scanning picocell first, and then the traffic picocells.
Follow the instructions in the AIReach OS Configuration Report
for specifications on picocell location, cable labeling and telco
block assignments.
Important: All T1 wiring must comply with TIA/EIA–568A and
TIA/EIA–606. (In Canada, must comply with CSA Standards
T528 and 529.)
CAUTION
Before removing or installing electronic
components, make sure static electricity
has been discharged from yourself and any
object that will contact the component.
Wear a new or recently tested anti–static
wrist strap and use an anti–static pad while
handling components.
Failure to follow these instructions could
result in damage to components.
Before you begin installing picocells, ensure that . . .
• The power supply for line power is mounted in the telco
room and correctly connected to the telco block.
• The T1 cables are punched down and correctly labeled on
the telco block.
• The power supply voltage to the picocell is –48 Vdc.
• The picocell location will not interfere with door clearances.
• The picocell will not be located in an inappropriate room
(for example: a room without air conditioning).
7.1
Preparing for
picocell installation