
User's Manual


Thuraya IP+ Satellite Modem User Guide 1
3500799-0001 rev A
Introduction
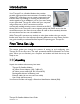
Your Thuraya IP+
is a Satellite Modem that provides
portable, high-speed data communications via satellite. Using
“Always On” technology, you can remain connected to the
Internet while only sending or receiving the data that you
need at speeds of up to 444kbits/s, just as if you were sitting
at your office desk. Thuraya IP+ works with your computer
using an Ethernet or Wi-Fi connection much like
commercially available wireless routers. Note that the Wi-Fi
Access Point in the Thuraya IP+ uses a separate subnet and DHCP server than the
wired Ethernet port. An internal router allows IP traffic to flow seamlessly between
the two subnets and out over the satellite link.
While Thuraya IP+ operates very similarly to other data modems that you may be
familiar with, there are a few important operating differences to note. Please read this
user guide carefully to understand all the aspects of operating your Thuraya IP+.
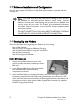
First Time Set-Up
This section guides you through the process of setting up and configuring your
Thuraya IP+ for the first time. The steps presented should be followed in the order
given. When you are finished, your computer and modem will both be set up and
ready to use.
Unpacking
Unpack the modem and accessory box items.
Thuraya IP+
Satellite Modem
AC Mains Power Adapter (100 – 240V AC)
AC Mains power cables (UK, EU, US and AUS)
Rechargeable Lithium Ion Battery pack
Ethernet cable (do not use cross-over cable)
User Guide (this document)
Your Service Provider will supply a Subscriber Identification Module (SIM).