
User Manual
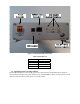
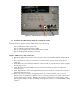
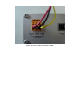
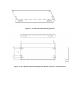
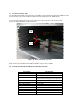
Table Of Contents

STEP 2: Antenna Cable Connection to TMG
There are 2 types of antenna connector on the TMG as shown on figure 5
1) There are 3 SMA type RF connectors for DVB only interface to antenna
2) There is 1 TNC type RF connector for GMR-1/DVB + 12 volt power for antenna
A. If one is going to connect TMG to antenna assembly. Use the 4 RF cables provided for
connection.
B. If the set up is for the TMG to be connected with lab equipment such as vector signal znalyzer
(VSA) or other signal source device (e.g. SMIQ). Please read following.
Installation Warning
TNC connector carries +12 volt DC power supply for antenna assembly. Before connecting TNC
connector to any VSA or signal source, please ensure a DC-block is installed at the TNC connector.
STEP 3: Connecting Ethernet Cable and USB Cable to TMG
Ethernet:
Refer to figure 5, connect user-provided standard Ethernet cable to the RJ45 Ethernet port on theTMG.
This allows 10-Base-T connection between User Device and TMG’s GMR-1 modem.
USB:
Refer to figure 5, connect user-provided standard USB cable to the USB port on the TMG. This allows
direct connection between the User Device and the TMG’s DVB receiver module.
Step 4: Mounting TMG Brackets in the Trunk
Mounting Bracket Information
Note: Use care when drilling through the body of the vehicle to avoid damage to critical items
The bracket is connected to the TMG with 4 screws. 2 Brackets come pre-installed on TMG unit.
Installation Instructions:
1. The mounting bracket should only be used for mounting the TMG in the trunk of a car.
2. Mount the mounting bracket onto a flat surface using at least 2 screws per bracket (screws not
supplied)