
User's Manual
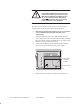
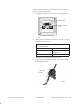
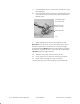
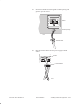
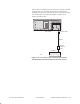
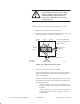
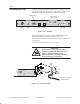
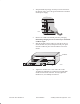
Table Of Contents
1027145–0001 Revision D Installing indoor hub equipment 6–25Hub installation
If you are installing a single–pole remote power–off switch,
use a single–pole, single–throw switch rated at 60 Vdc, 15
amperes (minimum):
Install jumper 1.
In place of jumper 2, wire the switch between the (–)
terminal from the rectifier and the (–) terminal from
the IDU chassis.
• If you installed a switch, follow steps 4 through 9 to test the
switch:
4. Place the remote power–off switch in the open position.
5. Replace the junction box cover.
6. Turn on the dc breaker.
7. Close the power–off switch. Confirm that the chassis is
receiving power.
8. Open the switch again. Confirm that the chassis is no longer
powered. If the switch does not operate correctly, turn the
rectifier breaker off and make sure the circuit is connected
as shown in figure 6-14.
9. If the switch operates correctly, leave it in the open position
with the breaker off.
Do not install the channel and control module (CCM) or
service–specific interfaces (SSIs) yet.
To test the IDU chassis and power supply, perform these steps
without a CCM or SSIs:
1. If the IDU chassis is dc powered, inspect the power supply
wiring to verify that the polarity is correct.
2. Power on the IDU—with no modules installed; then check
to make sure no breakers have tripped or fuses have blown.
If a breaker trips or fuse blows, be sure to troubleshoot
and correct the problem before proceeding.
Power–on inspection
and test