
User's Manual
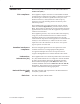
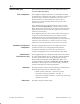
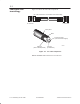
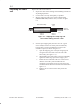
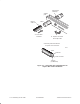
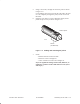
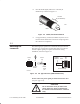
Table Of Contents
- Title page
- Contents
- About this manual
- Safety information
- Ch 1 - Installation summary
- Ch 2 - Prerequisites
- Ch 3 - Indoor equipment
- Ch 4 - Installing IFL cables
- Ch. 5 - Installing mast mounts
- Ch 6 - Installing ODUs
- Ch 7 - Commissioning the RT
- Ch 8 - Final steps
- Ch 9 - Troubleshooting
- Ch 10 - Maintenance
- App A - Acronyms
- App B - Standards compliance
- App C - Terminating the IFL cable
- Index

1027144–0001 Revision D Terminating the IFL cable C–5RT installation
5. Using a razor knife, carefully slit the outer jacket as shown
in figure C-4.
Cut around the cable; then cut from the cable end to the first
cut. Cut completely through the jacket, but do not cut into
the braid.
6. Using the razor knife or a pair of diagonal cutters, lift the
jacket and peel it away as shown in figure C-4.
Remove jacket.
hb016
1
2
5/8 inch
(16 millimeters)
Figure C-4 Cutting and removing the jacket
7. Check:
- Braid for nicked or broken strands
- Dielectric end for a straight cut
- Center conductor for nicks and a straight cut
If you see significant damage to the braid, dielectric, or
conductor, you must cut the cable and start over. (Start
with step 1.)