
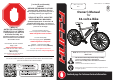
User Manual


34
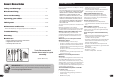
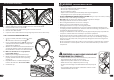
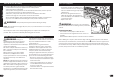
Drive Battery Replacement
A
C
E
D
B
STEPS:
1. Insert and turn Key fully Counter Clockwise before starting.
2. Pull top of Battery to the LEFT and out to remove from Mount.
3. Remove new Battery from packing. Make sure no packing remains around Slot and Plug
A
.
4. On bottom of Battery, align Slot and Plug
A
with Tab and Pins
B
on Battery Mount
and swing into place so that Battery
Notch
C
slides into top of Battery
Mount
D
.
5. With Battery fully in place, turn Key fully
Clockwise
E
to lock Battery in place.
6. Gently pull on battery to make sure it
does not come lose. Remove key and
keep in a safe place.
7. See Battery Charge section for Charging
instructions.
Maintenance
7
3
1
2
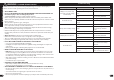
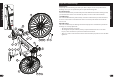
Owner’s Bicycle Identi cation Record
To determine the correct size of bicycle for the rider:
• Straddle the assembled bicycle with feet shoulder width
apart and at on the ground.
• There must be at least 1 inch (2.5 cm) of clearance
between the highest part of the top tube
and the
crotch of the rider with tires properly in ated.
• The minimum leg-length for the rider is the highest
part of the top tube plus one inch
.
• NOTE: See Assembly sections for Seat adjustment.
Fitting the Rider to the Bicycle
NOTE: This information is only available on the
bicycle itself.
Each bicycle has a Recovery Code stamped into the
frame. The Recovery Code
can be found on the
bottom of the crank housing as shown.
Write this number below to keep it for future refer-
ence.
If the bicycle is stolen, give this number and a de-
scription of the bicycle to the police. This will help
them nd the bicycle.
1
Recovery Code:
Purchase Date:
Model Name:
Introduction