
User Guide


Table Of Contents
- ELECTRIC HEATER COMPANY
- WARNING / CAUTION
- TABLE OF CONTENTS
- GENERAL DESCRIPTION
- CONSTRUCTION
- OPTIONS
- Low Water Cut-Off
- Dial Temperature and Pressure Gauge
- Vacuum Relief Valve
- A vacuum relief valve may be provided with the unit to reduce the risk of back siphonage and back pressure of the system. The valve will be shipped loose for in-line installation. Instructions for installation are provided with the valve.
- Electro-Mechanical Timer
- An electro-mechanical 7-day time clock with battery back-up may be supplied for specific timing operations. A set of instructions will be supplied with the timer.
- FINAL CHECKS
- CONSTRUCTION
- GENERAL DESCRIPTION
- Symptom
17
HEATING ELEMENT
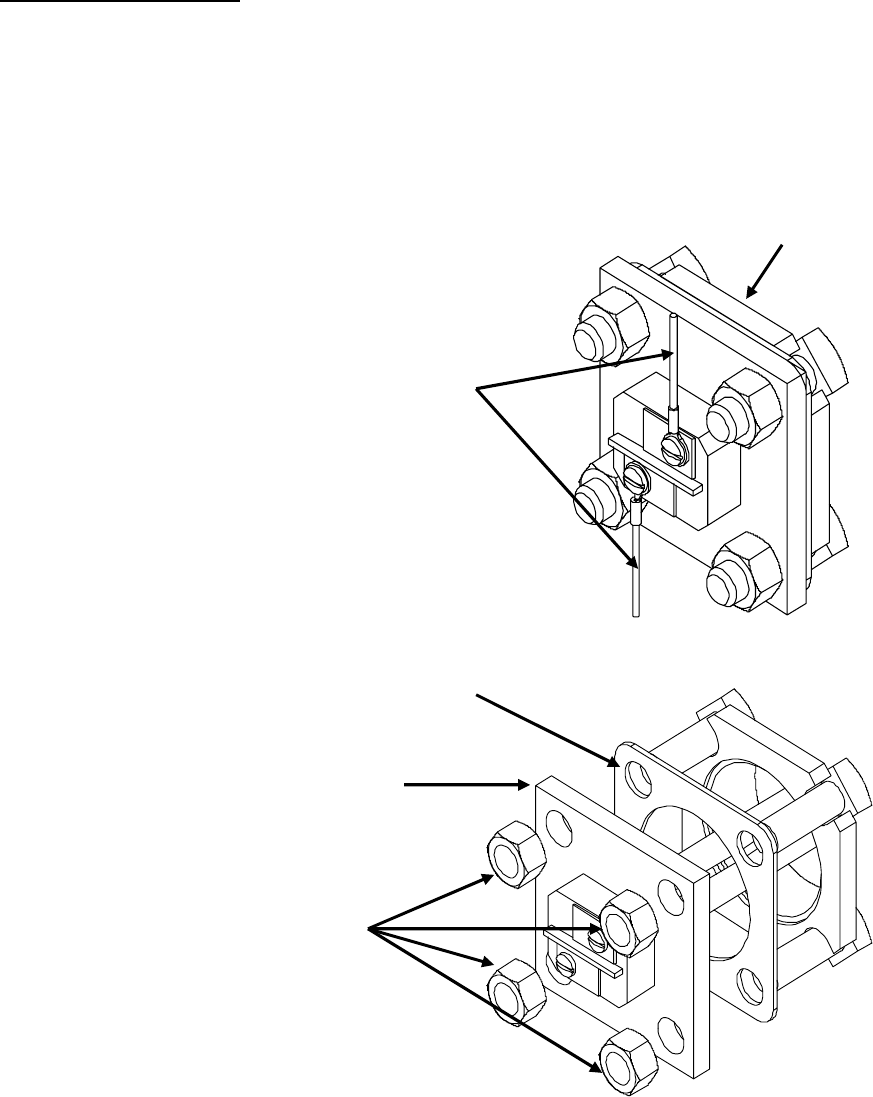
1. Disconnect power from unit.
2. Shut off incoming water supply.
3. Attach hose to drain connection.
4. Lift manual release lever on relief valve to let air into system or break union on outgoing
water line.
5. Drain water from tank.
6. Disconnect the wires from the heating element terminals.
Tank Flange
Wires
7. Remove the 3/8-16 nuts.
8. Withdraw element assembly and remove gasket.
Gasket
Element Assembly
Nuts
9. Install new gasket and insert new heating element.
10. Rewire element according to type of unit as shown below.
11. Fill tank and check around gasket for any leaks.