
Installation & Assembly
ASSEMBLY & INSTALLATION INSTRUCTIONS
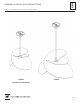
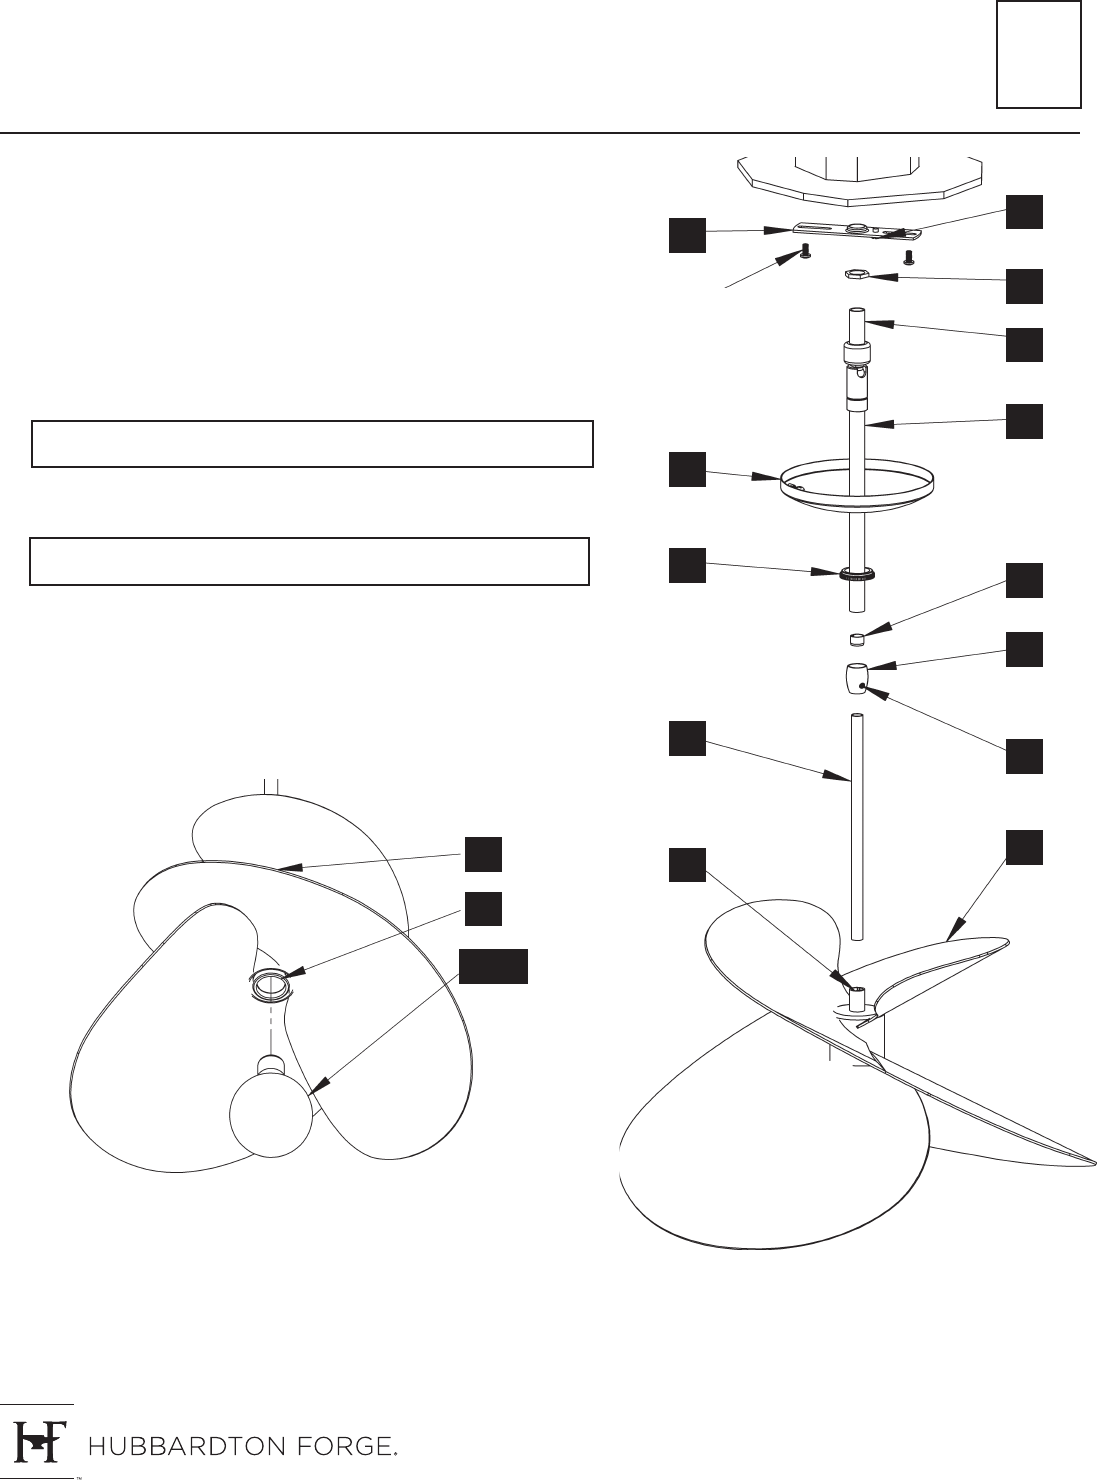
Hibiscus Pendants Small 139450 & Large 139455
A610
44702
C
B
MACHINE
SCREWS
D
F
E
I
G
H
A
J
K
L
M
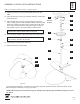
12. Tighten set screw (L) in clutch (K) rmly with hex wrench pro-
vided.
13. Using two machine screws (not provided), fasten the crossbar (B)
to the electric box.
14. Using suitable wire connectors (not provided) connect fixture
wires to supply (white to white and black to black). Attach a pigtail
lead to the crossbar ground screw (C). Holding canopy (E) close
to the ceiling connect all ground wires (bare copper or green to
bare copper or green). Push wires back into electrical box.
15. Push canopy (E) against ceiling and secure with canopy ring (F).
16. Install bulb (not provided) into socket (N).
17. Restore electricity at main breaker.
4 OF 4
CAUTION: MAKE SURE WIRE CONNECTORS ARE TWISTED
ON SECURELY AND NO BARE WIRE IS EXPOSED.
(Figure 1)
CAUTION: BE SURE NO WIRES ARE PINCHED BETWEEN
THE CANOPY (E) AND THE CEILING.
If you need further assistance, or nd that you are missing any parts, please contact the dealer from which you pur-
chased this product. We hope you enjoy your xture!
* Hubbardton Forge will not be liable for injury or damage caused by improper installation, lamping or use of
this xture.
N
A
BULB
(Figure 3)