
Setup and Install


Configuring HP WebQoS
Configuring WebQoS from the Management User Interface
Chapter 3 41
Starting the WebQoS Management User Interface
To start the WebQoS management user interface, follow these steps:
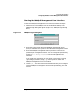
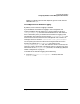
1. Double-Click on the WebQoS icon on the Windows desktop. The
WebQoS login dialog box appear (Figure 3-2, “WebQoS Login Dialog
Box”).
Figure 3-2 WebQoS Login Dialog Box
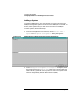
2. Enter the system name where the WebQoS management server
(SCO) is installed. This system is also called the management station.
3. Enter the WebQoS management station password. There is one
password per management station. You can change this password by
choosing File: Change Password from the management user
interface.
If you forget your password, you can specify a new one by running
/opt/webqos/install/setup -p on the system on which the
WebQoS management server is installed.
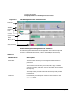
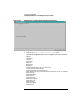
4. Choose [OK]. The user interface shown below allows you to configure
and use WebQoS to manage the service levels provided by your web
servers.