
- Hewlett-Packard Widescreen LCD Monitor User's Guide


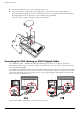


Table Of Contents
- Notational Conventions
- Product Features
- Safety and Maintenance Guidelines
- Setting Up the Monitor
- Unpacking the Monitor
- Installing the Monitor
- Assembling the cantilever base
- Unfolding the double-hinged monitor
- Preparing the cantilever-base monitor for wall-mounting
- Wall-mounting the double-hinged monitor
- Preparation
- Connecting the VGA (Analog) or DVI-D (Digital) Cable
- Connecting the VGA / DVI-I Cable (Select Models Only)
- Connecting the HDMI Cable (Select Models Only)
- Audio and Video Cables and Adapters
- Connecting the Audio Cable
- Connecting the USB Hub Cable (Select Models Only)
- Connecting USB Devices to the Monitor (Select Models Only)
- Connecting the Power Cable
- Cable Management
- Adjusting the Tilt
- Adjusting the Swivel
- Keyboard Parking
- Operating the Monitor
- CD Software and Utilities
- My Display Software (Select Models Only)
- Front-Panel Controls
- Using the On-screen Display (OSD)
- Selecting Video Input Connectors
- Identifying Monitor Conditions
- Adjusting Screen Quality
- Power-Saver Feature
- Ambient Light Sensor (Select Models)
- Task Light (Select Models)
- Webcam (Select Models)
- High-Bandwidth Digital Content Protection (HDCP)
- Operating the Digital Picture Frame Card Reader (Select Models)
- Preparing the Monitor for Shipping
- Troubleshooting
- Technical Specifications
- Agency Regulatory Notices
- Federal Communications Commission Notice
- Declaration of Conformity for Products Marked with FCC Logo, United States Only
- Materials Disposal
- Chemical Substances
- Canadian Notice
- Avis Canadien
- European Union Regulatory Notice
- Disposal of Waste Equipment by Users in Private Households in the European Union
- Japanese Notice
- Japanese Power Cord Notice
- Japanese Material Content Declaration
- Korean Notice
- EPA ENERGY STAR® Compliance
- HP Recycling Program
User’s Guide 3–1
3
Setting Up the Monitor
Unpacking the Monitor
1. Unpack the monitor. Make sure all contents are included. Store the packing box.
2. Turn off the computer and other attached devices.
3. Determine whether the monitor will be desktop mounted or wall-mounted. See “Installing the Monitor.”
4. Prepare a flat area to assemble the monitor. You may need a flat, soft, protected area for placing the monitor
screen-down while preparing it for installation.
5. You need a Phillips screwdriver for preparing the monitor for wall-mounting. You may need a straight-slot
screwdriver to secure some cables.
Installing the Monitor
You can install the monitor on a desktop or wall-mount it. Place the monitor in a convenient, well-ventilated location
near your computer.
Connect the monitor cables after you have installed the monitor.
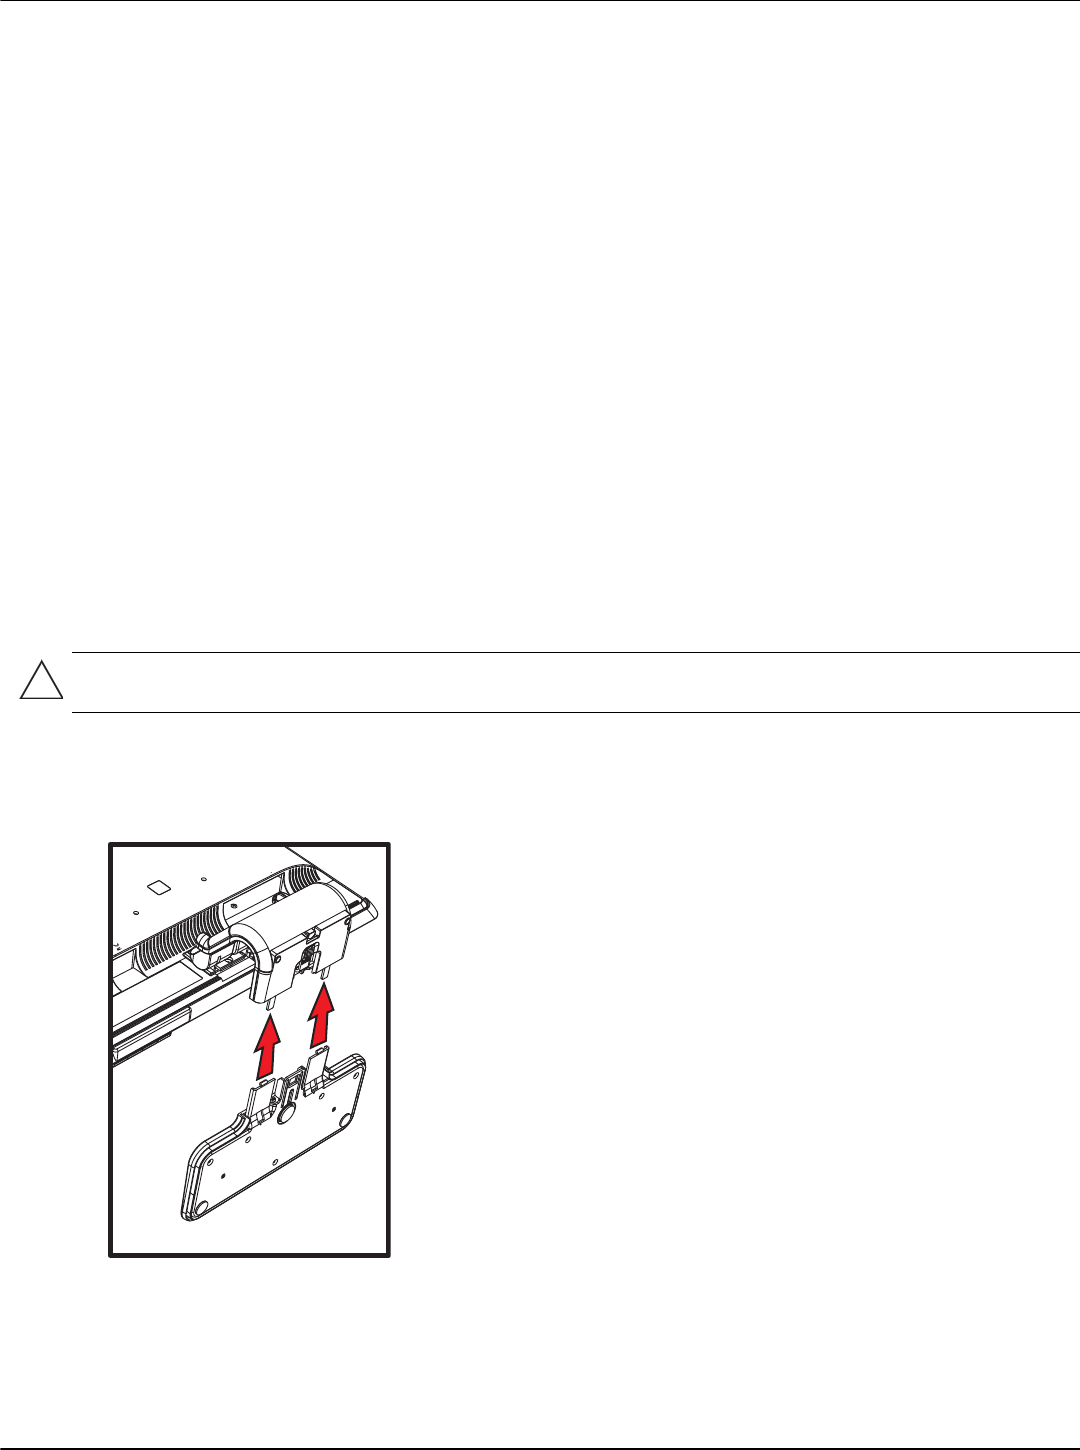
Assembling the cantilever base
1. Set the monitor screen down on a flat, soft, protected surface.
2. Align the neck with the monitor base.
3. Slide the base until it snaps in place. Make sure the base is securely locked in place.
Attaching the cantilever base
4. Lift the monitor to an upright position and place on a flat, stable surface.
CAUTION: The screen is fragile. Avoid touching or applying pressure to the LCD screen; doing so can cause
damage.