
Getting Started Guide


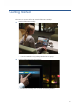

Getting Started
7
Installing the software
Before you install the Desktop client software, install the headset and camera according to the
instructions that came with the devices.
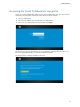
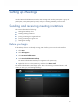
The first time you log in, you will see a message that Visual Collaboration Desktop is not
running.
1. Click Install Desktop to start the Installation Wizard.
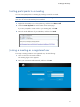
2. When prompted, click I Agree to accept the license agreement.
3. When installation is complete, click Finish to close the installer.
The Desktop icon appears in the system tray.
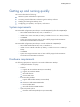
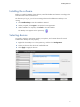
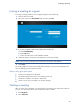
Selecting devices
You need to select the appropriate speaker, microphone, and camera devices for Visual
Collaboration Desktop to work properly.
1. Right-click the Desktop icon in the system tray, and then click Configuration.
2. Select your devices from the list of installed devices.
3. Click Apply to apply the devices.