
User's Manual


Virtual Connect domains 23
Deleting a domain
CAUTION: Deleting a domain returns all settings to factory default. This action cannot be
undone.
1. Power off all servers that are associated with profiles. See "Server Bay Status screen (on page 270)."
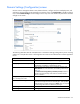
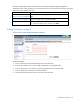
2. Navigate to the Domain Settings (Configuration) screen (on page 22).
3. If necessary, select the Remove all unencrypted keys and CSPs (zeroize) check box to zeroize all
unencrypted keys and CSPs.
When a module enters or exits FIPS mode, all unencrypted CSPs must be zeroized. The following CSPs
might exist on one or more VC-Enet modules: passwords in the user database, VC session keys, SSH
private key, SSL private key, iSCSI CHAP passwords.
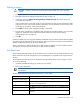
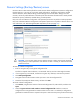
4. Click Delete. A domain name confirmation window is displayed.
5. Enter the name of the domain to be deleted. This should be the name of the domain you are currently
logged into, displayed in the Virtual Connect Domain Name box on the Domain Settings
(Configuration) screen (on page 22).
6. Click OK.
If deleting a domain that was using MAC addresses predefined by HP, the administrator should also update
the "Teaming" driver configuration file on the host OS. Otherwise, the driver reinitializes to the saved MAC
address predefined by HP and not the factory default value.
When a VCM domain is deleted, VCM resets VC 8Gb 24-Port FC Modules to a factory default condition.
This operation can take up to 50 seconds per VC 8Gb 24-Port FC Module.
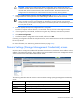
Auto-deployment
The auto-deployment feature allows for the configuration of a VC domain from a centralized location using
DHCP and TFTP to access the configuration script. Auto-deployment is supported only for single-enclosure
domains.
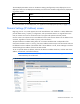
The Auto-Deployment Settings section on the Domain Settings (Configuration) screen (on page 22) allows
you to do the following:
• Use DHCP provided TFTP settings or provide your own settings.
• Start or stop a deployment.
IMPORTANT: Auto-deployment is not supported with an IPv6-only management network
environment.
The auto-deployment feature is disabled if the domain is in FIPS mode.
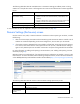
Task Action
Use DHCP provided settings
Select (enable) the Use DHCP Provided Settings check box.
Use user-defined TFTP settings
Clear (disable) the Use DHCP Provided Settings check box, and then specify the
TFTP server and configuration file.
Save changes
After you are finished making changes to the settings, click Apply.
Start deployment
Click Start if the button is enabled, and then enter Start in the confirmation
dialog box.
Stop deployment
Click Stop if the button is enabled, and then enter Stop in the confirmation
dialog box.