
User's Manual


Configuring an Array
HP Smart Array 641/642 Controller User Guide 5-13
HP CONFIDENTIAL
Writer: John Turner File Name: f-ch5 configuring an array
Codename: darkmatter - antimatter Part Number: 309311-001 Last Saved On: 11/6/02 4:17 PM
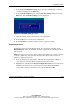
3. Exit from the previous screen, and then move the highlight to the logical drive. If
the controller has a battery-backed write cache, there should be an entry Disable
Cache in the right-hand panel, implying that the cache is enabled. If the entry is
Enable Cache, the cache is currently disabled; enable it.
4. In the Logical Configuration View panel, select the logical drive that you want
to migrate and then press the Enter key.
5. Select Drive Settings, and then press the Enter key.
6. Change the RAID level or stripe size shown on this screen.
Table 5-3: Supported Stripe Sizes for a Given RAID Level
Fault-Tolerance Level Supported Stripe Sizes (KB) Default (KB)
RAID 0, RAID 1+0 8, 16, 32, 64, 128, 256 128
RAID 5, RAID ADG* 8, 16, 32, 64 16
*Not all controllers support RAID ADG.
Table 5-4: Optimum Stripe Size for a Given Application
Type of Server Application Suggested Stripe Size Change
Mixed read/write Accept the default value
Mainly sequential read (such
as audio/video applications)
Use larger stripe sizes for best performance
Mainly write (such as image
manipulation applications)
Use smaller stripes for RAID 5, RAID ADG*
Use larger stripes for RAID 0, RAID 1+0
*Not all controllers support RAID ADG
7. Press the Esc key to accept the changes and begin migration.
You can check the progress of the migration at any time by pressing the F3 key
and then scrolling to the progress bar near the bottom of the screen.