
User's Manual
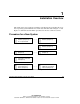


Installing the Hardware
2-2 HP Smart Array 641/642 Controller User Guide
HP CONFIDENTIAL
Writer: John Turner File Name: c-ch2 installing hardware
Codename: darkmatter - antimatter Part Number: 309311-001 Last Saved On: 11/6/02 4:05 PM
4. Unplug the AC power cord from the outlet, and then from the server.
5. Disconnect any peripheral devices from the server.
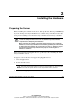
Installing the Smart Array Controller
1. Remove or open the access panel.
2. Select an available 3.3-V PCI or PCI-X slot.
3. Remove the slot cover or open the hot-plug latch. Save the retaining screw, if one
is present.
4. Slide the controller board along the slot alignment guide, and press the board
firmly into the slot so that the contacts on the board edge are properly seated in
the system board connector.
5. Secure the controller board in place with the hot-plug latch or retaining screw.
6. Continue by following the instructions given in “Connecting the Cables.”
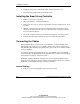
Connecting the Cables
Each peripheral that is connected to the server must have a unique SCSI ID value,
falling in the range from 0 to 15 (except ID 7, which is reserved for controller use).
The SCSI ID value determines the priority that is given to the device when it attempts
to use the SCSI bus.
On products that support hot-pluggable devices, the SCSI IDs for such peripherals
are automatically set. The IDs for non-hot-pluggable devices must be set manually by
using switches or jumpers on the device itself.
SCSI buses require termination on both ends to prevent signal degradation. In all
Compaq servers and storage systems, and the newer ProLiant systems, the controller,
SCSI cable, and backplane already provide this termination.
Internal Cabling
1. If the device is not hot pluggable, power down the system.