
Data Replication manager with Compaq Tru64 UNIX Logical Storage Manager
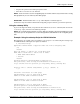
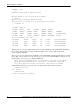

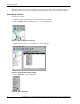
Table Of Contents
- Application Notes – Data Replication Manager with HP Tru64 UNIX Logical Storage Manager
- Application Notes Contents
- HP StorageWorks Technical Support
- Introduction
- DRM Configuration Variations
- Administering LSM
- Augmented Failover, Failback, and Role Reversal Procedures
- All Procedures Description
- Augmented Procedures with Scripts
- Chapter 6: Unplanned Site Failover with Full Failback Procedure
- Chapter 7: Resumption of Operations After Unplanned Loss of Target Site Procedure (Failsafe Mode)
- Chapter 8: Resumption of Operations After Unplanned Loss of Target Site Procedure (Normal Mode)
- Chapter 9: Short Planned Site Failover with Fast Failback Procedure
- Chapter 10: Extended Planned Site Failover With Full Failback Procedure
- Chapter 11: Resumption of Replication After Extended Planned Loss of Target Procedure (Failsafe M...
- Chapter 12: Unplanned Site Failover With Failback To New Hardware Procedure
- Chapter 13: Planned Site Role Reversal Procedure
- Augmented Procedures with Command Line Interpreter
- Chapter 2: Unplanned Site Failover with Full Failback Procedure
- Chapter 3: Resumption of Operations After Unplanned Loss of Target Site Procedure (Failsafe Mode)
- Chapter 4: Resumption of Operations After Unplanned Loss of Target Site Procedure (Normal Mode)
- Chapter 5: Short Planned Site Failover with Fast Failback Procedure
- Chapter 6: Resumption of Replication After Short Planned Loss of Target Procedure
- Chapter 7: Extended Planned Site Failover With Full Failback Procedure
- Chapter 8: Resumption of Replication After Extended Planned Loss of Target Procedure (Failsafe Mode)
- Chapter 9: Unplanned Site Failover With Failback To New Hardware Procedure
- Chapter 10: Planned Site Role Reversal Procedure
- Chapter 11: Disaster Recovery After Role Reversal Procedure

DRM Configuration Variations
8 Application Notes – Data Replication Manager with HP Tru64 UNIX Logical Storage Manager
CONTINUE ? [y/n]
< y >
Addition of disk dsk9b as dsk9b succeeded.
Add disk dsk10b to the root disk group as dsk10b:
<Return>
Addition of disk dsk10b as dsk10b succeeded.
Initialization of vold and the root disk group was successful.
# volprint -ht
dg rootdg 830202105.1025.tinker
At this point, the rootdg disk group has been created, and disks have been initialized and added to
the rootdg disk group. If you need to add more disks to the rootdg disk group, use the
voldiskadd command.
The /etc/inittab file has been modified to ensure that LSM is started automatically by a system
reboot. The /sbin/lsmbstartup entry in /etc/inittab starts the LSM vold and voliod
daemons. The /etc/inittab entries look like this:
lsmr:s:sysinit:/sbin/lsmbstartup -b </dev/console >/dev/console 2>&1 ##LSM
lsm:23:wait:/sbin/lsmbstartup -n </dev/console >/dev/console 2>&1 ##LSM
vol:23:wait:/sbin/vol-reconfig </dev/console >/dev/console 2>&1 ##LSM
You should verify that the vold and voliod daemons have been started as follows:
# /sbin/voldctl mode
mode: enabled
# /sbin/voliod
2 volume I/O daemons are running
DG NAME GROUP-ID
DM NAME DEVICE TYPE PRIVLEN PUBLEN PUBPATH
V NAME USETYPE KSTATE STATE LENGTH READPOL PREFPLEX
PL NAME VOLUME KSTATE STATE LENGTH LAYOUT ST-WIDTH MODE
SD NAME PLEX PLOFFS DISKOFFS LENGTH DISK-NAME DEVICE
dm dsk10b dsk10b simple 512 261120 /dev/rdisk/dsk10b
dm dsk2b dsk2b simple 512 261120 /dev/rdisk/dsk2b
dm dsk3b dsk3b simple 512 261120 /dev/rdisk/dsk3b
dm dsk9b dsk9b simple 512 261120 /dev/rdisk/dsk9b