
Data Replication manager with Compaq Tru64 UNIX Logical Storage Manager
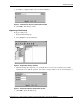
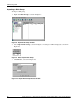
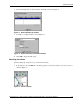

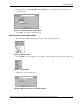
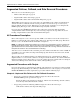
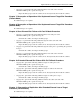
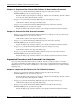
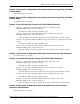
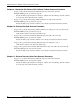
Table Of Contents
- Application Notes – Data Replication Manager with HP Tru64 UNIX Logical Storage Manager
- Application Notes Contents
- HP StorageWorks Technical Support
- Introduction
- DRM Configuration Variations
- Administering LSM
- Augmented Failover, Failback, and Role Reversal Procedures
- All Procedures Description
- Augmented Procedures with Scripts
- Chapter 6: Unplanned Site Failover with Full Failback Procedure
- Chapter 7: Resumption of Operations After Unplanned Loss of Target Site Procedure (Failsafe Mode)
- Chapter 8: Resumption of Operations After Unplanned Loss of Target Site Procedure (Normal Mode)
- Chapter 9: Short Planned Site Failover with Fast Failback Procedure
- Chapter 10: Extended Planned Site Failover With Full Failback Procedure
- Chapter 11: Resumption of Replication After Extended Planned Loss of Target Procedure (Failsafe M...
- Chapter 12: Unplanned Site Failover With Failback To New Hardware Procedure
- Chapter 13: Planned Site Role Reversal Procedure
- Augmented Procedures with Command Line Interpreter
- Chapter 2: Unplanned Site Failover with Full Failback Procedure
- Chapter 3: Resumption of Operations After Unplanned Loss of Target Site Procedure (Failsafe Mode)
- Chapter 4: Resumption of Operations After Unplanned Loss of Target Site Procedure (Normal Mode)
- Chapter 5: Short Planned Site Failover with Fast Failback Procedure
- Chapter 6: Resumption of Replication After Short Planned Loss of Target Procedure
- Chapter 7: Extended Planned Site Failover With Full Failback Procedure
- Chapter 8: Resumption of Replication After Extended Planned Loss of Target Procedure (Failsafe Mode)
- Chapter 9: Unplanned Site Failover With Failback To New Hardware Procedure
- Chapter 10: Planned Site Role Reversal Procedure
- Chapter 11: Disaster Recovery After Role Reversal Procedure
Administering LSM
Application Notes – Data Replication Manager with HP Tru64 UNIX Logical Storage Manager 15
2. Select the boxes for Clear Host ID and Force Import, as shown in Figure 17, then browse for
your disk group.
Figure 17: Force Import Disk Group window
3. Click OK to force import of the disk group.
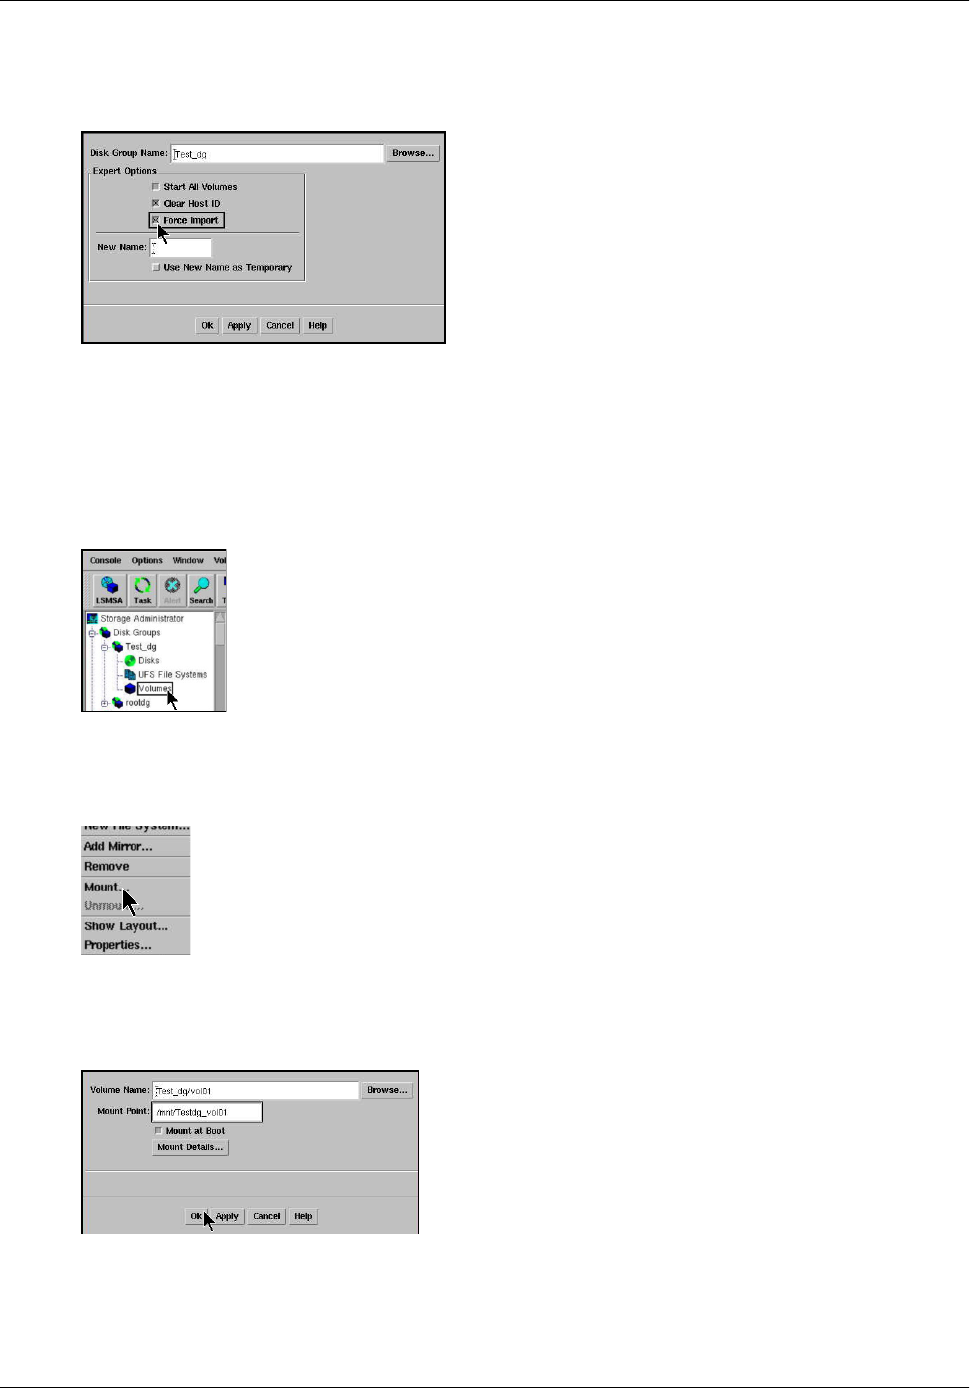
Mounting the Forced Import Volume
1. Right-click the Volumes folder (in the left-pane under the Disk Groups tree).
Figure 18: Mount window
2. Select Mount, as shown in Figure 19. You will see a display similar to the one shown in Figure 20.
Figure 19: Select Mount
3. Click OK, as shown in Figure 20.
Figure 20: Mount File System confirmation window