
Service manual
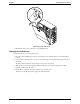
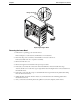

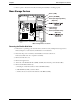
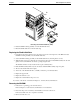
Table Of Contents
- 1 Specifications
- 2 Controls, Ports, and Indicators
- 3 Connector Pinouts
- 4 Maintenance Guidelines
- 5 Error Messages
- 6 Diagnostics
- 7 Maintenance and Troubleshooting
- Preventive Maintenance Procedures
- Troubleshooting
- Password Problems
- General Server Problems
- No lights are on and no error message appears
- Operating system or an application is not responding properly
- Server stops working (hangs)
- Server does not start (boot)
- Power Problems
- Video/Monitor Problems
- Configuration Problems
- Printer/Datacomm Problems
- Keyboard and Mouse Problems
- Flexible Disk Drive Problems
- CD-ROM Problems
- SCSI Problems
- Processor Problems
- Memory Problems
- Embedded Network Interface Card Problems
- Network Interface Card (Installed) Problems
- 8 Parts and Illustrations
- 9 Remove/Replace Procedures
- Introduction
- Covers
- Front Bezels
- Status Panel Assembly
- Mass Storage Devices
- Removing the Flexible Disk Drive
- Replacing the Flexible Disk Drive
- Removing the CD-ROM
- Replacing the CD-ROM
- Removing a Backup Tape Drive
- Replacing a Backup Tape Drive
- Removing a Hard Disk Drive (Tray Mounted)
- Replacing a Hard Disk Drive (Tray Mounted)
- Removing a Hard Disk Drive (Drive Cage Mounted)
- Replacing a Hard Disk Drive (Drive Cage Mounted)
- DIMMs
- Processor
- Accessory Boards
- Power Supply
- Battery
- Chassis Fan
- System Board
- Index
Chapter 9 Remove/Replace Procedures
79
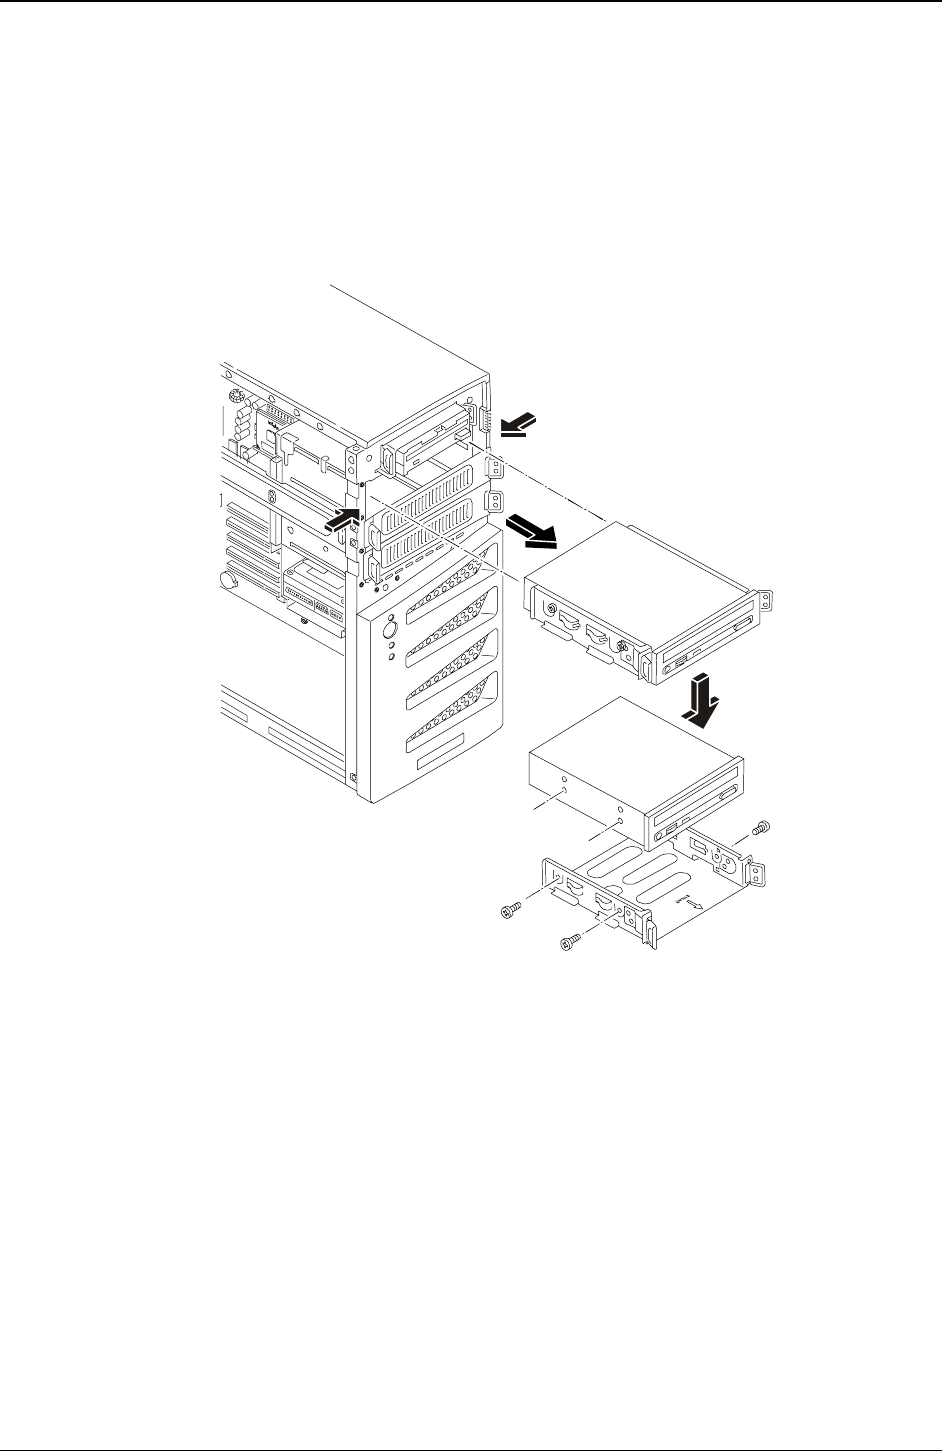
4. Remove the upper bezel.
5. At the rear of the CD-ROM, carefully disconnect the power and data cables.
6. Remove the CD-ROM by:
a. Pressing in on both release tabs to release the CD-ROM tray assembly.
b. Pull the CD-ROM assembly out of the chassis.
c. Remove the four screws, two from both sides of the CD-ROM tray.
7. Place the CD-ROM in an anti-static bag.
A
B
C
Removing the CD-ROM
Replacing the CD-ROM
1. Remove the CD-ROM from the shipping container.
2. Make any settings required by the CD-ROM documentation (primary or slave, etc.)
The CD-ROM is configured as the master device, unless a third HDD is installed, which should be
configured as the master device and the CD-ROM would be changed to the slave device.
3. If not already mounted, place the CD-ROM into the CD-ROM tray and secure it using the four screws.
4. Guide the CD-ROM tray into the chassis opening, with the cable connectors of the CD-ROM toward the
rear of the chassis.
The first CD-ROM is only mounted in the second shelf.
5. Push the CD-ROM tray all the way into the chassis until the CD-ROM tray snaps into place.
The two release tabs should click when in place.
6. At the rear of the CD-ROM, carefully connect the power and data cables.