
- Hewlett-Packard Computer Drive User Manual

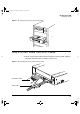
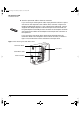

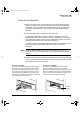
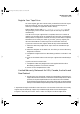
Table Of Contents
- Internal Drives—Installation Overview
- Contents
- Product Details
- Installing an “i” Model Drive (internal)
- Before You Start: Check the Contents of the Box
- Before You Start: Check System Prerequisites
- Step 1: Check the Drive’s SCSI ID
- Step 2: Set the Configuration Switches (UNIX Systems Only)
- Step 3: Prepare the Mounting Bay
- Step 4: Attach Mounting Rails
- Step 5: Install the Drive
- Step 6: Attach Power and SCSI Cables
- Step 7: Secure the Drive
- On Completion
- Installation Troubleshooting
HP SureStore DAT
Installation Guide
1-18
2 Attach a spare SCSI cable to the SCSI connector.
If you are using an existing SCSI cable, simply attach the drive to a spare
connector on the computer’s SCSI ribbon cable, as shown in figure 1.12.
DAT8i and DAT24i drives only: If your computer has wide SCSI, use the
supplied 50-to-68-pin adapter to connect the tape drive to the SCSI bus.
Plug the adapter into the 68-pin SCSI connector on the computer and then
connect the SCSI cable from the adapter to the 50-pin SCSI connector on
the tape drive.
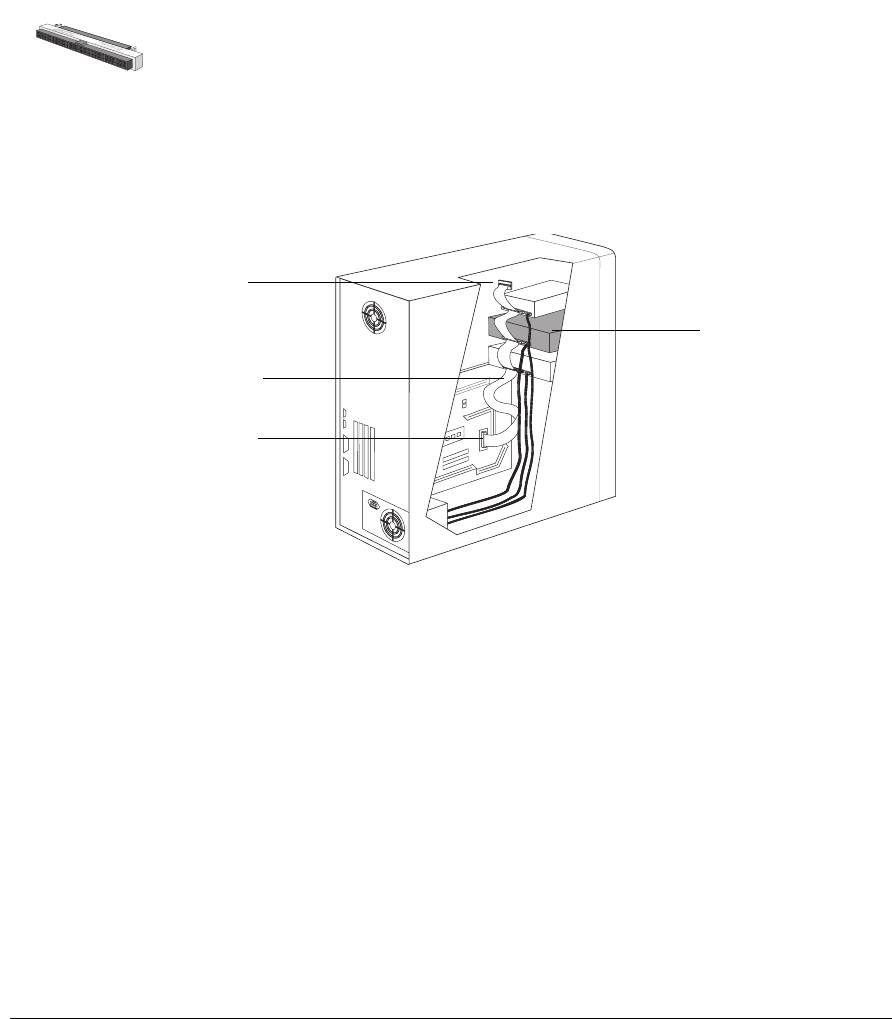
If you are using a new SCSI cable, attach the end farthest from the
terminator block to the computer’s internal SCSI connector, as shown in
figure 1.13, and attach one of the connectors to the tape drive.
Figure 1.13 Attaching the SCSI ribbon cable
Tape drive
SCSI ribbon cable
SCSI connection
Terminator block
Dat-int.bk Page 18 Wednesday, May 26, 1999 10:46 AM