
- Hewlett-Packard Computer Drive User Manual

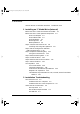
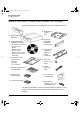
Table Of Contents
- Internal Drives—Installation Overview
- Contents
- Product Details
- Installing an “i” Model Drive (internal)
- Before You Start: Check the Contents of the Box
- Before You Start: Check System Prerequisites
- Step 1: Check the Drive’s SCSI ID
- Step 2: Set the Configuration Switches (UNIX Systems Only)
- Step 3: Prepare the Mounting Bay
- Step 4: Attach Mounting Rails
- Step 5: Install the Drive
- Step 6: Attach Power and SCSI Cables
- Step 7: Secure the Drive
- On Completion
- Installation Troubleshooting
HP SureStore DAT
Installation Guide
1-2
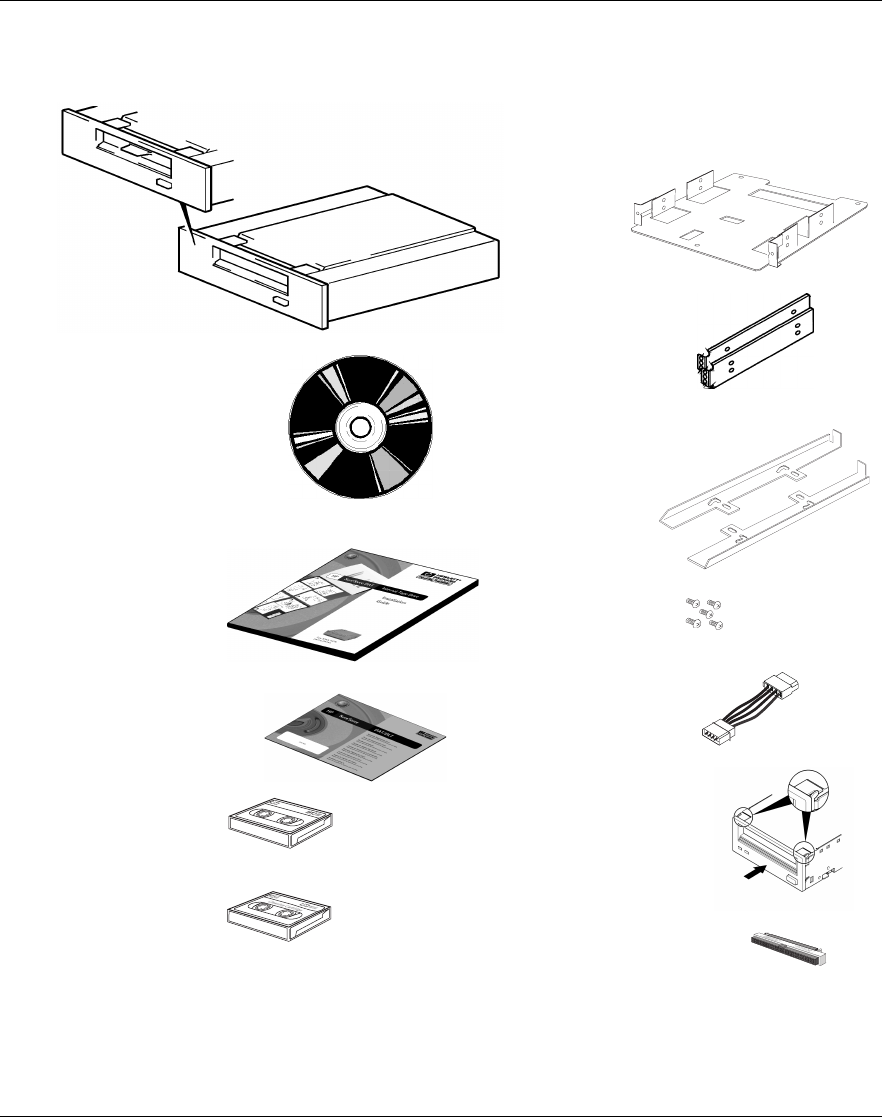
Before You Start: Check the Contents of the Box
The following equipment is supplied with your HP SureStore DAT drive.
If anything is damaged or missing, contact the delivery company or your
supplier. Spare jumpers for the drives’ SCSI ID switch may also be
supplied.
❑ HP SureStore
DAT drive
❑ HP NetServer
L- s e r i e s
tray
❑ Compaq rails
(with DAT8i,
DAT24i and
DAT40i
models only)
❑ Cleaning cartridge
❑ DDS-format
data cartridge
❑ Warranty Registration
Card and label
❑ HP Vectra/
Kayak/Brio/
NetServer
E-series rails
❑
Installation Guide
(Please discard
unneeded
languages
in recycling bin.)
❑ Set of four
screws (+ one
spare)
❑ Power
extension
cable
❑ 5¼ to 3½-inch
conversion kit
❑ 50-to-68-pin
adapter
(not for use
with DAT40 drives)
❑
HP SureStore Tape
CD-ROM containing:
• HP TapeAssure software
• TapeAlert utility
• Drivers
• Backup software
• HP Tape Tools
• Electronic
User’s Guide
• Media and accessories
information
Dat-int.bk Page 2 Wednesday, May 26, 1999 10:46 AM