
User guide


To run custom tests:
1. Ensure that you are viewing the physical library. From the View menu or in the Managed
Views area of the LMC, select the name of the physical library.
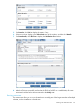
2. Select Tools→Library Diagnostics→Verification Tests.
3. On Verification Tests, click Custom from the Select Test drop-down list.
The Select Sub-test field defaults to the Library Alignment sub-test and cannot be changed.
4. Click Start.
5. If prompted to take the library offline, click Yes.
The Attention dialog box appears.
6. Select the number of the module and racks where the you want to perform the tests.
7. Click Finish.
The test progress appears in the Verification Tests window. After the test is complete, the test
name and results summary display in the Test Results area of the window.
8. Click Reports to view detailed test results.
Understanding the verification test inventory
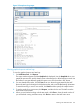
The verification tests generate inventory lists that provide specific information about the library
configurations. Inventory lists for the library, drives, and blades are available. On the Verification
Test window, select the type of inventory list that you want to see (Library, Drive, or Blade).
The results of all sub-tests are displayed on the window after each individual test is completed. To
understand the results, see “Test results” (page 153).
Library inventory
This inventory list provides the following statistical information:
• Library Serial Number
• Library Firmware Version
• Library WWN Base
• Power Supply Count
• IEX Count
• LSC Count
• Frame Count
• CMB Count (Control Management Blade)
• EEB Count
• MCB Count (Management Control Blade)
• LMD Count
• LGR Count
• For each EEB: EEB App Fwr Version, EEB Serial Number, and EEB Location
• LMD Serial Number
• Frame Serial Number
• Frame Location (for example "in Module 1")
• For each power supply: Power Supply Serial Number and Power Supply Location
• For each CMB: CMB App Fwr Version, CMB Boot Fwr Version, CMB PIP Fwr Version, CMB
Serial Number, and CMB Location
152 Maintaining the library