
User's Manual

64 Configuring FSE
• DriveIndex
• Capabilities
• Host
• ControlDevice
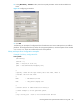
IMPORTANT: You need to assign unique DriveIndex values to the FSE drives in the ascending
order, starting with the value 1 for the first FSE drive you add to the FSE system.
For configuration examples, see ”Library and tape drive configuration examples” on page 65. You will
configure your media pool according to your drive configuration.
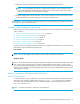
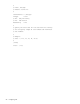
5. Add the new FSE library to the FSE implementation. LibraryCfgFileName is the name of the local
copy of the FSE library configuration template:
Once the library is configured, a new Library Agent is started. Media that are physically located in the
library are added to the FSE system automatically, but they do not get assigned to the media pools yet.
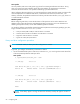
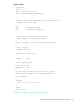
6. Add the new FSE drive to the FSE implementation. DriveCfgFileName is the name of the local copy
of the FSE drive configuration template:
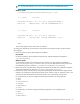
To configure an FSE library and an FSE drive using the FSE graphical user interface, proceed with the
following steps:
2. Start an interactive session with the FSE Management Console client.
For details, see section ”Using the FSE Management Console for configuring resources and policies”
on page 42.
3. If not already connected, choose the online operational mode and connect to the FSE Management
Console server.
For details, see section ”Choosing online operational mode” on page 43.
4. Right-click the container Libraries, click New, and then click Manual.
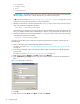
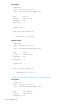
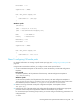
5. In the [ New Library ] - Creation window, enter the required parameter values into the available text
fields.
Figure 14 Configuring an FSE library
6. Click OK.
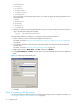
7. Right-click the container Drives, click New, and then click Manual.
fselibrary --add LibraryCfgFileName
fsedrive --add DriveCfgFileName