Windows Server 2003 HP StorageWorks EVA Fast Recovery Solution administration guide EVA4000 EVA6000 EVA8000 product version: 02.01.
© Copyright 2005 Hewlett-Packard Development Company, L.P. All rights reserved. Hewlett-Packard Company makes no warranty of any kind with regard to this material, including, but not limited to, the implied warranties of merchantability and fitness for a particular purpose. Hewlett-Packard shall not be liable for errors contained herein or for incidental or consequential damages in connection with the furnishing, performance, or use of this material.
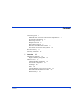
Contents About this guide 7 IMPORTANT: firmware and software dependencies Prerequisite information 8 HP storage web site 8 Helpful web sites 8 HP technical support 9 HP sales and authorized resellers 9 Document conventions and symbols 10 Revision history 11 Warranty statement 12 1 Contents 7 Overview 15 FRS feature summary 16 High availability using FRS 16 FRS overview 17 Additional FRS capabilities 18 Functional components 18 Exchange 20 FRS 20 Volume Shadow Copy Service (VSS) 21 HP VDS/VSS Hardware Pr
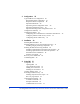
2 4 Configuration 25 Typical FRS server configuration 26 Required hardware components 27 Required software components 28 Important limitations 29 Important general configuration notes 29 Important performance issues 30 Important Exchange 2003 configuration notes 30 Configuration summary 31 Configuration details 32 Configuring the Command View workstation and software Configure production and recovery servers 33 Configuring the EVA disk array 34 3 Installation 39 Installing HP VSS HWP 40 Installing FRS o
Troubleshooting 75 Troubleshooting 76 Checking logs 76 Troubleshooting checks 76 FRS error messages 78 Maintenance 78 Recovery 79 Terminating processes 80 Glossary Index Contents 81 85 5
HP StorageWorks EVA Fast Recovery Solution for Windows Server 2003: Administration Guide
About this guide This guide provides information about configuring and using HP StorageWorks EVA Fast Recovery Solutions (FRS) in a Microsoft Windows Server 2003 environment running Exchange 2003. FRS enables quick recovery of Exchange storage groups. FRS combines LUN copy creation and database recovery features for use with HP StorageWorks EVA disk arrays.
Prerequisite information The instructions in this guide are intended for system administrators who have the following skills and knowledge: • A background in direct access storage device subsystems and their basic functions • Familiarity with EVA and related disk array management software such as CommandView EVA • An understanding of VSS installation and configuration of the recovery volumes within VSS • Familiarity with the Windows Server 2003 operating system • Familiarity with Exchange 2003 administratio
HP technical support In North America, call technical support at 1-800-633-3600, available 24 hours a day, 7 days a week. Outside North America, call technical support at the location nearest you. The HP web site lists telephone numbers for worldwide technical support at: http://www.hp.com/support. From this web site, select your country.
Document conventions and symbols Table 1. Document conventions Convention Element Blue text (Figure 1) Cross-reference links Bold Menu items, button names, key names, tab names, and group box names Italics Text emphasis and document titles Blue underlined sans serif font (www.hp.com) Web site addresses Caution Indicates that failure to follow directions could result in damage to equipment or data. Warning Indicates that failure to follow directions could result in bodily harm or death.
Revision history July 2005 About this guide New EVA FRS manual 11
Warranty statement HP warrants that for a period of ninety calendar days from the date of purchase, as evidenced by a copy of the invoice, the media on which the Software is furnished (if any) will be free of defects in materials and workmanship under normal use. DISCLAIMER. EXCEPT FOR THE FOREGOING AND TO THE EXTENT ALLOWED BY LOCAL LAW, THIS SOFTWARE IS PROVIDED TO YOU “AS IS” WITHOUT WARRANTIES OF ANY KIND, WHETHER ORAL OR WRITTEN, EXPRESS OR IMPLIED.
LIMITATION OF LIABILITY.
HP StorageWorks EVA Fast Recovery Solution for Windows Server 2003:
1 Overview This chapter presents a technical overview of the HP StorageWorks Fast Recovery Solution (FRS) and explains how it operates with Microsoft’s operating system, VSS service, and applications as well as HP StorageWorks Hardware Providers. When you have read this chapter, you should have a functional understanding of FRS that will prepare you to install it and get it working.
FRS feature summary HP StorageWorks FRS provides these features: • Supports HP StorageWorks EVA disk arrays • Provides fast recovery of large Microsoft Exchange 2003 storage groups • Minimizes downtime from an Exchange corruption • Independently recovers Exchange storage groups • Supports multiple instances of production Exchange 2003 servers from a single FRS server (and a single Command View workstation) • Supports Microsoft Cluster Services • Includes Command Line Interface (CLI) feature for FRS copy cre
FRS overview FRS is a Windows server tool designed to enable fast recovery when an Exchange storage group maintained on an HP disk array becomes damaged. (1) Use Production Server to store production data on array primary volume. Disk Array (3) In the event of production data damage, restore primary data from the secondary data using the FRS GUI on the Recovery Server. Store Primary Production Server w/FRS Copy (2) Use FRS GUI on Recovery Server to copy production data to secondary array volume.
Additional FRS capabilities FRS can create and maintain copies of storage groups or databases for multiple production servers. The FRS user interface allows Exchange instances to be added or deleted from FRS management at will. FRS supports Microsoft clustering. Without compromising the cluster or taking it offline, FRS provides quick database recovery. Database integrity checking is included in FRS.
Production Server Management MS Exchange Application(s) HP FRS Management Provider Application(s) Recovery Server Management HP FRS GUI Application(s) Microsoft Volume Shadow Copy Service HP EVA VSS Hardware Provider Hardware Provider(s) Disk Array Array Management Command Application(s) Device Overview 19
Exchange Exchange runs on the Producton Server and writes data to primary disk array volumes. FRS protects Exchange by creating and managing shadow copies of Exchange storage groups. Software components called “writers” interface with Exchange to coordinate volume shadow copy creation. Some operating system writers come with Windows, while others, such as the Exchange writer, come with the application software.
can use the FRS GUI to restore the production volumes from the most recent data copy or another point-in-time copy on the recovery volumes. Volume Shadow Copy Service (VSS) Microsoft’s VSS manages creation and maintenance of shadow copies of production data for backup and recovery. This service works under the control of the FRS interface and the Windows OS file system services.
VSS process flow The following steps show the VSS process flow: 1. A Requestor application (FRS) initiates a Volume Shadow Copy. 2. FRS requests that the Volume Shadow Copy service create a shadow copy of a selected set of storage groups. 3. VSS tells the Writer and application to prepare for a shadow copy. The Writer reports which LUNs to copy, flushes cache, and holds I/O. 4. VSS tells the disk array through HP HWP to create a shadow copy of the production storage volume. 5.
HP VDS/VSS Hardware Providers Windows Server 2003 sees, partitions, mounts, and manages file systems on the disk array using its own software providers. HP’s Hardware Providers extend the array management capabilities of Windows and its applications to include functions normally performed using the disk array’s proprietary control software. These functions include managing disk array LUNs and ports and performing volume copy operations.
HP StorageWorks EVA Fast Recovery Solution for Windows Server 2003: Administration Guide
2 Configuration This chapter explains how to configure the servers and the disk array before you install FRS. If you have not read Chapter 1 Overview to understand how FRS works, HP recommends that you do so before attempting to install and use FRS.
Typical FRS server configuration The following figure shows a typical FRS configuration. Note that any firewall must be open between the FRS servers and the Command View server. Anything that slows down access to the CV server will cause VSS timeout failures.
Required hardware components • HP StorageWorks Disk Array: EVA disk array 4000/6000/8000 with a Windows workstation running Command View EVA. • Production Server with Windows Server 2003 Enterprise Edition. This server runs Exchange and manages storage and retrieval of application data on the production volumes of the array. Server specifications must meet minimum Microsoft OS requirements. • Recovery Server with Windows Server 2003 Enterprise Edition.
Required software components IMPORTANT NOTE: The right combination of software versions is crucial to configuring a working system. Refer to the README file accompanying FRS for information about compatible software versions.
• KB903650 Extended maintenance mode fix for clusters • KB831112 VDS update http://support.microsoft.com/kb/831112 • KB887827 VSS update 2 http://support.microsoft.com/?kbid=887827 • KB891957 VSS hotfix http://support.microsoft.com/?kbid=891957 • KB892514 Exchange hotfix http://support.microsoft.com/?kbid=892514 • KB898790 Volume mount point hotfix for clusters http://support.microsoft.com/?kbid=898790 Important limitations • FRS supports only basic disk configuration, not dynamic disks.
Important performance issues Take steps to prevent these issues which can affect FRS performance: • Excessive traffic on the Ethernet LAN. • Viruses that slow down network traffic. • A firewall that slows traffic between the servers hosting FRS and the CV server. Any firewall must be open between these systems. Important Exchange 2003 configuration notes FRS works within the limits of Exchange 2003.
Configuration summary Before you install FRS as explained in the next chapter, you must configure the Exchange production server(s) the FRS recovery server(s), and the array as follows: • Install and configure production server(s) and recovery server(s) with Microsoft Windows Server 2003 Enterprise Edition with SP1. Install any required Microsoft quick fixes (QFEs) also. • Download JRE 1.4.2 or later from Sun and install on all FRS servers.
Configuration details Configuring the Command View workstation and software Configure the Command View workstation as explained below: 1. Ensure an ethernet LAN connects the FRS servers to the CV station. If you use a firewall, make sure it is open between the CV and FRS servers. Important: Ensure this network is listed first in the Network Connections control panel Advanced Settings window. If you change settings in this panel, reboot the CV station so they take effect. 2.
Configure production and recovery servers The production server hosts Exchange and manages the production volumes on the disk array where production data is stored. The recovery server hosts the FRS GUI and manages the array recovery volumes where snapclones are stored. Configure the servers as follows: Install Windows OS and Microsoft quick fixes 1. If it is not already present, install the Windows Server 2003 OS with SP1 on the host according to Microsoft’s installation instructions.
Configuring the EVA disk array The following configuration steps are required in order for the disk array to recognize the FRS production and recovery servers. This procedure also explains how to create disk groups for the recovery snapclones. 1. Log into Command View as an administrator (the default administrator user name and password is administrator). Adding FRS production and recovery hosts 2.
Adding disk groups Add a snapclone disk group using the steps below. Exchange also requires separate disk groups for data and logs. 4. Click the Disk Groups folder in the left panel. The Disk Groups Properties window displays. 5. Select the + next to the Disk Groups folder to expand Disk Groups.
6. Click Create disk group to begin creating a new disk group. 7. Enter a name for the new disk group, and click Advanced options.
8. Select a disk type, enter the number of disks to use for this disk group, and click Next step. 9. Select a drive failure protection level, and click Next step.
10. Accept the occupancy alarm level and select Finish. 11. A message indicates the disk group was added, and the new group appears in the left panel. Click OK. 12. Repeat the previous steps as required to add the data and log disk groups.
3 Installation This chapter covers installing, uninstalling, and licensing FRS. You must use Administrator privileges for all hardware and software to perform these tasks. Before you install FRS, you must complete the server and array configuration tasks presented in Chapter 2. If you have not yet done so, go to Chapter 2 and complete those tasks now. Then return to this chapter and follow the installation instructions.
Installing HP VSS HWP Install HP’s VSS Hardware Provider on each production and recovery server according to the HP StorageWorks HWP Administration Guide.
Installing FRS on recovery and production servers FRS is required on all servers participating in FRS. This includes the recovery server and all production servers. For example, if one FRS recovery server will host two Exchange 2003 servers, you must install FRS on all three servers. The installation steps for each production or recovery server are nearly identical, except for the Custom Setup window: 1. Download FRS from the hp.com web site or open the FRS CD and launch the ISScript8.Msi file.
6. Launch the HP StorageWorks Fast Recovery Solution.msi file. The installation wizard opens. 7. Click Next. The Custom Setup window opens. 8. Choose Change... to select a directory where the program will be installed, or use the default location shown under Install to:. 9. Select the type of server software you want to install: To install on a PRODUCTION server: Click the Production Server drop down menu, and select “This feature will be installed on local hard drive”.
10. Click Next. 11. Click Install. Installation begins. 12. When installation completes, click Finish. 13. Repeat the installation on all additional servers participating in FRS. Be sure to select the correct server icon each time and to deselect the unwanted icon so that it is marked with an “X”. Installing integrity checking components For Exchange integrity checking to work, you must copy the Exchange eseutil.exe and ese.dll files to the c:\hpfrs directory on the recovery server.
Enabling the FRS license using AutoPass FRS offers a free trial license period of 60 days. When the trial period is over, you must install a permanent license using AutoPass within the FRS GUI in order to continue using FRS. The procedure for starting the permanent licensing process is different depending on whether your trial license has already expired or not. Use one of the two procedures below to install the permanent license.
Permanent license installation Important: If you have multiple FRS instances, be ready to import all license passwords for all instances in one session. If you quit AutoPass while some licenses are still without passwords, all licenses will fail, and AutoPass will have been overwritten and disabled by the partial license file. Use the following procedure to install the permanent license(s): 1.
4. Click the password file in the display to highlight it (as shown above). 5. Click Import to import the selected password file. The message below indicates a successful password import.
6. Click OK. This completes installation of the license password. Important: If you need to install multiple licenses, you must repeat this process for each license password. It is not possible to import multiple passwords at one time. Also, be sure you have imported all licenses before closing AutoPass. If some licenses are left without passwords, all licenses will fail. Instance count check If you are running too many instances of FRS for the license you own, you may receive a warning message.
Recovery server XML files FRS stores the recovery volume information in the form of XML files. By default these files are created in the install directory. It is not necessary to change the location of the XML files, but should you wish to do so, you can place these files in a different directory.
Uninstalling FRS You can uninstall FRS in one of three ways: by using the FRS CD, by using the Uninstall FRS shortcut, or by using the Windows Add/Remove Programs feature in the Control Panel. With each method, the uninstall script prompts you to remove FRS. To uninstall FRS with the CD: Open the FRS CD. Click setup.exe to launch the uninstall script and follow the prompts.
4. Click Remove to launch the uninstall script. A confirmation window asks “Are you sure...” 5. Click Yes to remove FRS from the server. The removal process takes a few minutes.
4 Using FRS The following items are explained in this chapter: • Using FRS • Creating shadow copies • Executing an FRS recovery • Using the command line interface Using FRS 51
Using FRS You operate FRS from the graphical user interface that was installed on the recovery server when you installed FRS. The following pages explain how to open and use the FRS GUI to add and delete servers, make shadow copies of production storage groups and restore production storage groups and databases from shadow copies. Opening FRS 1. On the recovery server, click Windows Start, and select Programs. 2. Click Hewlett-Packard, click HP StorageWorks Fast Recovery Solution, and click HP FRS GUI.
Using the main window The following example shows the FRS main window after two Exchange 2003 server instances have been added. Adding server instances is explained later in this chapter.
To expand a server instance: 1. Click the plus symbol (+) next to a server instance in the left panel of the main window. This displays the detail views of the production storage groups and/or databases associated with that server instance. 2. Click a storage group or database to display the location and path of the LUN where it is stored in the right panel of the main window.
Adding server instances Add Exchange production server instances whose storage groups or databases you want FRS to be able to copy and restore. The servers must have FRS installed on them for the GUI to recognize them: 1. On the FRS main window, click the File pulldown menu and click Add Exchange Server Instance. The Add Server Instance window opens. 2. Enter the instance name in the “Enter Server Instance” box and click OK. The FRS main window opens and shows the new server instance.
Deleting server instances If you no longer need to use FRS with a particular server, you can delete it from the FRS GUI. This does not affect the server itself but only removes it from the list of servers available in the FRS main window. 1. Click the server instance to highlight it. 2. Click File and click Delete Server Instance. A confirmation window opens. 3. Click Yes to confirm your choice.
Creating shadow copies The primary feature of FRS is creating shadow copies of production LUNs. FRS then manages these copies. If a production database is lost because of a failure or catastrophic event, FRS restores the production database from a shadow copy. To create shadow copies of production LUNs: 1. Click the production server instance, storage group, or database you want to copy. The example below shows Exchange 2003 Server “N03” selected. 2.
3. Select the storage group to be copied and click Add. Repeat as needed. The storage group to be copied appears in the “Selected for shadow copy” list, and the associated databases appear in the “Files/Volumes selected for shadow copy” list.
4. Click Create at the bottom of the Create shadow copy window. Storage group copying begins. The copy is placed on a volume in the recovery storage group you identified when you installed FRS. The Activity Log shows the stages of copying and their success or failure, ending with a completion message. 5. When copying ends, click Close to close the window. FRS now has a recovery-ready LUN containing the shadow copy of the storage group or database. You can create shadow copies as often as needed.
Executing an FRS recovery Use the Recovery feature to restore a production storage group from an FRS shadow copy. 1. Click Recovery on the main window menu bar, and select Roll-Forward Recovery or Point-in-Time Recovery. Roll Forward Recovery Use Roll Forward Recovery if the production storage group's database(s) becomes damaged but the storage group's transaction logs are known to be unaffected.
all data created after the Copy Date and Copy Time of the selected shadow copy. After you select a recovery method, the Recover Storage Group window opens and indicates the type of recovery in the window name. The copies available for selection differ in this window depending on whether you selected Roll Forward or Point-in-Time.
2. Click on the production storage group you want to recover in the Select Storage Group panel. A list of point-in-time shadow copies displays in the Point-in-Time copies panel. The contents of the list depends on whether you selected Roll Forward or Point-in-Time. 3. Click the point-in-time copy you want to use to restore the production storage group. Note: The point-in-time recovery dialog shows only the point-in-time copies residing in the user specified xml file path.
5. Click Start Recovery. The recovery process begins. Progress of the recovery displays in the Activity Log panel. 6. When the log panel shows the recovery is finished, click Close to close the window. Your recovered production LUN should now be ready to use again.
Deleting old point-in-time copies Using the procedure below, you can delete old point-in-time copies any time your pool of Point-In-Time copies grows too large. HP recommends you delete the oldest copy first, followed by the next oldest, and so on. 1. Click Recovery on the main window menu bar, and select Point-in-Time Recovery. 2. Click on a production storage group in the Select Storage Group panel. A list of point-in-time shadow copies displays in the Point-in-Time copies panel.
3. Click the point-in-time copy you want to delete, and click Delete Selected Copy. FRS deletes the copy immediately. 4. Click Close when copy deletion is finished. Recovery log analysis If a recovery fails, analyze the Activity Log in the FRS GUI for any failed activities.
Command line interface The following pages describe the FRS command line interface. 1. Change to the directory (cd) where FRS is installed. The default location is c:\hpfrs. 2. Type this command, and press Enter: dir A list of files and subdirectories in the 'hpfrs' directory is presented.
Available commands Type C:\hpfrs>hpfrscli /? to see a listing of available FRS commands.
Command usage hpfrscli.exe Microsoft Exchange Server: addcopy delcopy listcopy /? Create a point-in-time copy Delete a point-in-time copy List all point-in-time copies Displays the current usage screen Creating a point-in-time copy: hpfrscli addcopy /EXCHANGE /SERVER= /SG=
Listing the point-in-time copies: hpfrscli listcopy /EXCHANGE /SERVER= /SG=
Example commands Three examples follow to demonstrate the addcopy, listcopy, and delcopy commands. Creating a copy The following command creates a point-in-time copy of a storage group (sg1) on a selected Exchange server instance (evs1). C:\hpfrs>hpfrscli addcopy /exchange /server=evs1 /sg=sg1 The screen displays progress as the copy is made.
Listing copies The following command lists point-in-time copies of a storage group (sg1) on a selected Exchange instance (evs1). C:\hpfrs>hpfrscli listcopy /exchange /server=evs1 /sg=sg1 The following example lists the point-in-time copies of storage group “sg1” on selected Exchange instance “evs1.
Deleting a copy The following command deletes a copy of a selected XML file (evs1_sg1_07-26-2005_09-20-31.xml): C:\hpfrs>hpfrscli delcopy /exchange /server=evs1 /xmlfile=C:\hpfrs\evs1_sg1_07-26-2005_09-20-31.xml The figure shows the deletion in progress. Command line error codes FRS CLI issues a return code indicating success or failure of the operation performed.
failure. The following example shows a 0 code being returned, indicating a successful operation. The return codes for the supported operations are: Using FRS [0] The operation displayed in the usage screen (create shadow copy, delete point-in-time copy or listcopy) succeeded. [1] The specified operations failed with a win32 error [1001] Incorrect command line parameter entered by the user [1002] Missing command line parameter entered by the user [1003] Create shadow copy operation failed.
HP StorageWorks EVA Fast Recovery Solution for Windows Server 2003: Administration Guide
5 Troubleshooting This chapter explains how to maintain Fast Recovery Solutions (FRS) on an EVA disk array and troubleshoot problems or error messages.
Troubleshooting The following pages present typical problems and solutions as well as suggested testing methods. Checking logs Checking event logs is often the first step when trying to identify problems. Error messages in the logs may indicate the problem. • Check application event logs associated with Exchange, FRS, and HP VSS Hardware Provider. • Check Windows system event logs. Common problems and solutions are also listed below.
4. Check Cluster administrator and verify resources are online. 5. Check the Command View server for errors associated with the storage system. 6. Check that the Exchange server can access the data LUNs via My Computer. 7. Check for mount points found under the FRS directory. 8. If Exchange copies fail because of a failed integrity check, verify that eseutil.exe and ese.dll are installed on the recovery server. Integrity checks will not work without them, and a failed integrity check causes a failed copy.
FRS error messages The following text explains FRS error messages. Maintenance Error: Dismounting the local/remote drive failed. Please close any open files on that drive and select retry to try again, select ignore to ignore the error and continue, or select abort to cancel the operation. Explanation: FRS cannot dismount any file system drive if it sees any activity on the drive. This could cause corruption, so FRS waits until all files on that drive are closed before dismounting the drive.
Recovery Error: Extended maintenance mode fix (for clusters) is not installed on node [production server name]. Explanation: Before installing HP StorageWorks Fast Recovery Solution (FRS) on a Microsoft cluster node, Microsoft hot fix KB903650 must be installed on the cluster node. This hot fix is required on Windows Server 2003 systems to support the cluster extended maintenance mode.
being managed by FRS, and then a recovery is attempted, this error will be given. Error: Are you sure you want to continue with a recovery? Explanation: Once a recovery is started, it cannot be cancelled until the recovery is complete. The production database will be replaced by the recovery-ready database and there is no going back to the original if this was not the intended action.
Glossary This glossary defines acronyms and terms used in this guide or related to this product and is not a comprehensive glossary of computer terms. API Application Programming Interface, an interface that allows a software application to connect to and work with a third party software application. BC HP StorageWorks Business Copy EVA. Software that creates and maintains local copies of data stored on the disk array. The copies can be used for data duplication, backup, and local disaster recovery.
failover Process that automatically shifts the workload from one server in a cluster to another server in the event of a failure. FC Fibre Channel, a fiber optic interconnection standard commonly used for storage area networks. FRS HP StorageWorks Fast Recovery Solution. FRS server The server where copies of the production database are staged and managed. The FRS server runs the FRS GUI. Also known as the recovery server. GUI Graphical User Interface. HBA Host bus adapter.
production server Exchange 2003 server. plex A Microsoft term denoting a full copy of data that has been split off from the original and is no longer being updated. Synonymous with “split mirror.” production LUN The volume containing the active application database. Known to Business Copy as a P-VOL. P-VOL Primary volume. Typically the volume where application data is stored. RAID Redundant array of independent disks. recovery LUN The volume containing the data copies used for recovery.
split mirror A full copy of data that has been split off from the original and is no longer being updated. subsystem Synonym for “disk array” or “RAID.” S-VOL Secondary volume. The volume that receives copies of data. SVP Service processor. A laptop PC built into the HP XP Disk Array. The SVP provides a direct interface into the disk array, and is used by the HP service representative only.
Index A addcopy command 68, 70 adding server instances 55 architecture Fast Recovery 26 authorized resellers 9 B Business Copy 28 C command line 66 addcopy 68, 70 available commands 67 delcopy 68, 72 error codes 72 examples 70 listcopy 69, 71 Command View 28 Command View management station 27 components 18 hardware 27 software 28 conceptual overview, FRS 17 configuration disk array 34 important notes 29 Index conventions, document 10 copy terminology 21 creating shadow copies 57 D deinstallation FRS 49 d
firmware required 7 FRS adding servers 55 creating shadow copies 57 installing 41 main window 53 overview 20 recovery 60 starting 52 functional components 18 G glossary 81 H hardware components 27 HBAs 27 hot fixes 28 HWP 28 HWP overview 23 I Installation 39 J Java Runtime Environment 28 L licensing FRS 44 listcopy command 69, 71 M main window, FRS 53 maintenance 75 Microsoft quick fixes 28 O opening FRS 52 overview components 18 disk array 23 FRS conceptual 17 HWP 23 VSS 21 P performance issues 30 product
T technical support 9 terminology 21 troubleshooting 75, 76 V VDS/VSS server 27 VSS overview 21 VSS process flow 21 W web site HP storage 8 HP support 9 Index 87
HP StorageWorks EVA Fast Recovery Solution for Windows Server 2003: Administration Guide