
Specifications


Table Of Contents
- MSA1510i maintenance and service guide
- Contents
- About this guide
- 1 Illustrated parts list
- 2 Specifications
- 3 System components and LEDs
- 4 Available diagnostic tools
- 5 Customer replaceable components
- Procedural overview
- Customer self repair
- Recommended tools
- Warnings and precautions
- Determining whether a component is hot-pluggable
- Powering off and powering on the MSA
- Removing or installing a 2-Port Ethernet iSCSI blank
- Removing or installing a hard drive blank
- Replacing a hard drive
- Replacing the controller, controller cache, or controller battery
- Replacing a 2-Port Ethernet iSCSI module
- Replacing a fan module
- Replacing a SCSI I/O module
- Replacing a power supply module
- Replacing the MSA1510i chassis
- A Regulatory compliance and safety
- Index
Removing or inst
alling a 2-Port Ethernet iSCSI blank
Before you begin
CAUTION:
• Before removing a component or blank from an operational device, make sure that you have the
replacement part or blank available. Removing a component or blank impacts the airflow pattern
and cooling ability of the device. Allow approximately 30 seconds before installing the new or
replacement component to ensure that configuration data about the removed component is cleared
from the system registry, but, to avoid possible overheating, insert the new or replacement component
within one or two minutes. If the internal temperature exceeds acceptable limits, the device may
overheat and automatically shut down or restart.
• Parts can be damaged by electrostatic discharge. Use proper anti-static protection.
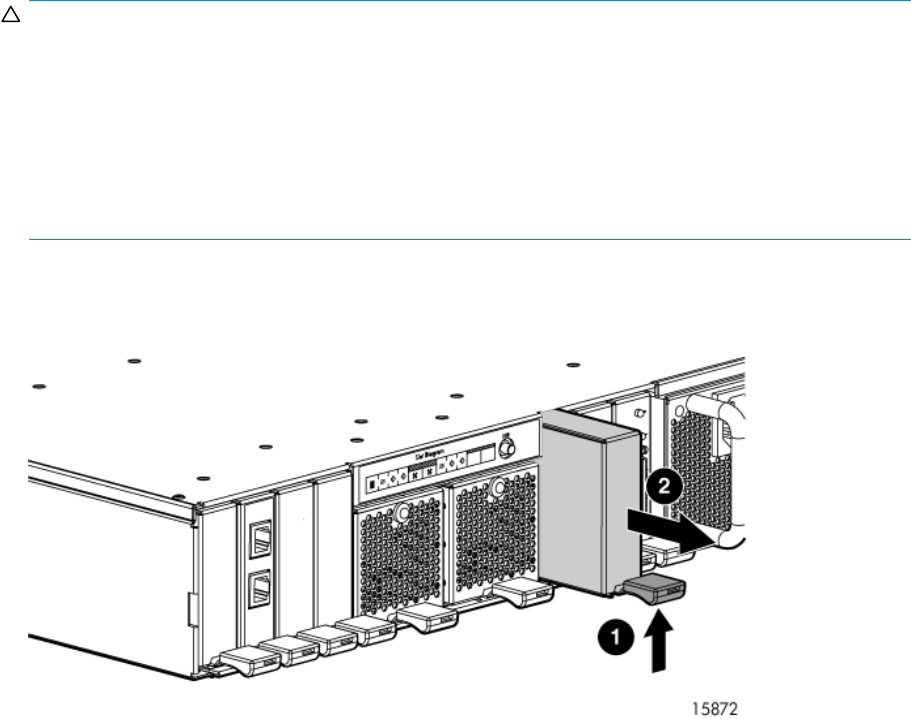
Removing a 2-Port Ethernet iSCSI blank
Lift the port-colored module latch (1) and pull the module out of the chassis (2).
Installing a 2-Port Ethernet iSCSI blank
Slide the blank into the MSA chassis bay until the blank clicks into place.
newpage pi
40
Customer replaceable components