Administrator's Guide HP Session Allocation Manager (HP SAM) v.3.
© Copyright 2007–2010 Hewlett-Packard Development Company, L.P. The information contained herein is subject to change without notice. Technical questions about the website go to Steve M.: webmaster at opensource.org / Policy questions about open source go to the Board of Directors. Microsoft and Windows are trademarks of Microsoft Corporation in the U.S. and other countries. The contents of this website are licensed under the Open Software License 2.1 or Academic Free License 2.1.
About This Book WARNING! Text set off in this manner indicates that failure to follow directions could result in bodily harm or loss of life. CAUTION: Text set off in this manner indicates that failure to follow directions could result in damage to equipment or loss of information. NOTE: ENWW Text set off in this manner provides important supplemental information.
iv About This Book ENWW
Table of contents 1 Introduction ..................................................................................................................................................... 1 What's New in This Release ................................................................................................................ 1 Key Features ........................................................................................................................................ 2 Overview ........................
Configure HP SAM System Settings ................................................................................. 26 Configure Secure Socket Layer (SSL) ............................................................................... 27 Install and Validate the HP SAM Registration Service Software ........................................................ 27 Install the HP SAM Registration Service ...........................................................................
Appendix A Firewall Rules .............................................................................................................................. 82 Web Server ........................................................................................................................................ 82 Clients ................................................................................................................................................ 82 Resources .......................................
viii ENWW
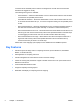
1 Introduction HP Remote Client Solutions are designed to support a variety of users’ needs, from the most basic computing tasks to more demanding professional and technical applications, while giving IT greater control over technology resources, simplifying desktop management, increasing agility and, in many cases, reducing total cost of ownership.
connected via the HP RGS protocol and are not designed for use with resources which are intended to be logged into locally. The following timer types are available: ◦ Active Sessions – Allows the administrator to force a disconnection after the user has been connected for the specified period of time. ◦ Active But Idle Sessions – Allows the administrator to force a disconnection when the user is connected and has been idle (i.e., no mouse or keyboard activity) for the specified period of time.
Overview HP SAM enables automatic provisioning of remote computing resources to users. Figure 1-1 HP SAM Configuration HP SAM can be configured to enable a user to connect to the desktop session of a particular remote computing resource (identified by its IP address or hostname)—this is known as a static connection. In Figure 1-1 HP SAM Configuration on page 3, HP SAM has been configured to statically connect user Tom to blade PC 1 with an IP address of 15.2.76.100.
How HP SAM Works 1. When a user on an access device (desktop, notebook, thin client) requests a desktop session, the HP SAM client sends a request to the HP SAM Web server. a. If configured, HP SAM supports server failover. If the HP SAM Web server does not respond, the HP SAM client goes down the list to the next HP SAM Web server. b. The HP SAM client sends the user name and domain information to the HP SAM server. 2.
ENWW Overview 5
HP SAM Software Components The following are the primary components of HP SAM. ● HP SAM Client—The HP SAM Client runs on the access device and displays the graphical interface employed by the user to request a connection from a client computer to a computing resource. When the user requests a connection, the HP SAM client communicates this request to the HP SAM Web Server for execution.
Common Tasks Setting up HP SAM 1. Install HP SAM. See Installation on page 23. 2. Add users. a. Add new users. See Add New Users on page 59. b. Create administrative groups, assign users, and customize permissions. See Manage Administrative Permissions on page 54. 3. Create a policy. See Create or Update a Policy on page 67. 4. Create a role. See Manage Resource Roles on page 52. 5. Assign computing resources or roles to the users. See Manage Users on page 55.
Setting up a User with Static (Dedicated) Resources Dedicated (static) resource assignment allows one or more specific computing resources to be assigned to a user and it allows one or more computing resources to be assigned as backup. Support for Static roaming allows users to work from other locations. The differing display configurations can be stacked on the client desktop to provide full access with fewer monitors.
Configuring a Monitor Layout for a User HP SAM allows a user to connect to multiple computing resources, thereby creating simultaneous remote sessions. Resources can be made available either by static assignment to the user or by assignment to roles allocated to the user. Mapping a static user/display ID to computing resource(s) allows a specific combination of user ID and client ID to be mapped to a specific computing resource or a specific group of computing resources.
Figure 1-5 Monitor Offset Configuration Example 10 Chapter 1 Introduction ENWW
2 Requirements HP SAM Hardware and Software Requirements Architectural Considerations and Best Practices for Setting up an HP SAM Environment Server Sizing In general, the HP SAM Server can handle a theoretical maximum user and resource population of 40,000. ● This is based on the assumption that no more than 1% of users will attempt to connect within the same 30-second window.
have to be written to the database. Therefore, the platform sizing for the SQL should take this into account as user populations grow. HP SAM is a multi-tier application and the actual user never logs into the database directly at any time. HP SAM only needs one login, which is the HP SAM service account. You may want have more than one login if you want manual access to the HP SAM database without using the HP SAM service account. HP SAM needs many concurrent connections.
particular gateway as their primary target. You may also split resources between HP SAM servers to distribute the load between servers.
● HP SAM only supports domains in a single forest. ● HP SAM requires UPN names on all user accounts to enable certain HP SAM functions, such as logging in to the HP SAM Administrative console and follow-me-roaming. NOTE: The built in Domain Administrator group and the built-in Administrator user on the domain controller (Windows 2003 or earlier) cannot be added into HP SAM.
HP SAM Web Server Software Requirements Minimum: One of the following operating systems must be installed: ● Windows Server 2003 R2, Standard Edition, with Service Pack 2 ● Windows Server 2003 R2, Enterprise Edition, with Service Pack 2 ● Windows Server 2003 R2, Web Edition, with Service Pack 2 ● Windows Server 2008, Standard Edition ● Windows Server 2008, Enterprise Edition ● Windows Server 2008, Web Edition NOTE: A 64-bit operating system is not supported on the HP SAM Server.
16 Chapter 2 Requirements ENWW
ENWW HP SAM Hardware and Software Requirements 17
18 Chapter 2 Requirements ENWW
HP SAM SQL Database Server Software Requirements Minimum: One of the following must be installed: ● Microsoft SQL Server 2005 Enterprise, Standard, or Express Edition, with Service Pack 1 or Service Pack 2 ● Microsoft SQL Server 2008 Standard or Enterprise Edition HP recommends using Microsoft SQL Server 2005 or 2008 Standard or Enterprise Edition.
Install and enable one or both of the following: ● RGS Sender 5.1.3 or higher with Single Sign-on enabled ● Terminal service enabled—RDP Access Device Requirements The following sections provide information about the requirements for access devices.
Desktop or Notebook PC Software Requirements Install and enable one of the following operating systems: ● Windows XP Professional, 32-bit or 64-bit, with Service Pack 2 or 3 NOTE: The HP SAM Client is unable to connect from access devices running Windows XP 64bit using the preinstalled version of RDP. This is due to the location (\windows\system32) of the preinstalled RDP protocol files.
Other requirements Create a Service Account The HP SAM Web server must run under a domain user account in which it can execute the HP SAM services on the local server. ● Create the account prior to installation of the HP SAM server application. ● Change this account name and password as infrequently as possible to minimize interruptions to HP SAM. ● Add the account to the local server administrator group on all HP SAM Web servers.
3 Installation Order of Installation New Installation For new setup, the recommended order of installation is: 1. Install the HP SAM Web Server and SQL Software on page 24 2. Install and Validate the HP SAM Registration Service Software on page 27 3. Install and Validate the HP SAM Client Software on page 31 4. Deploy the HP SAM Registration Service to All HP SAM Computing Resources on page 47 5.
You should see Command(s) completed successfully In the messages section. 2. 3. Shrink the database: a. Open SQL Server Management Studio and expand the Databases folder. b. Right-click on SAM database, and select Tasks > Shrink > Files. c. In the File type list, select Data. d. In the Shrink action section, select Reorganize pages before releasing unused space. e. Set the Shrink file size to the default 100MB. f. Click OK. Verify that you have a 100MB SAM_data.mdf file.
4. For HP SAM Web server installation, the installer asks for a user account. The user account is the owner (known as the HP SAM service account) of the HP SAM Web site and the HP SAM server service.
14.
Configure Secure Socket Layer (SSL) SSL: You may configure SSL on the HP SAM Web server (which includes installing a certificate) to encrypt your password and browser session when you log into the HP SAM administrator console. ● Manage: Access to the Web Administrator console ● Webclient: Communication line between Web client and HP SAM server Only certain virtual directories under the main HP SAM Web site can be set to Require secure channel (SSL).
● Start the HP SAM registration service by going to Control Panel > Administrative Tools > Services, and start the service under the name HP SAM Registration Service. For Linux, enter the following command in the terminal: /etc/init.d/daesvc start. ● If the computing resource has a firewall, enable the ports below.
[WebServerList] server1.yourdomain server2.yourdomain [RolesList] sample-role-1 sample-role-2 [AssetGroupList] sample-asset-group-1 sample-asset-group-2 [WebServerList] The [WebServerList] section lists one or more HP SAM Web servers. Each HP SAM Web server (primary and failover) is listed, one per line. The service uses this list in the order provided. The first HP SAM Web server in the list is the one tried first; if it fails, the service proceeds to try the remaining HP SAM Web servers in order.
[AssetGroupList] The [AssetGroupList] section lists zero or more asset groups to which the computing resource can belong. The HP SAM administrator or domain administrator has full rights to all Asset Groups in the HP SAM server. Asset Groups allow full HP SAM Administrators to limit or hide objects (resources, users, etc.) that other administrators are allowed to see and manage. For more information, see Manage Asset Groups on page 53.
NOTE: If the computing resource is marked off-line after the synchronize operation, this typically means the HP SAM Web server is unable to communicate to the computing resource. Check the firewall setting on the computing resource to make sure it allows incoming on port 47777 or the HP SAM registration service. You can find out if the firewall is blocking the necessary traffic by disabling the firewall temporarily and then enabling it again later.
Table 3-1 HP SAM Client Comparison (continued) Features Internet ExplorerBased Requires ActiveX controls to be downloaded in order to run X Languages English, Japanese, French, German, Korean, Simplified Chinese Windows XP EmbeddedBased Blade Workstation Client Embedded OS-Based Linux-Based English, Japanese, French, German, Korean, Simplified Chinese English English Internet Explorer-Based Client An access device can access HP SAM using Internet Explorer.
Windows-based Client To install the HP SAM client on a Windows-based thin client or on a desktop/notebook PC running Windows XP, Windows Vista, or Windows 7: 1. If you are installing the HP SAM client on a Windows-based thin client, unlock the write filter. If you do not unlock the write filter before installing or saving configuration information to the XPe client, the installation or configuration information will be lost when the client is turned off. 2.
Additional settings can be set by manually editing the .SAM files (configuration files). 1. The HP SAM connection client searches first for the user-specific .SAM file, hprdc.sam. 2. It then checks the access device file, hprdc_accessdevice.sam, in the folder in which you installed HP SAM. Parameters found in the access device file replace or are added to the merged file. 3. Then, the connection client checks the global file, hprdc_admin.sam, in the same folder.
Additional settings can be set by manually editing the .SAM files (configuration files). 1. The HP SAM connection client searches first for the user-specific .SAM file, hprdc.sam. 2. It then checks the access device file, /root/writable/opt/hpsam/hprdc_accessdevice.sam. Parameters found in the access device file replace or are added to the merged file. 3. Then, the connection client checks the file, /root/writable/opt/hpsam/hprdc_admin.sam.
Customization Steps (Recommended) 1. Start up the HP SAM client. When you launch the HP SAM client (by executing /opt/hpsam/hprdclx.sh) your saved settings will take effect. 2. Type the HP SAM Web server name. 3. Click Options. 4. Change the appropriate connection settings. 5. Click Save. Additional settings can be set by manually editing the .SAM files (configuration files). 1. The HP SAM connection client searches first for the user-specific .SAM file, hprdc.sam. 2.
● DefaultInsecurePassword—string value. You can use this field to pre-populate the password box. This field was intended for automated load testing in an environment where security is not of importance. CAUTION: The DefaultInsecurePassword field is in plain text format and should not be used in a production environment. ENWW ● Debug—integer value, 0 or 1. If value is set to 1, debug logs for troubleshooting purposes are captured to /tmp/hprdc.log. This option is valid only on the Linux Client.
the user to switch to the selected session, move the selected session, minimize the selected session, or minimize all currently connected sessions. When set to 0, this menu does not appear. Default is 1. ● ConnectionBar.EnableSave—integer value, 0 or 1. When set to 1, enables the Save button on the connection bar that allows an Administrator to save the current session configuration to the server as a Monitor Layout ID. Disconnected sessions are not saved back to the database. The default value is 0.
NOTE: The option to perform a power cycle from the connection bar is disabled by default in the Global Policy. The following requirements must be met for Power Cycle: —A certificate from the domain certificate authority must be installed on the HP SAM Web site to allow usernames and passwords to be transmitted to the server. —Version 4.20 or later Integrated Administrator (IA) software must be used on the HP BladeSystem PC Blade Enclosure(s). By default, the IA software has a disabled SAM account.
User Interface Customization Settings ● UiMode—integer value, 0, 1 or 2. Select the type of user interface to display. ◦ 0 (default)—HP SAM Server, User name, and Domain fields visible in the user interface. ◦ 1—show the UPN mode, where the Domain field is not shown. The user must use the format username@domain. ◦ 2—show smart card mode, where both the User Name and Domain fields are hidden, and a message displays asking that the user insert the smart card.
● EnableDomain—integer value, 0, 1, or 2. When set to 1, the Domain box on the main application dialog is visible. If set to 0, the field is not displayed. If the field is turned off, the domain specified using the DefaultDomain setting is applied (unless the username is entered in UPN or domain\username format with a different domain). If set to 2, the field is visible but cannot be edited. The domain set via DefaultDomain is always in effect and cannot be overridden using UPN or domain\username format.
Policy Entries You can set policy entries by manually editing the .SAM file. These settings must be located in a policy section of the .SAM file, for example, [Local Area Network] or [saved settings]. These values only specify the default settings in the UI. Values changed by the User in the UI will take effect. 42 ● Protocol—integer value, 0, 1, or 3. Specify which protocol to use for connection. RDP is 1, RGS is 3. A value of 0 (automatic) uses autodetected settings, with a preference of RGS over RDP.
ENWW ● Themes—0 or 1. If 1, Windows XP themes are shown in the session. This value is only supported for RDP connections. Default is 1. ● Animation—0 or 1. If 1, menu animation is shown in the session. This value is only supported for RDP connections. Default is 1. ● Caching—0 or 1. If 1, RDP bitmap caching is enabled. This value is only supported for RDP connections. Default is 0. ● AutoReconnect—0 or 1. If 1, RDP reconnection is enabled. Not recommended for an HP SAM solution.
default value is the user interface value of 15000 milliseconds - 15 seconds. The user interface displays this value in seconds. This value is only supported for RGS connections. ● ClearType—integer value, 0 or 1. When set to 1, support for Font Smoothing is enabled in an RDP6 session. This option is ignored for RDP5, RGS, and rdesktop. Set to 0 to disable. Default value is 0. ● ComposedUI—integer value, 0 or 1. When set to 1, support for Vista Aero interface is enabled (Desktop Composition).
display boundaries on the client desktop in order to set valid display resolutions on the sender. Use this feature for multi-display clients on senders that have multiple physical displays. Senders that are configured to use a single logical display will cause RGS to revert to setting a single display instead of multiple displays. RGS 5.1.3 or later is required. Default is 0.
/opt/hpsam/hprdc_accessdevice.sam ● Parameters in the global file override the personal and local parameters ◦ XP file location is the install directory. Default: C:\Program Files\Hewlett-Packard\HP Session Allocation Client\hprdc_admin.sam ◦ Workstation Client OS file location: /opt/hpsam/hprdc_admin.sam (/root/writable/opt/hpsam/ hprdc_admin.sam) ◦ Linux Client: /opt/hpsam/hprdc_admin.sam Legal Banner This allows a legal disclaimer to be displayed before logon. Name the file disclaimer.
en_US.UTF-8 English, International en_GB.UTF-8 English, UK en_GB.UTF-8 English, UK Extended en_US.UTF-8 English, US fi_FI.UTF-8 Finnish -- Suomi fr_FR.UTF-8 French -- Français de_DE.UTF-8 German -- Deutsch it_IT.UTF-8 Italian -- Italiano ja_JP.UTF-8 Japanese ko_KR.UTF-8 Korean nb_NO.UTF-8 Norwegian -- Norsk pt_PT.UTF-8 Portuguese -- Português pt_BR.UTF-8 Portuguese-Brazil -- Português do Brasil es_ES.UTF-8 Spanish -- Español es_MX.
3. Start or restart service on a single computing resource and verify that the computing resource self-registered into the HP SAM Web server. 4. Deploy the HP SAM registration service configuration file (hpevent.cfg) to all appropriate computing resources and start the service on those units. Deploy HP SAM Client Software to All HP SAM Access Devices To deploy the HP SAM Internet Explorer-based client, instruct your users to go to the HP SAM server Web site(s) that you have set up.
4 Administration Log In In the Internet Explorer address bar, enter in the HP SAM Web server name with “/manage” added to the URL (for example, http://HP SAMservername/manage). Use “https:” if the Web Administrator console has been set to require SSL. If SSL is configured and a certificate-related security pop-up message is displayed, click Yes. Once you get to the log-in page, enter username, password, and click the Sign In button. You have two ways to enter in your username.
Managing the HP SAM Administrator Access List The Domain Administrator, Domain Users in the Administrators group on the domain controller, and Domain Users in the HP SAM server Local Administrator Group are automatically members of the HP SAM Administrator Group. To add another user to the HP SAM Administrator group, see To Assign Attributes on page 55. Add Individual Users to the HP SAM Administrator Group If you are adding only a few users, add the names directly to the HP SAM Administrator group. 1.
Add Security Groups or Organizational Units to the HP SAM Administrator Group To add many users: 1. Leverage Active Directory services by adding the names in Active Directory under a security group or organizational unit. 2. Go to the Add New Users page. 3. Add the security group or organizational unit directly to the HP SAM Administrator group. a. In Search By, select Organizations (OU) or Security Groups. b.
HP SAM Administrator Console Tabs Home Tab When you log in to HP SAM, the Home tab page is the default. HP SAM shows a snapshot of current resource status grouped by roles, as a convenience to the administrator. Users and Roles Tab The Users and Roles tab facilitates the management of roles and user access list. Manage Resource Roles All roles, as created by computing resources when they self-registered or created with the Create button, are shown. ● Role column: A list of all roles.
● Public column: ◦ If selected, the role is available for all users in Active Directory. ◦ If not selected, then the role is only available to user(s) in that particular role access list. ◦ To change the setting, click the link for the role, select or clear the check box in the dialog box, and then click Save. ● Access Restriction column: Shows a summary of the resource reservations that have been added to the role. ● Create button: Click to create a new role that you can assign to resources.
Manage Administrative Permissions NOTE: You must have full HP SAM Administrator permissions to: —Create, modify, or delete an Administrator group. —Assign users to an Administrator group. The following have this permission: —HP SAM Server administrators —Domain administrators —Domain users assigned to “Administrator” Administrator group in HP SAM Use this window to customize permissions for differing levels of administrator access.
Manage Users By default, the search shows all users, security groups, and OUs. ● Search For: Organizations (OU), Security Groups, Users—Select in which group or groups you want to perform the search ● Filter Options: You can narrow the list of users shown by using the filter options. The filter option is based on “AND” combinations, so the more boxes you enter, the narrower the list of users shown. ◦ Name—Type the name to search for. ◦ Role—Select the role to search within.
8. Double-click roles or use the arrows between the Available and Selected boxes to move the roles. Place all roles you want to assign to the selected user in the Selected box. 9. Click Save to save your changes. To Assign Resources This option allows you to assign a specific resource (such as a blade PC) to a user. You can also assign a backup to a dedicated resource, as well as assign a user-friendly name to the resource.
7. If you want to change the friendly name for the resource, click the link in the Friendly Name column, and then type a new friendly name for the resource in the Update Friendly Name window. The default friendly name is the resource host name. 8. If you want to assign a backup for the dedicated resource, in the Backup column, click either Role or Resource for the user. To select a role: ▲ Select a role to assign as a backup for the user, and then click Save. To select a resource: 9. a.
NOTE: A message will be displayed if you attempt to assign resources to a user who already has resources or if the primary roles do not have enough resources available. The template user must have at least one dedicated resource that exists in a role. Only primary roles are considered when assigning dedicated resources to multiple users. The selected users will be assigned dedicated resources from free resources in this role.
8. Select the USB Default, which is the session you want RGS to use by default with USB devices connected to the access device. 9. Click Save. To Change the Monitor Layout Configuration for the User 1. Select the check box next to the appropriate name. 2. From the Operation list, select Assign Monitor Layouts, and then click the Go button to open the Monitor Layouts for window, which shows the monitor layouts, if any, assigned to the selected user. 3.
NOTE: Searching by Global Catalog displays all users from external domains. Users from other domains can be added to HP SAM using Global Catalog, but they may not be able to log in if the External setting has not been selected on the Active Directory page of the System Settings tab. 4. Type one or more of the parameters, as shown in the following examples: a. Last Name: Search is performed by last name when entering characters. b.
Manage Resources By default, the search shows all computing resources (such as blade PCs). You can narrow the list of resources shown by using the filter options. The filter option is based on “AND” combinations, so the more boxes you enter, the narrower the list of resources shown. The following are your filter options: ● IP Address/Host Name—Show the list of resources where the IP address or host name matches what you entered (or range or set of computing resources matching what you entered).
To perform any of the operations listed below: 1. Select the appropriate resource(s). 2. Select the task to perform in the Operation list. 3. Click the Go button. Operations ● Delete—Delete the resource from the system. Do this to clean up the database. You can delete the computing resource only if its current status is Offline. ● Disable—Prevent the resource from further allocation. If In-use, the current user session is unaffected.
Manage Access Devices To Add an Access Device Manually NOTE: The Windows-based client, Blade Workstation Client, and Linux Client register access devices automatically upon connection to the HP SAM server. The XP Embedded OS image on some thin client access devices lack support needed for this to occur. For these systems, follow the instructions in the CIMWIN32 folder found in the AddOns folder in the HP SAM SoftPaq. 1. Click Create. 2. Type the serial number and friendly name. 3.
To Modify a Monitor Layout 1. If you want to change the name, description, or asset group of the monitor layout, click the link in the Monitor Layout ID column and then change the desired settings. 2. Click Save to change the monitor layout ID. To Delete a Monitor Layout 1. Select the check box next to the appropriate monitor layout. 2. Click Delete and then click OK. Manage Data Centers Data Centers in HP SAM are groupings of enclosures.
To Delete Enclosures from a Data Center 1. Select the check box for the appropriate data center. 2. Choose View Enclosures from the Operation list and click Go. 3. Select the check boxes for the enclosures to delete. 4. Click Delete. 5. Click Close. To Delete a Data Center ENWW 1. Select the check box for the appropriate data center or data centers. 2. Choose Delete from the Operation list and click Go. 3. Click OK.
Policies Tab Policy management allows administrator to override the user’s HP SAM client settings. In general, the user is allowed the flexibility to customize the connection settings on the client side. If there are specific settings that the user must always connect with, then the administrator may use the Policies tab to define the forced settings.
Table 4-1 Effective Hierarchical Policy Example (continued) Parameter Global Role OU SG1 SG2 User Effective 3 ON OFF ON OFF ON Not Assigned OFF P6 1 2 3 The order of policy assignment is User (highest) > Security Group > OU > Role > Global Policy (lowest). Individual parameters assigned at the User level override parameters set at the Group level, and so forth.
System Settings Tab This tab allows the administrator to set how the HP SAM server behaves. General This page allows the administrator to define the settings for the entire system. Make the appropriate change(s) and click Save to apply. ● New Role Settings—When a new role is created (computing resource self-registers with a role that is brand new to the system), the flags are set accordingly based on the value assigned.
● ● Multi-Session Autoconnection—When enabled, allows the system to autoconnect users to all resources of the chosen type which are assigned to the user when user is on an access device without a monitor layout ID assigned. Select one or more: ◦ Dedicated Resources ◦ Roles with Public Enabled ◦ Roles with Public Disabled Client-Resource Network—When the access device connects to the computing resource, you can specify which method it uses.
● Banner text—Select the language and type the appropriate message in the box to change the customizable message that is displayed to the user on the HP SAM Web client page. ● Smart Card ◦ Smart card login—Select the value for the type of login you want. - Disallowed—Select to disable logging in using a smart card. Only the traditional log in information fields are displayed. - Optional—Select to make optional the use of a smart card to login. All log-in fields are displayed.
Auto Schedules NOTE: These schedules can now be found on the Auto-Schedules page instead of the top menu. Resource Synchronization Scheduler To schedule when to run the synchronize operation task to capture any resources that are offline, set the timer as instructed below and click Create or Update. In general, you do not need to do this if the resources are running under normal operation.
—Type the file path where you want to store the CSV file. Logoff User from Resource Scheduler To schedule when the system will forcibly log off users from their resources, set the timer as instructed below and click Create or Update. NOTE: A certificate from the domain certificate authority must be installed on the HP SAM Web site in IIS for this feature to work. ● Auto-Schedule Event—To turn it on, check the Enabled box. ● Scheduled Start Date—Select the date when the event is to start.
Click the Enter New Key button to add a new key to HP SAM. Once entered, the system displays the information encoded on the key. To delete the key from the system, check the appropriate key(s), and then click Delete. NOTE: In order to successfully enter the license key for HP SAM, the HP SAM service account must be a member of the server's Local Administrators group. If a license message displays on the HP SAM administrator console at any time, go to this area to view the details of the license message.
Output Report ● Role Name—Name of role. ● Minimum Available %—For the time period chosen, the peak value of minimum available is shown. This value indicates the percentage of computing resources that are still available for allocation dropped to this lowest value. ● Minimum Available—This value complements the percentage number above to show specifically how many resources within that role are still available.
Output Report ● Minimum and Maximum Capacity graphs—The graphs show the minimum number of blades available and the maximum number of blades used for the specified time period. In general, these values should add up to 100%. However, if a blade supports multiple roles, then the numbers will not add up because consuming a blade (which is in two or more roles) in one role will also decrease the minimum available in the other role. ● Time Interval—The time interval for which the report was run.
Output Report ● Role Name—Name of role.
Before you attempt the following procedure for the HP SAM client, refer to this white paper to configure the smart card on the computing resource: Implementing ActivIdentity Smart Cards for Use with HP Compaq t5720 Thin Clients and HP Blade PCs at http://h20000.www2.hp.com/bc/docs/ support/SupportManual/c01153197/c01153197.pdf?jumpid=reg_R1002_USEN. You must successfully configure the smart card on the computing resource before attempting to configure it on the access device.
You can configure smart card-related settings on the Web client after you complete this procedure. From the HP SAM administrator console, go to System Settings > Web Client. NOTE: The CAC is a high-security type of smart card used by the military. Its behavior in HP SAM matches that of typical smart cards. HP SAM does not access extended data in the CAC card beyond the certificate needed to determine the user's credentials.
Once this administrative template has been imported into the Group Policy Management utility on the domain controller, three new policies will be available: ● Emulate Terminal Services Session Time Limits—This policy controls whether or not to have the HP session timer utilities emulate the Microsoft session timer group policies. This is useful for resources running Windows XP Pro with Service Pack 2 or earlier.
resource in the Math Class role without having to choose which role. He can then use the resource until the class is over. Another reservation on the Math Class role may specify another math class in a different room at a later time for the same resource(s). The automatic logoff feature ensures that those resources will be available for students in the later class.
● There is no setup needed for the Web Client, but the user must type in the URL using https instead of http (e.g., https://samserver). ● Ensure that communication between the access device and the HP SAM Server via SSL (typically port 443) is not blocked by a firewall. The Allow Expired Password setting in System Settings gives the HP SAM administrator the option to allow users with expired passwords to continue on so that they can change the password using the operating system on the resource.
A Firewall Rules This appendix lists the rules needed for communication between the various components. The values in parenthesis represent ports, with ANY meaning any ports on that component.
◦ From clients (TCP/ANY) to resources (TCP/3389—RDP) ◦ From clients (TCP/ANY) to resources (TCP/42966)—RGS) NOTE: The default RGS port is TCP/42966; however, RGS 5.3 and later allows this to be changed. Please see the RGS documentation for details.
B 84 Frequently Asked Questions Question Answer Why do some users on the HP SAM client have to select a role or resource to connect and others do not. Users who are in more than one role must select the role to connect. Those users who are in only one role do not see this screen. A user assigned a single dedicated resource does not have to select a role. Also, when Monitor Layout IDs or Multi-Session Autoconnections or Resource Reservations are used, the user is not prompted for a role or resource.
ENWW Question Answer How do I enable HP Sygate Security Agent on the Windows XP Embedded-based thin client for the HP SAM client(s)? Go to HP Sygate Security Agent advance rules and create a new rule for HP SAM. Add IEXPLORE.EXE and/or hprdcw32.exe to the Application tab. On the Ports and Protocol tab, set protocol to TCP and type 80,443,3389,42966 on the remote port line if you want both clients to work. Otherwise, make sure port 3389 is set for IEXPLORE.
Question Answer How can I change both the HP SAM Web server http and https ports to some other value beside the default 80 and 443? After changing the desired value (TCP and/or SSL ports) in Internet Information Services (IIS) Manager, modify the CONNECTION.CONFIG file located on the HP SAM Web server in root of the HP SAM installation directory (usually c: \Program Files\Hewlett-Packard\HP SAM). Use Notepad to edit the file.
Question Answer How do I change the HP SAM datagram communication port to another value beside the default 47777? Modify the connection.config file located on the HP SAM Web server in the HP SAM installation directory (usually c: \Program Files\Hewlett-Packard\HP SAM). Use Notepad to edit the file. Add this line in the appSettings section: Where port number is the new HP SAM datagram communication port you want to use.
Question Answer Users are getting the message All resources are currently in use. Please try again later but there appear to be free resources according the HP SAM Web Admin console. What are the potential causes for this? First, refresh the Resources list in the HP SAM Web Admin console and check to see if any resources are available in the role (or dedicated resource) the user is attempting to access.
ENWW Question Answer Why does a user, whose Security Group has been added to HP SAM from a child domain, receive the error “Your account cannot be assigned to any existing roles?” The user may see this error when logging into HP SAM using his username in UPN (user@domain.dom) format. When UPN is used, HP SAM checks the global catalog for group memberships in Active Directory. Local and Global Security Groups are not visible this way.
C Registration Service Error Codes The following is a list of possible errors which the registration service writes to the event log file on the computing resource. If you encounter a critical issue on the blade, note the error code and communicate it to the support team. BC0001—Internal error accessing WMI. Contact your HP SAM support team. BC0002—Internal error accessing WMI. Contact your HP SAM support team. BC0003—Internal error failed to spawn threads, usually due to low memory.
BC0022—Memory allocation error. Close other applications or increase memory. BC0023—Internal error. Contact your HP SAM support team. BC0024—Internal error. Contact your HP SAM support team. BC0025—Internal error. Contact your HP SAM support team. BC0026—Error communicating with the Terminal Services subsystem. Contact your HP SAM support team. BC0028—Failed to set up UDP server port. Check if another program is already using the same UPD port (usually port 47777 by default).
BC0050—Problem accessing WMI, possibly related to missing QFE documented in MS KB 828653. BC0100—Failed to setup timer. Internal error, possibly due to low memory conditions. Close other applications or increase memory. BC0101—No gateway/HP SAM server was found in the configuration file. Check the registration service installation section above on how to create the correct CFG file contents. Make sure the server name is correct. BC0104—Failed to set up properties for listening UDP socket.
D Glossary Access Device—A device such as a thin client used to access HP SAM to connect to computing resources. Active Directory—A Microsoft Windows directory service that stores an enterprise’s information and settings in a central, organized, accessible database. Active Directory allows administrators to assign policies, deploy programs, and apply critical updates to an entire organization.
Policy—The policy defines settings to be forced upon users from the HP SAM server. It controls the appearance of the desktop, taskbar, command access, sound availability, etc. There are five levels of policy: Global, Role, OU, SG, User (User settings override SG, and so forth). Public—A public role is one that is accessible to all users in Active Directory.
Index A access device adding manually 63 changing 63 deleting 63 requirements 20 access devices, managing 63 access list 50 access restrictions 79 account, service 22 Active Directory 22, 70 ActiveX controls 32 adding access device, manually 63 enclosures into data centers 64 monitor layout 63 organization units to the Administrator role 51 security groups to Administrator role 51 users 59 users to Administrator group 50 Administrative permissions 54 rights required to install 22 Administrator access list 5
ConnectionBar.ShowOnDisconnec t 38 ConnectionBar.ShowReboot 38 ConnectionBar.
I ImageQuality 42 installation error 84 new 23 order 23 upgrade 23 installing Administrative rights 22 HP Blade Workstation Client series 34 HP SAM client software 31 HP SAM registration service 27 HP SAM registration service software 27 HP SAM SQL software 24 HP SAM Web Server 24 HP ThinPro GT client 35 Internet Explorer-based client 32 RHEL client 35 Windows-based client 33 Internet Explorer-based client 32 IP address list 25 J Japanese characters 85 K KeyRepeatEnabled Keys 43 KioskMode 41 42 L legal ba
user 59 users from Administrator group 51 reports Resource Capacity Consumption 73 Resource Capacity Consumption Trend 74 Resource Utilization 75 Reports tab 73 requirements access device 20 Blade Workstation client 21 desktop or notebook PC 21 domain environment 13 hardware and software 11 mobile thin client 20 Personal Workstation client 21 registration service 19 SQL server 14 thin client 20 Web server 14 ResetAfterSession 37 Resolutions 38 Resource Capacity Consumption report 73 Resource Capacity Consum
updating, policy 67 upgrade, installation 23 URL, Internet Explorer-based client 32 user deleting 59 interface 49 interface settings 40 User name field 70 User Sign-in Time Out 68 users adding 59 managing 55 removing from Administrator group 51 users and roles 52 V validating, HP SAM registration service software 27 view details 61 W Wallpaper 42 Web client 69 Web server firewall rules 82 hardware requirements 14 software requirements 15 WebServerList 29 Width 43 Windows-based client 33 WindowSnapEnabled 42