Veritas 5.1 SP1 Installation Guide HP-UX 11i v3 HP Part Number: 5900-1514 Published: September 2011 Edition: 2.
© Copyright 2009, 2011 Hewlett-Packard Development Company, L.P. Confidential computer software. Valid license from HP required for possession, use or copying. Consistent with FAR 12.211 and 12.212, Commercial Computer Software, Computer Software Documentation and Technical Data for Commercial Items are licensed to the U.S. Government under vendor’s standard commercial license. The information contained herein is subject to change without notice.
Contents About this Document......................................................................................6 Intended Audience....................................................................................................................6 Document Organization............................................................................................................6 Typographic Conventions...........................................................................................................
Installing Veritas 5.1 SP1 Products.............................................................................................27 Installing VxFS 5.1 SP1............................................................................................................28 Installing Base-VxFS-51.......................................................................................................28 Installing Base-VxFS-51 in Non-Interactive Mode................................................................
Upgrading from VxFS 5.0 on HP-UX 11i v2 or HP-UX 11i v3 to VxFS 5.1 SP1 on HP-UX 11i v3...........51 Upgrading from VxFS 5.0.1 on HP-UX 11i v3 to VxFS 5.1 SP1 on HP-UX 11i v3...............................52 6 Upgrading from Previous Versions of VxVM to VxVM 5.1 SP1........................54 Determining VxVM Disk Group Version.....................................................................................54 Native Multipathing with Veritas Volume Manager................................................
About this Document This document provides information on Veritas 5.1 Service Pack1 (SP1) suite of products on systems running HP-UX 11i v3. Veritas 5.1 SP1 suite of products include Base-VxFS, Base-VxVM, OnlineJFS, Full VxVM, and Cluster Volume Manager (CVM). This document also includes a product overview, system requirements, installation, basic configuration, and removal steps for Veritas 5.1 SP1 suite of products on HP-UX 11i v3.
\ Continued input on the following line; you do not type this character [ ] In command synopsis, brackets indicates an optional argument. ls [ -a ] | In command synopsis, a vertical bar separates mutually exclusive arguments. mount [ suid | nosuid ] blue text An active hypertext link In PDF and HTML files, click on the links to move to the specified location. Related Information Additional information on the Veritas suite of products is available at: HP Business Support Center.
Email: hplicense.na@hp.com ◦ (Asia Pacific) Phone: 0120.42.1231 or 0426-48-9310 (Inside Japan) +81.426.48.9312 (Outside Japan) Email: sw_codeword@hp.com • For latest information on the available patches, see: http://itrc.hp.com • For technical support, see: http://welcome.hp.com/country/us/en/support.html HP Welcomes Your Comments HP welcomes your comments concerning this document. HP is committed to providing documentation that meets your needs. Please send comments to: docsfeedback@hp.
1 Introduction This chapter introduces the Veritas 5.1 SP1 suite of products. It also describes the features of each product that is included within the Veritas 5.1 SP1 suite of products. This chapter addresses the following topics: • “Overview” (page 9) • “Volume Managers Supported on HP-UX 11i v3” (page 9) • “Veritas Volume Manager (VxVM) ” (page 9) • “File Systems Supported on HP-UX 11i v3” (page 17) • “Veritas File System (VxFS) ” (page 18) Overview Veritas 5.
computing environments and Storage Area Network (SAN) environments. Through RAID support, VxVM protects against disk and hardware failure. Additionally, VxVM provides features that offer fault tolerance and fast recovery from disk failure. VxVM overcomes physical restrictions imposed by hardware disk devices, by providing a logical volume management layer. This enables volumes to span multiple disks. VxVM also dynamically configures disk storage while the system is active.
VxVM 5.1 SP1 does not support snapshots of RAID 5 volumes. • Dirty Region Logging Dirty Region Logging (DRL) keeps track of the regions that have been changed because I/O writes to a mirrored volume. The DRL uses this information to recover only those portions of the volume that need to be recovered, thereby speeding up recovery after a system crash.
• Distributed Volume Recovery In a Cluster Volume Manager (CVM) cluster, upon a node failure, the mirror recovery is initiated by the CVM master. Prior to this release, the CVM master performed all the recovery I/O tasks. Starting from this release, the CVM master can distribute recovery tasks to other nodes in the cluster. Distributing the recovery tasks is desirable in some situations so that the CVM master can avoid an I/O or CPU bottleneck.
NOTE: The disk group version must be at least 160 to create and use the cdsdisk format on disks of size greater than 1 TB. IMPORTANT: VxVM uses the Global Partition Table (GPT) format to initialize disks of size greater than 1TB in the cdsdisk format. HP Logical Volume Manager (LVM) and the diskowner command do not recognize disks formatted with the GPT layout. So, LVM and the diskowner command do not recognize disks of size greater than 1 TB.
The following example shows some sample device names on a system using the Agile Device Naming Scheme: Example 3 Sample device names on a system using the Agile Device Naming Scheme DEVICE TYPE DISK GROUP STATUS disk6 auto:hpdisk rootdisk01 rootdg online disk7 auto:LVM - - LVM disk11 auto:cdsdisk c4t0d0 dg1 online disk10 auto:LVM - - LVM disk9 auto:LVM - - LVM Only in cases where customers upgrade from an earlier version to this version, Operating System Native Naming Scheme(osn) or the setting from the ear
VxVM Daemons VxVM relies on the following daemons for its operation: • vxconfigd – The VxVM configuration daemon maintains disk and disk group configuration information, communicates configuration changes to the kernel, and modifies the configuration information stored on the disks. • vxiod – The VxVM I/O daemon provides extended I/O operations without blocking the calling processes.
Volume Layouts in VxVM A volume layout is defined by the association of a volume to one or more plexes, each of which maps to a subdisk. VxVM supports two different types of volume layout: • Non-Layered • Layered Non-Layered In a non-layered volume layout, a subdisk maps directly to a VM disk. This enables the subdisk to define a contiguous extent of storage space backed by the public region of a VM disk. Layered Volumes A layered volume is constructed by mapping its subdisks to the underlying volumes.
RAID-5 (Striping with Parity) Although both mirroring (RAID-1) and RAID-5 provide redundancy of data, they use different methods. Mirroring provides data redundancy by maintaining multiple complete copies of the data in a volume. Data being written to a mirrored volume is reflected in all copies. If a portion of the mirrored volume fails, the system continues to use the other copies of the data. RAID-5 provides data redundancy by using parity.
Veritas File System (VxFS) Introduction The Veritas File System (VxFS) is a high availability, high performance, commercial grade file system that provides features such as transaction based journaling, fast recovery, extent-based allocation, and online administrative operations, such as backup, resizing, and defragmentation of the file system. It provides high performance and easy manageability required by mission-critical applications, where high availability is critical.
• ◦ Bypasses the system buffer cache for file I/O ◦ Specifies the expected access pattern for a file Extended Mount Options The extended mount options supported by VxFS include the following: • ◦ Enhanced data integrity modes ◦ Enhanced performance modes ◦ Temporary file system modes ◦ Improved synchronous writes ◦ Large file sizes Large File and File System Sizes File systems up to 40 TB and files up to 16 TB in size are supported on HP-UX 11i v3.
it. The SmartMove feature uses VxFS information to detect free extents and avoids copying them.
to a host. Physical storage capacity is allocated from a thin pool to the thin/thin reclaim capable LUNS only after application I/O writes. Starting with the VxFS 5.1 SP1 release, you can tune VxFS to enable or disable thin-friendly allocations. This feature is only supported on file systems mounted on a VxVM volume. • Partitioned Directories VxFS 5.1 SP1 allows you to create partitioned directories.
Extent Based Allocation An extent is defined as one or more adjacent blocks of data within the file system.
2 System Requirements This chapter discusses the various system requirements for the Veritas 5.1 SP1 suite of products. This chapter addresses the following topics: • Software Dependency • OS Version • Patch Requirements • Required Packages for VEA • Software Depot Content • License Bundles • Disk Space Requirements Software Dependency • VxFS 5.1 SP1 works with both HP LVM and VxVM 5.1 SP1 on HP-UX 11i v3 • VxVM 5.1 SP1 works only when VxFS 5.
Table 3 Required and Recommended Patches (continued) PHKL_40377 No PHKL_41005 No PHKL_41083 Yes PHKL_41087 No PHKL_41442 Yes Required Software In addition to the recommended patches listed in Table 3, the software products listed in Table 4 are required for use with VxFS 5.1 SP1 and VxVM 5.1 SP1 installations. You can download these products from http://www.software.hp.com. Table 4 Required Software Products Product Name: Revision Ignite-UX C.7.12 or later BaseLVM B.11.31.
Table 6 Base-VxVM-51 Bundle Components (continued) Package Description Base-VxVM-51.VRTSvxvm Veritas Volume Manager by Symantec Base-VxVM-51.VRTSvlic Symantec License Utilities Table 7 lists the Base-VxTools-51 bundle components. Table 7 Base-VxTools-51 Bundle Components Package Description Base-VxTools-51 VERITAS Infrastructure Bundle 5.1 for HP-UX Base-VxTools-51.VRTSat Symantec Product Authentication Service Base-VxTools-51.VRTSvlic Symantec License Utilities Base-VxTools-51.
Disk Space Requirements Table 10 and Table 11 list the disk space requirements for VxFS 5.1 SP1 and VxVM 5.1 SP1, respectively. Disk Space Requirements for VxFS 5.1 SP1 Table 10 lists the disk space required by VxFS 5.1 SP1. Table 10 Minimum Space Required for Each Directory for VxFS 5.
3 Installing the Veritas 5.1 SP1 Products This chapter describes how to install VxFS 5.1 SP1 and VxVM 5.1 SP1 with the swinstall (1M) command. This chapter addresses the following topics: • “Mounting the HP Serviceguard Storage Management Suite Media” (page 27) • “Installing Veritas 5.1 SP1 Products” (page 27) • “Installing VxFS 5.1 SP1” (page 28) • “Installing VxVM 5.1 SP1” (page 29) • “Installing CVM [B9117EB] on HP-UX 11i v3” (page 31) • “Cold-Installing VxVM 5.1 SP1 and VxFS 5.
your system before installing the 5.1 SP1 version of the Veritas software. As the HP-UX 11i v3 March 2011 OEUR release contains the VxVM 5.0 and VxFS 5.0 products by default, you cannot directly install the 5.1 SP1 products. You must upgrade the Veritas 5.1 SP1 products from 5.0 to 5.1 SP1 after installing HP-UX 11i v3 March 2011 OEUR release. Installing VxFS 5.1 SP1 VxFS 5.1 SP1 consists of the Base-VxFS-51 and HP OnlineJFS (B3929HB) bundles.
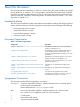
Verifying Base-VxFS-51 Installation Verify the Base-VxFS-51 installation on your system by entering the following command: # swverify Base-VxFS-51 For more information on the supported options, see swverify (1M). Installing HP OnlineJFS (B3929HB) The HP OnlineJFS (B3929HB) license enables additional VxFS functionality not available with Base-VxFS-51. You can install HP OnlineJFS (B3929HB) either in the non-interactive or in the interactive mode.
NOTE: Ensure that you select the complete Base-VxVM-51 bundle for installation while installing Full-VxVM bundle B9116EB if your system already does not have Base-VxVM-51. Also, verify that the bundles Base-VxVM-51, Base-VxFS-51, Base-VxTools-51 and B9116EB are present on your system after installing B9116EB.
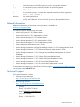
Installing Full VxVM in Interactive Mode To install Full VxVM in the interactive mode, complete the following steps: 1. Enter the swinstall command in the interactive mode, as follows: # swinstall -s For more information on supported options, see swinstall (1M). 2. 3. Mark the B9116EB bundle on the SD Install window. Select Actions, and click Install. Follow the on-screen instructions to complete the installation. NOTE: The B9116EB bundle contains a license for the Full VxVM 5.
3. Create the configuration file for the VxVM 5.1 SP1 depot. 1. # cd /var/opt/ignite/data/Rel_B.11.31 2. # /opt/ignite/bin/make_config \ - s <1131_Vx*5.1_depot> – c _cfg 3. Test the configuration file. # /opt/ignite/bin/instl_adm –T –f _cfg 4. Combine both configuration files into one Ignite-UX INDEX configuration clause: 1. # vi /var/opt/ignite/INDEX 2. Append a new configuration clause, such as: cfg “HP-UX B.11.31_Mar2011_OE-Vx51” { description “B.11.
6. Base-VxFS-50(OE) Veritas File System Bundle 5.0 for HP-UX Base-VxTools-50(OE) ERITAS Infrastructure Bundle 5.0 for HP-UX Base-VxVM-50(OE) Base VERITAS Volume Manager Bundle 5.0 for HP-UX B3929FB OnlineJFS for Veritas File System 5.0 Bundle Make any other configuration choices needed using the Ignite-UX interface, and then select Go! to cold-install the client. Confirming the Client After the system boots, confirm that the client has the intended software and configuration.
For example, copy the /11iv3SG_DVD into the same HP-UX depot. If there are multiple ServiceGuard and StorageManagement DVDs, you must repeat this step for each DVD. 4. If you plan to use this HP-UX depot to update systems other than the system where the depot resides, you must register the HP-UX depot. The swcopy command automatically registers the depot when it is first created. However, HP recommends that you register the depot again such that it is visible to other systems.
For more information on managing depots, see Software Distributor Administration Guide: HP-UX 11i v1, 11i v2, and 11i v3. To locate this document, go to the HP Business Support Center.
4 Setting up the Veritas 5.1 SP1 Products This chapter describes how to initialize and set up VxVM 5.1 SP1 and VxFS 5.1 SP1.
If the disk to be removed is the last disk in the volume group, use the vgremove command to remove the volume group, and then use the pvremove command to erase the LVM disk headers. If the disk is not currently in use by any volume or volume group but has been initialized by the pvcreate command, you must still use the pvremove command to remove LVM disk headers. If you want to mirror the root disk across multiple disks, ensure that all the disks are free from LVM control. 2.
# vxdctl mode The following message indicates that the vxconfigd daemon is running and enabled: mode: enabled This message indicates that vxconfigd is not running: mode: not-running • Enabling the Volume Daemon To enable the volume daemon, enter the following command: # vxdctl enable Once started, vxconfigd automatically becomes a background process. By default, vxconfigd writes error messages to the console. However, you can configure it to write errors to a log file.
1. 2. 3. 4. 5. Obtain a license for the VxVM cluster feature. Install the software packages on each node in the cluster. Initialize VxVM. Start VEA. Configure shared disks. For information on configuring shared disks, see the Veritas Volume Manager Administrator’s Guide. To locate this document, go to the HP-UX Core docs page at: www.hp.com/go/ hpux-core-docs. On this page, select HP-UX 11i v3.
1. 2. Start the cluster on all nodes. Enter the following command on all nodes: # vxdg -s list This command displays the existing shared disk groups. Converting Existing VxVM Disk Groups to Shared Disk Groups This section discusses the procedure to upgrade from VxVM 3.x to VxVM 5.1 SP1 and to convert existing disk groups to shared disk groups. To convert existing disk groups to shared disk groups, complete the following steps: 1. Ensure that all systems that are running are part of the same cluster. 2.
NOTE: To find out if you are on the master node, enter the following command: # vxdctl -c mode 2. Using the diskgroup names displayed in the previous command, list the disk groups that have volumes on which FastResync is set: # vxprint -g diskgroup -F "%name" -e "v_fastresync" 3. Reattach each snapshot: # vxassist -g diskgroup -o nofmr snapback snapshot_volume 4. If you are upgrading from VxVM 3.5 Maintenance Patch 3 or from VxVM 3.
NOTE: Disks use the traditional naming format, usually c#t#d#. Enclosure-based naming enables disk devices to be named for enclosures rather than for the controllers through which they are accessed. In a Storage Area Network (SAN) that uses Fibre Channel hubs or fabric switches, information about the disk location provided by the operating system may not correctly indicate the physical location of the disks. Enclosure-based naming enables VxVM to access enclosures as separate physical entities.
3. For the volume manager to detect these new disks, enter the following command: # vxdisk scandisks For more information on supported options, see vxdisk (1M). 4. Invoke the vxdiskadm menu driven utility, by entering the following command: # vxdiskadm For more information on the supported options, see vxdiskadm (1M). Follow the on-screen instructions to complete adding and initializing the disk.
2. Start the VEA service by entering the following command: # /opt/VRTSob/bin/vxsvcctrl start For more information on the supported options, see vxsvcctrl(1M). NOTE: To stop the VEA service later, enter the following command: # /opt/VRTSob/bin/vxsvcctrl stop Setting Up a Veritas Enterprise Administrator Client To run VEA and administer a local or remote system, ensure that you have sufficient privileges.
# /sbin/fs/vxfs/vxfsconvert [-l logsize] [-s size] [-efnNvyY] special For more information on the supported options, see vxfsconvert(1M). Mounting a VxFS File System To mount a vxfs file system, enter the following command: # mount -F vxfs [generic_options] [-r] [-o specific_options] special For more information on the supported options, see mount_vxfs(1M).
appropriate disk group if it takes control of the root disk. Alternatively, bootdg is set to nodg. To check the name of the disk group, enter the command: # vxdg bootdg 2. Decide on the layout of shared disk groups (as one or more shared disk groups may exist) and determine how many you wish to use. 3. If you plan to use the Dirty Region Logging (DRL) feature with VxVM in a cluster, ensure that some space is available on the disk for these logs.
5 Upgrading from Previous Versions of VxFS to VxFS 5.1 SP1 This chapter discusses various VxFS upgrade paths based on the version of your OS. This chapter addresses the following topics: • “Upgrading from VxFS 3.3 or 3.5 on HP-UX 11i v1 to VxFS 5.1 SP1 on HP-UX 11i v3” (page 47) • “Upgrading from VxFS 3.5 on HP-UX 11i v2 to VxFS 5.1 SP1 on HP-UX 11i v3” (page 48) • “Upgrading from VxFS 4.1 on HP-UX 11i v2 or HP-UX 11i v3 to VxFS 5.1 SP1 on HP-UX 11i v3” (page 49) • “Upgrading from VxFS 5.
6. If there are any VxFS file systems with disk layout 2 or 3 or non-VxFS file systems on your system, after upgrading to VxFS 5.1 SP1, that must be converted to VxFS. To upgrade to DLV 7 and convert an HFS file system to VxFS, enter the following command: # opt/VRTS/bin/vxfsconvert The vxfsconvert command works with unmounted file systems. To upgrade mounted file system, use the vxupgrade command, as described in step 8.
NOTE: You cannot upgrade from DLV 2 to DLV 4 directly. DLV4 is the lowest disk layout that is supported by VxFS 5.1 SP1. a. To upgrade a mounted VxFS file system from DLV 2 to DLV 3, enter the following command: # vxupgrade -n 3 b. To upgrade a mounted VxFS file system from DLV 3 to DLV 4, enter the following command: # vxupgrade -n 4 4. 5. 6. Upgrade to HP-UX 11i v3. For more information on upgrading, see the HP-UX 11i v3 Installation and Update Guide.
1. To determine the volume names, enter the following command: # bdf 2. To determine the current disk layout version for system partitions, enter the following command: # fstyp -v 3. To upgrade file systems with DLV 2 or 3, before installing 5.1 SP1, complete the following steps: NOTE: You cannot upgrade from DLV 2 to DLV 4 directly. DLV4 is the lowest disk layout that is supported by VxFS 5.1 SP1. a.
# vxupgrade -n 7 c. To upgrade a mounted VxFS file system from disk layout 6 to disk layout 7, enter the following command: # vxupgrade -n 7 9. To verify the conversion, enter the following command: # fstyp -v Upgrading from VxFS 5.0 on HP-UX 11i v2 or HP-UX 11i v3 to VxFS 5.1 SP1 on HP-UX 11i v3 To upgrade from VxFS 5.0 on HP-UX 11i v2 or HP-UX 11i v3 to VxFS 5.1 SP1 on HP-UX 11i v3, complete the following steps: 1.
a. To upgrade a mounted VxFS file system from disk layout 4 to disk layout 7, enter the following commands: # vxupgrade -n 5 # vxupgrade -n 6 # vxupgrade -n 7 b. To upgrade a mounted VxFS file system from disk layout 5 to disk layout 7, enter the following commands: # vxupgrade -n 6 # vxupgrade -n 7 c.
During pass 4, fsck displays several error messages that require a yes response to complete the conversion process. 7. VxFS file systems with disk layout 4, 5, 6 and 7 can still be mounted with VxFS 5.1 SP1. However, to upgrade the disk layout version of mounted file systems to 8, use the vxupgrade command, as follows: a.
6 Upgrading from Previous Versions of VxVM to VxVM 5.1 SP1 This section discusses the requirements to update from the pervious version of Veritas Volume Manager to the 5.1 SP1 version of Veritas Volume Manager and also the various supported disk groups. It addresses the following topics: • “Determining VxVM Disk Group Version” (page 54) • “Native Multipathing with Veritas Volume Manager” (page 55) • “Upgrading from VxVM 3.5 on HP-UX 11i v1 to VxVM 5.
Table 12 VxVM Disk Group Version (continued) 5.0.1 140 90,120, and 140 5.1 SP1 160 90,120, 140 and 160 Use the following command to determine the version of a disk group: # vxdg list To upgrade a disk group to version 160, use the following command: # vxdg upgrade After you upgrade from a previous release of VxVM, HP recommends that you upgrade to the latest disk group version. For more information on disk groups, see the Veritas Volume Manager 5.1 SP1 Administrator's Guide.
disk227 disk228 disk229 auto:hpdisk auto:hpdisk auto:hpdisk - - online online online This procedure essentially instructs DMP to bypass all auto-configured devices. As a result, no DMP metanodes are created under /dev/vx/[r]dmp directory. VxVM names these devices according to their corresponding agile or persistent device special files (DSFs) assigned by the operating system. CAUTION: Foreign devices are not supported as cluster-sharable disks.
# vxconfigd –kr reset 3. To restart all the volumes in each disk group, enter the following command: # vxvol –g diskgroup startall The output from the vxdisk list command shows the DMP metanode names according to the current naming scheme.
c89t0d3 c89t0d4 c89t0d5 auto:hpdisk auto:hpdisk auto:hpdisk - - online online online Output in agile naming scheme. # vxdisk list DEVICE TYPE disk155 auto:LVM disk156 auto:LVM disk224 auto:cdsdisk disk225 auto:cdsdisk disk226 auto:cdsdisk disk227 auto:hpdisk disk228 auto:hpdisk disk229 auto:hpdisk DISK - GROUP - STATUS LVM LVM online online online online online online For information on migrating an individual device or only a subset of devices, see vxdiskadm(1M).
Upgrading from VxVM 3.5 on HP-UX 11i v2 to VxVM 5.1 SP1 on HP-UX 11i v3 You must consider the following guideline prior to upgrading from VxVM 3.5 on HP-UX 11i v2 to VxVM 5.1 SP1 on HP-UX 11i v3: • VxVM 3.5 and VxVM 5.1 SP1 both support disk group version 90. To Upgrade from VxVM 3.5 on HP-UX 11i v2 to VxVM 5.1 SP1 on HP-UX 11i v3 To upgrade from VxVM 3.5 on HP-UX 11i v2 to VxVM 5.1 SP1 on HP-UX 11i v3, complete the following steps: 1. Stop activity to all VxVM volumes.
3. 4. If patches to VxVM 5.1 SP1 for HP-UX 11i v3 are required, the patches must be applied prior to upgrading the product. Install the VxVM 5.1 SP1 package. # swinstall –x autoreboot=true -s Base-VxVM-51 Upon successful completion of the upgrade, VxVM 5.0 will be replaced by VxVM 5.1 SP1. Disk groups created in VxVM 4.1 on HP-UX 11i v2 will be accessible after you upgrade the system to VxVM 5.1 SP1. Upgrading from VxVM 4.1 on HP-UX 11i v3 to VxVM 5.
Installing the 5.1 SP1 Veritas software updates Veritas File System 5.0. After installing the 5.1 SP1 version of Veritas File System, to revert to the 5.0 version, you must remove the 5.1 SP1 version and then re-install the 5.0 version. The 5.0 and 5.1 SP1 versions of Veritas File System cannot coexist. To Upgrade from VxVM 5.0 on HP-UX 11i v2 to VxVM 5.1 SP1 on HP-UX 11i v3 To upgrade from VxVM 5.1 SP1 on HP-UX 11i v2 to VxVM 5.1 SP1 on HP-UX 11i v3, complete the following steps: 1.
Upgrading From VxVM 5.0 on HP-UX 11i v3 to VxVM 5.1 SP1 Using Integrated VxVM 5.1 SP1 Package for HPUX 11i v3 You can upgrade from VxVM 5.0 HP-UX 11i v3 to VxVM 5.1 SP1 using the integrated VxVM 5.1 SP1 package for HP-UX 11i v3 from the ignite depot. To upgrade from VxVM 5.0 HP-UX 11i v3 to VxVM 5.1 SP1 on HP-UX 11i v3 using the integrated VxVM 5.1 SP1 package for HP-UX 11i v3 from the ignite depot, complete the following steps: 1. Integrate the VxVM 5.1 SP1 package with the latest HP-UX fusion.
When all paths to a disk fail, there may be certain paths that have a temporary failure and are likely to be restored soon. If I/Os are not retried for a period of time, the I/Os may be failed to the application layer even though some paths are experiencing a transient failure. For more robust handling of such transient errors, the dmp_lun_retry_timeout tunable provides a time-based retry mechanism at the LUN level.
7 Post Upgrade Tasks This chapter discusses the tasks that you must complete after upgrading the VxVM software.
1. Select one of the nodes of the cluster and mount the file system locally on this node. Use the mount command but without the -o cluster option. Following is a sample mount command: # mount -F vxfs /dev/vx/dsk/sharedg/vol1 /mnt1 2. Find the current disk layout version on a file system: # fstyp -v | grep version | \ awk '{print $2}' 3. On the node selected in Step 1, incrementally upgrade the disk layout of this file system to layout Version 6 or 7.
Upgrading VxVM Disk Group Versions All Veritas Volume Manager disk groups have an associated version number. Each VxVM release supports a specific set of disk group versions and can import and perform tasks on disk groups with those versions. Some new features and tasks work only on disk groups with the current disk group version. Before you can perform the tasks, you need to upgrade existing disk groups. After upgrading from Storage Foundation 4.x to 5.
Converting from QuickLog to Multi-Volume Support The 4.1 release of the Veritas File System is the last major release to support QuickLog. The Version 6 or Version 7 disk layout does not support QuickLog. The functionality provided by the Veritas Multi-Volume Support (MVS) feature replaces most of the functionality provided by QuickLog. This section discusses the procedure to convert from QuickLog to MVS. The QuickLog device need not be related to the file system.
8 Removing Veritas 5.1 SP1 Products This chapter discusses how to remove the Veritas 5.1 SP1 suite of products from an HP-UX 11i v3 system, using the HP-UX SD commands. This chapter addresses the following topics: • “Removing VxVM” (page 68) • “Removing VxFS” (page 70) • “Removing CVM” (page 71) • “Removing the Veritas Enterprise Administrator (VEA) Client” (page 71) CAUTION: If VxVM 5.
2. Remove the evacuated disks from VxVM control by entering the following command: # vxdg -g rmdisk For more information on supported options, see vxdisk (1M) and vxdg (1M). 3. 4. 5. Unmount the disk to be removed first. If the volume is being used as a raw partition for database applications, ensure that the application is not updating the volume and the data on the volume is synchronized. Create an LVM volume of the same size as the plex on the VxVM volume.
2. Remove a named plex: # vxplex -g -o rm disk If the remaining plex has more than one sub-disk, enter the following sequence of commands to consolidate the sub-disks into a single sub-disk: # vxassist -g mirror volume layout=config # vxplex -g -o rm disk For more information on the supported options, see vxassist(1M) and vxplex(1M). NOTE: The consolidation operation fails if you do not have sufficient space on a single sub-disk.
For more information on the supported options, see swremove(1M). CAUTION: Do not remove the VRTSvlic package if there are any other Veritas products running on your system. NOTE: VxFS 4.1 is activated after the removal of Base-VxFS-51. Removing CVM To remove CVM, enter the following command: # swremove -x autoreboot=true B9117EB Removing the Veritas Enterprise Administrator (VEA) Client You must remove the VEA client software from any system that you used to access the Veritas software.
A Files Added and Modified After VxFS Installation This appendix discusses the files that are added and modified after installing VxFS 5.1 SP1. Files Added After VxFS Installation Table 13 lists the files added after installing VxFS 5.1 SP1. Table 13 Files Added After VxFS Installation File Description /usr/conf/lib/libvxfs50.a Kernel library for VxFS 5.1 SP1 /sbin/lib/mfsconfig.d/vxfs50 VxFS 5.1 SP1 command configuration file /usr/lib/libxdsm.a DMAPI library /usr/lib/libvxfsutil.a VxFS 5.
Table 14 Files Modified After VxFS Installation File Modifications /stand/system Deactivates JFS and OnLineJFS and configures VxFS 5.1 SP1 and Quick I/O. /etc/MANPATH Inserts /opt/VRTS/vxfs5.1/man before the /usr/share/man directory in the MANPATH environment variable to ensure that the VxFS 5.1 SP1 manpages are displayed, instead of HP OnLineJFS/JFS 5.1 SP1 manpages located in the /usr/share/man directory.
*5900-1514* Printed in the US