HP Server tc2110 Network Operating System Installation Guide For: Microsoft Windows NT 4.0 Server Microsoft Windows 2000 Server and Microsoft Small Business Server 2000 Novell NetWare 5.1 and Novell Small Business Suite 5.1 Novell NetWare 6.0 and Novell Small Business Suite 6.0 Red Hat Linux 7.1TurboLinux Server 6.
Notice The information contained in this document is subject to change without notice. Hewlett-Packard makes no warranty of any kind with regard to this material, including, but not limited to, the implied warranties of merchantability and fitness for a particular purpose. Hewlett-Packard shall not be liable for errors contained herein or for incidental or consequential damages in connection with the furnishing, performance, or use of this material.
Contents 1 HP Server tc2110 Installation Highlights for Experts ...................................1 Section 1. Introduction........................................................................................1 Section 2. Installation Highlights ........................................................................1 2 Preparing your HP Server tc2110 for your NOS installation .......................3 Section 1. Hardware Setup ..............................................................................
Contents Tip #5. Booting from Another SCSI HDD.....................................................17 Tip #6. Restarting Windows NT installation .................................................17 On-Line Information and Software Sources.....................................................17 4 Installing Microsoft Windows 2000 Server and Small Business Server 2000 .....................................................................................................................
Contents Section 2. Create the Drivers Diskettes ...........................................................37 Section 3. Perform NetWare 5.1 or Novell Small Business Suite 5.1 Installation38 PHASE 1 – Start the Installation ..................................................................38 PHASE 2 – Install HP Drivers ......................................................................40 PHASE 3 – Configure the Network ..............................................................
Contents On-Line Information and Software Sources.....................................................
1 HP Server tc2110 Installation Highlights for Experts Section 1. Introduction This chapter is for expert users only, and assumes they are familiar with the standard installation process of their NOS. HP recommends taking into account the following specific information in order to adapt your usual NOS installation to the particularities of your HP server tc2110. The detailed instructions relative to each specific step (location of drivers, workarounds) are provided in the respective NOS chapters.
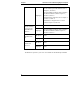
Chapter 1 HP Server tc2110 Installation Highlights for Experts Suite 5.1 Create NetWare patch file diskette (refer to Chapter 5 | Section 2) Highlights For Novell SBS, use floppy disk to initialize the NOS installation (refer to Chapter 5 | Section 3 | Phase 1) Install NetWare patch file (refer to Chapter 5 | Section 3 | Phase 1) Install NW 5.1 Support Pack 3 or above (refer to Chapter 5 | Section 4) Novell NetWare 6.0 and Novell Small Business Suite 6.0 Red Hat Linux 7.1 TurboLinux Server 6.
2 Preparing your HP Server tc2110 for your NOS installation Section 1. Hardware Setup Prepare your HP server following the instructions in the HP Server tc2110 Operations and Maintenance Guide. It is recommended that you do not install any third party adapter until you verify that the HP equipment is functioning properly and you complete the NOS installation. Preparing your Hard Disk Drives The HP Tower Server tc2110 comes with new hard disk drive(s) that do not need specific setup.
Chapter 2 Preparing your HP Server tc2110 for your NOS installation Section 3. Run HP Diagtools To perform HP Diagtools hardware diagnostic on your HP Server tc2110, switch off your HP server then reboot on the Startup CD and follow the on-screen instructions. View and save the hardware inventory after the test. Section 4.
3 Installing Microsoft Windows NT 4.0 Server Prepare the Installation Please refer to the Chapter 1 "Preparing your HP Server tc2110 for your NOS installation" for our recommendations on the server preparation. Then gather the following material: · HP Server tc2110 Startup CD · Microsoft Windows NT4 CD-ROM as well as the latest Microsoft NT Service Pack (#6a or above) · Seven blank formatted 3.
Chapter 3 Installing Microsoft Windows NT 4.0 Server o HP Server tc2110 Windows NT SCSI driver (HP disk NT SCSI) o HP Server tc2110 Windows NT LAN driver (HP disk NT LAN #1 and #2) NOTE If the Windows PC does not auto-start the Startup menu, start it by opening Startup.htm found at the root level of the Startup CD. Section 2. Create Microsoft Windows NT Installation Diskettes Three installation diskettes are required to install Microsoft Windows NT 4.0 on your server.
Chapter 3 Installing Microsoft Windows NT 4.0 Server NOTE Do not try to install Windows NT 4.0 via booting from the Windows NT CD-ROM. This method of installation does not work properly on most servers. The installation procedure will prompt you to insert the Windows NT CD-ROM at a later time. PHASE 1 – Drivers Installation 1. Insert the Windows NT Setup/Boot Diskette #1 and boot the system. 2. Replace the diskette when prompted and press Enter. 3.
Chapter 3 NOTE Installing Microsoft Windows NT 4.0 Server Windows NT setup will prompt a different menu if you have reconfigured your new HP server to use a hard drive already containing data. 3. Insert the Windows NT CD-ROM when prompted then press Enter. NOTE Your CD-ROM drive needs few seconds to detect the newly inserted CD-ROM. You may need to press Enter again if you pressed Enter too quickly the first time. 4.
Chapter 3 Installing Microsoft Windows NT 4.0 Server NOTE Your CD-ROM drive needs few seconds to detect the newly inserted CD-ROM. If the window "Files Needed" appears, press Enter again. 2. Click Next at the Windows NT Server Setup screen to gather information about your computer. 3. You can now proceed through the customization of your installation using the graphical interface. NOTE You can later promote your "Backup domain controller" to "Primary domain controller" and vice versa.
Chapter 3 Installing Microsoft Windows NT 4.0 Server NOTE The network settings need to be customized to your environment. Please refer to Microsoft NT Server manuals should you need further details on the networking settings. 6. Click Next to install all above selected components when prompted by Windows NT Server Setup.
Chapter 3 Installing Microsoft Windows NT 4.0 Server 5. When prompted, insert the blank formatted disk to create the Emergency Repair Disk then click OK. 6. When prompted, remove the Emergency Repair disk and the Windows NT Server CD-ROM from their drives and reboot the system by pressing Enter. 7. The Windows NT logon screen will show after the POST, as the basic Windows NT installation is now complete.
Chapter 3 Installing Microsoft Windows NT 4.0 Server PHASE 7 – Install HP Video Driver The Microsoft Windows installation process has installed the standard VGA video driver. If you would like to make use of the high-resolution video driver, follow these steps: 1. Ensure Microsoft Windows NT Service Pack (version #6a or above) is installed. This is a REQUIREMENT. 2. Logon as the Administrator on your HP server then insert HP Startup CD in the CD-ROM drive.
Chapter 3 Installing Microsoft Windows NT 4.0 Server Section 5. Perform Hardware Status Check This section will provide a simple way to verify your installation of Windows NT. Note that Windows NT Resource Guide CD-ROM (available from Microsoft) provide utilities to generate activities to stress the system. The following steps use standard tools provided with the Windows NT Server installation. 1.
Chapter 3 Installing Microsoft Windows NT 4.0 Server 4. Open a command prompt window on your HP server (Start | Program | Command Prompt) and verify the TCP/IP configuration you have set during Windows NT installation by entering: ipconfig /all 5. To verify the server and clients can communicate properly: a. From one of the clients, open a command prompt and type: ping computername Where computername is the server name you entered during Windows NT installation.
Chapter 3 Installing Microsoft Windows NT 4.0 Server Tip #1. Troubleshooting SCSI Host Bus Adapter Configuration The boot manager for Windows NT contains recovery logic to allow you to return to the last known good configuration. If you have changed your SCSI host bus adapter configuration and Windows NT no longer boots, follow these steps to recover: 1. Undo any hardware changes you have made to the computer since it was last operational. 2. Reboot the computer.
Chapter 3 Installing Microsoft Windows NT 4.0 Server 3. Press F3 to quit the installation program. 4. Restart the installation program. 5. At the drive partition screen, delete the 1024 MB primary partition. 6. Partition the primary partition to any desired size up to the drive capacity. 7. Continue with the Windows NT installation program. Tip #3. Service Pack Files Replaced Without Feedback Some system configuration changes may ask you to install the original Windows NT drivers diskette.
Chapter 3 Installing Microsoft Windows NT 4.0 Server Tip #5. Booting from Another SCSI HDD To boot Windows NT from another SCSI hard disk, press Ctrl+A during system boot to enter SCSI-Select menu. In this menu, configure the SCSI Hard Drive Priority option in the Boot Device Ordering menu. Tip #6. Restarting Windows NT installation If you want to restart Windows NT installation from the very beginning, use a utility such as fdisk to erase all data and partitions from your hard drive.
4 Installing Microsoft Windows 2000 Server and Small Business Server 2000 Prepare the Installation NOTE For ease of reading, we will refer to "Windows 2000 Server" and " Small Business Server 2000" both as "Windows 2000" in this chapter. Please refer to the Chapter 1 "Preparing your HP Server tc2110 for your NOS installation" for our recommendations on the server preparation.
Chapter 4 Installing Microsoft Windows 2000 Server and Small Business Server 2000 2. Insert your HP Startup CD in a Windows PC and follow the on-screen instructions to create the Windows 2000 SCSI driver diskette (HP disk W2K SCSI). NOTE If the Windows PC does not auto-start the Startup menu, start it by opening Startup.htm found at the root level of the Startup CD. Section 2.
Chapter 4 Installing Microsoft Windows 2000 Server and Small Business Server 2000 5. Press C to continue Setup at the "Setup has determined that your computer's startup hard disk is new…" screen. 6. Press F8 to accept the licensing agreement. 7. At the drives partitioning screen, select the target drive. If you want to use the entire drive to install Windows 2000 then press Enter. Otherwise, press C to create a drive a partition. In this example we will create a 2GB partition.
Chapter 4 Installing Microsoft Windows 2000 Server and Small Business Server 2000 NOTE There may be a period of time with no apparent activity at the "Saves Settings". Be patient. 17. At the "Completing the Windows 2000 Setup Wizard" screen, remove the CD-ROM then click Finish. The system will automatically reboot from the hard drive. 18. Follow screen instructions to logon (press Ctrl+Alt+Del). Enter the administrator password you have defined earlier. 19.
Chapter 4 Installing Microsoft Windows 2000 Server and Small Business Server 2000 5. When prompted, click Restart to reboot your system (remember to remove all diskettes and CD-ROM from their respective drives). PHASE 2 – Install the Chipset Driver 1. Insert HP tc2110 Startup CD in the CD-ROM drive. The Startup CD will automatically start and a menu will display. NOTE Your HP server should auto-detect the presence of the Startup CD and start the Startup menu.
Chapter 4 Installing Microsoft Windows 2000 Server and Small Business Server 2000 6. After your logon, you will be notified that default display resolutions are being used. Click OK. You can now configure your settings and test them. PHASE 4 – Install the HP LAN driver Windows 2000 installation can not detect the embedded HP LAN. The following procedure will help you install the driver using the HP Startup CD: 1. Insert the HP Startup CD in your new server.
Chapter 4 Installing Microsoft Windows 2000 Server and Small Business Server 2000 2. Verify that no devices have either a yellow band (!) or question mark (?) symbol next to it. o Yellow (!) means that there is a resource issue with the device. o Question (?) means that the device is unknown. If (!) or (?) symbols are reported then double click on each of the devices with (!) or (?). Use the "Device Status" message for troubleshooting.
Chapter 4 Installing Microsoft Windows 2000 Server and Small Business Server 2000 To start the disk administrator use the following procedure. 1. Click Start | Programs | Administrative Tools | Computer Management. 2. Double click Storage | Disk Management in the tree. 3. The "Write signature and Upgrade" wizard will start if you have new hard drives with no signatures on them. Follow the on-screen instructions to create this signature. 4.
Chapter 4 Installing Microsoft Windows 2000 Server and Small Business Server 2000 9. Click Yes to restart the system. (Remove the CD-ROM). 10. After the system reboots, login to the system. 11. Open Start | Settings | Control Panel | Administrative Tools. Check that the following services are now available: "Terminal Services Client Creator", "Terminal Services Configuration" and "Terminal Services Manager". Create Client Installation Diskettes 1. Double click Terminal Services Client Creator. 2.
Chapter 4 Installing Microsoft Windows 2000 Server and Small Business Server 2000 Section 5. Configure the Network PHASE 1 -- Configure Server IP Address During the installation process the system was configured to use DHCP. If no DHCP server is found on the network the system will auto-configure a random IP address to start functioning. It is important that you configure the proper IP address to be able to communicate with the clients: 1.
Chapter 4 Installing Microsoft Windows 2000 Server and Small Business Server 2000 where computername is the server name you entered during Windows 2000 installation. You should get four reply's from your new server. If there is a link problem it must be fixed before going any further. You may test the link further by doing a ping between two clients: at the same command prompt, type: ping other_client_IPaddress You should get four reply's from the second client. b.
Chapter 4 Installing Microsoft Windows 2000 Server and Small Business Server 2000 7. Click Next at the "Create or Join Forest" to accept the default "Create a new forest of domain trees". 8. At the text box for "Full DNS name for new domain:" type in the assigned DNS name for your server (for example: mycompany.com). 9. Click Next. The system may take a few minutes before moving to next screen. 10. Click Next at the "NetBIOS Domain Name" dialog box to accept default "Domain NetBIOS name:" 11.
Chapter 4 Installing Microsoft Windows 2000 Server and Small Business Server 2000 · HP Surestore DAT24i Please refer to the product manual enclosed with your accessory for the detailed installation procedures. Troubleshooting This section will help you resolve some of the most common installation problems. Tip #1. Upgrading from NT 4.0 to Windows 2000 It is possible to upgrade from any edition of NT 4.0 including Terminal Server to Windows 2000. Please refer to the readme.
Chapter 4 Installing Microsoft Windows 2000 Server and Small Business Server 2000 1. If you experiences this problem, remove all drives with the exception of the target boot drive. Install Windows 2000 and then add the removed hard drives to the system. 2. Run the Disk Management tool to prepare the remainder of the drives to be used in the system. a. Boot the system with a Windows 98SE recovery diskette. (This version supports FAT32, which works on large hard drives.) b. Perform an FDISK on each drive.
Chapter 4 Installing Microsoft Windows 2000 Server and Small Business Server 2000 · Digital signatures are a powerful way to ensure system integrity as you add drivers to your systems - whether provided by HP or others. Tip #5.
Chapter 4 Installing Microsoft Windows 2000 Server and Small Business Server 2000 Recovery option #3: Recovery Console (RC) Boot The Recovery Console (RC) can be used when safe boot fails. You can enter RC: · either by booting from Windows 2000 CD-ROM · or by installing the RC boot on your system. It is recommended to install the RC immediately after installing Windows 2000.
Chapter 4 Installing Microsoft Windows 2000 Server and Small Business Server 2000 Booting RC 1. Shutdown and Restart system. 2. Select "Windows 2000, Recovery Console" from the boot menu. 3. The system will display a menu asking to select the instance of the NOS you want to boot. For example it displays: 1: C:\WINNT 4. Type 1 then Enter. 5. Type the administrator password when prompted. 6. At the command prompt type help and proceed to achieve your objective. 7. Type exit when done troubleshooting.
5 Installing Novell NetWare 5.1 and Novell Small Business Suite 5.1 Prepare the Installation Please refer to the Chapter 1 "Preparing your HP Server tc2110 for your NOS installation" for our recommendations on the server preparation. Then gather the following material: · HP Server tc2110 Startup CD · Novel NetWare 5.1 or Novell Small Business Suite 5.1 CD-ROM and latest Support Pack CD-ROM · NetWare 5.1 or Novell Small Business Suite 5.
Chapter 5 Installing Novell NetWare 5.1 and Novell Small Business Suite 5.1 2. Insert your HP Startup CD in a Windows PC and follow the on-screen instructions to create the HP Server tc2110 NetWare SCSI drivers (HP disk NW SCSI). NOTE If the Windows PC does not auto-start the Startup menu, start it by opening Startup.htm found at the root level of the Startup CD. 3. Create the second diskette for LAN drivers (HP disk NW LAN). 4. Create the third diskette for Novell 5.1 patch (HP disk NW patch).
Chapter 5 Installing Novell NetWare 5.1 and Novell Small Business Suite 5.1 For NetWare 5.1 NOTE The NetWare NOS installation contains a known software error (not product-specific) that does not allow you to boot from CD-ROM. To work around this problem, boot from a DOS diskette and create a bootable DOS partition on the drive. 1. Insert the Novell NetWare 5.1 CD-ROM and boot the system. 2. Press Enter to read the license agreement then press Esc, and select "Accept License Agreement". 3.
Chapter 5 Installing Novell NetWare 5.1 and Novell Small Business Suite 5.1 6. Insert the Netware SBS 5.1 CD, then type: C:\>D: D:\>INSTALL 7. Select the Appropriate Language if prompted. 8. Press F10 to Accept the License Agreement. For both NetWare 5.1 and Small Business Suite 5/5.1 6. Press Enter to setup "a new server" then scroll down and make sure "Continue" is highlighted. 7. At the bottom bar of the screen, you can see the key function tips. Press F3. 8. Insert the HP disk NW patch. 9.
Chapter 5 Installing Novell NetWare 5.1 and Novell Small Business Suite 5.1 e. Press Insert to add a driver, then Insert again to add an unlisted driver. f. Press F3 and specify the path: A: then press Enter. g. The installation program takes a few seconds then automatically adds the HP driver on the driver list. NOTE The new HP driver may show the same device name description but is a more recent version. h. Scroll down and select "Return to driver summary". i. Scroll down and select Continue. 3.
Chapter 5 Installing Novell NetWare 5.1 and Novell Small Business Suite 5.1 NOTE Some settings can be defined by using the tree icon at the right side of the field. The network settings need to be customized to your environment. Please refer to Novell NetWare manuals should you need further details on the networking setup fields. 2. Insert and browse the NetWare 5.1 or Novell Small Business Suite 5.1 licensing/cryptographic diskette when prompted. 3.
Chapter 5 Installing Novell NetWare 5.1 and Novell Small Business Suite 5.1 4. At the system console prompt enter the command: cdrom 5. Wait for about 15 seconds for the CD to be automatically mounted as a volume. Note the volume name (example: “NW51SP1”). 6. Type: nwconfig NetWare Configuration Tool will open. 7. Scroll down to select "Product Options". 8. Scroll up to select "Install a Product Not Listed". 9.
Chapter 5 Installing Novell NetWare 5.1 and Novell Small Business Suite 5.1 Troubleshooting Tip #1. Restarting NetWare Installation If you want to restart NetWare installation from the very beginning, use a utility such as fdisk to erase all data and partitions from your hard drive. Then resume all installation process. On-Line Information and Software Sources · HP World Wide Web access: http://www.hp.com · Novell World Wide Web access: http://www.novell.
6 Installing Novell NetWare 6.0 and Novell Small Business Suite 6.0 Prepare the Installation Please refer to the Chapter 1 "Preparing your HP Server tc2110 for your NOS installation" for our recommendations on the server preparation. Then gather the following material: · HP Server tc2110 Startup CD · Novell NetWare 6.0 or Novell Small Business Suite 6.0 CD-ROM · Novell NetWare 6.0 or Small Business Suite 6.0 licensing/cryptographic diskette · Novell Small Business Suite 6.0 Partner CD (only for SBS 6.
Chapter 6 Installing Novell NetWare 6.0 and Novell Small Business Suite 6.0 2. Insert your HP Startup CD in a Windows PC and follow the on-screen instructions to create the HP Server tc2110 NetWare SCSI drivers (HP disk NW SCSI). NOTE If the Windows PC does not auto-start the Startup menu, start it by opening Startup.htm found at the root level of the Startup CD. Section 3. Perform NetWare 6.0 or SBS 6.0 Installation The installation of NetWare 6.0 or SBS 6.
Chapter 6 Installing Novell NetWare 6.0 and Novell Small Business Suite 6.0 5. If you accept erasing all data on your disk, select Continue. Then press any key for your system to create the partition, reboot, and format that partition. 6. Press F10 to "Accept License Agreement". For Small Business Suite 6.0 1. Boot your HP Server on a DOS bootable utility diskette. NOTE You can boot from the NetWare SBS 6 License diskette.
Chapter 6 Installing Novell NetWare 6.0 and Novell Small Business Suite 6.0 2. Review the Server Settings. If you do not want the "SERVER" to automatically load after reboot, Modify the “Load Server at reboot” parameter to NO. 3. Go to the "Server SET Parameters" and Choose Edit. A window will pop-up and the following should be added: i. SET MINIMUM PACKET RECEIVE BUFFERS=2500 ii. SET MAXIMUM PACKET RECEIVE BUFFERS=12500 4. Press ESC, save the changes. 5. Scroll down to select Continue. 6.
Chapter 6 Installing Novell NetWare 6.0 and Novell Small Business Suite 6.0 g. The installation program takes a few seconds then automatically adds the HP driver on the driver list. NOTE The new HP driver may show the same device name description but is a more recent version. h. Scroll down and select "Return to driver summary". i. Scroll down and select Continue. 3. The next driver summary screen displays storage and network devices.
Chapter 6 Installing Novell NetWare 6.0 and Novell Small Business Suite 6.0 6. You may then configure the Domain Name Service. Click Next to proceed. 7. Select your time zone then click Next. 8. Select whether to create a New NDS Tree or use an Existing NDS Tree, and click Next. 9. To create a New NDS Tree, enter the “Tree Name”, the “Context for Server Object”, and the administrator password and click Next. 10. Click Next to validate the NDS summary. 11.
Chapter 6 Installing Novell NetWare 6.0 and Novell Small Business Suite 6.0 Please refer to the product manual enclosed with your accessory for the detailed installation procedures. Troubleshooting Tip #1. Restarting NetWare Installation If you want to restart NetWare installation from the very beginning, use a utility such as fdisk to erase all data and partitions from your hard drive. Then resume all installation process. On-Line Information and Software Sources · HP World Wide Web access: http://www.
7 Installing Red Hat Linux 7.1 Prepare the Installation Please refer to the Chapter 1 "Preparing your HP Server tc2110 for your NOS installation" for our recommendations on the server preparation. Then gather the following material: · HP Server tc2110 Startup CD · Red Hat Linux 7.1 CD-ROMs #1 and #2 · Two or more clients for testing purpose (Optional) High Level Process Flow 1. Perform Linux 7.1 installation. 2. Install additional HP accessories. Section 1.
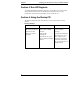
Chapter 7 Installing Red Hat Linux 7.1 · HP recommends selecting a Custom System installation type, because this mode includes the X Window graphical interface. ("Install Options" section) · HP recommends using the default partitioning mode: Automatically partition and REMOVE DATA ("Disk Partitioning" section) NOTE The network settings need to be customized to your environment. Please refer to Red Hat manuals should you need further details on the networking settings.
Chapter 7 Installing Red Hat Linux 7.1 Section 2. Install Additional HP Accessories The hp server tc2110 Startup CD includes the drivers for the following HP accessories: · HP-Intel 10/100 LAN Please refer to the product manual enclosed with your accessory for the detailed installation procedures. On-Line Information and Software Sources · HP World Wide Web access: http://www.hp.com · Red Hat World Wide Web access: http://www.Red Hat.com · Red Hat Errata World Wide Web access: http://www.Red Hat.
8 Installing TurboLinux Server 6.5 Prepare the Installation Please refer to the Chapter 1 "Preparing your HP Server tc2110 for your NOS installation" for our recommendations on the server preparation. Then gather the following material: · HP Server tc2110 Startup CD · TurboLinux Server 6.5 CD-ROM · A blank 3.5-inch diskette, labeled TurboLinux 6.5 Boot Disk (Optional) · Two or more clients for testing purpose (Optional) High Level Process Flow 1. Perform TurboLinux 6.5 installation. 2.
Chapter 8 Installing TurboLinux Server 6.5 · Your HP server comes with a Generic 104-key PC keyboard and a 2 Button Mouse. · HP recommends using Automatic Partitioning ("Partition Disk" section) NOTE The network settings need to be customized to your environment. Please refer to TurboLinux manuals should you need further details on the networking settings. · HP recommends selecting "Everything" for the Installation Type, because this is the only mode that includes the X Window graphical interface.
Chapter 8 Installing TurboLinux Server 6.5 On-Line Information and Software Sources · HP World Wide Web access: http://www.hp.com · TurboLinux World Wide Web access: http://www.turbolinux.