
Quick Start Guide

Poster Designer Pro QuickStart Guide
5
Creating your first poster
Poster Designer Pro provides a wide range of
professionally-designed design templates and
themed layouts, which you can use as starting
points for your own custom posters.
In the following pages, we’ll show you how to
create a poster from a design template and from a
themed layout. You’ll learn how to add your own
pictures and text, and print your finished poster.
We’ll use the sample images installed with Poster
Designer Pro. In a standard installation, you’ll find this
folder in the following location:
C:\Program Files\Serif\Poster Designer
Pro\1.0\Images
You can use your own images if you prefer.
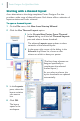
Starting with a design template
Each design template is offered in a poster (choose
from portrait or landscape orientation) and a
banner style, and comes complete with pictures and text.
Design template categories include Education, Retail, Business,
Sports, Travel, Celebrations, and more—you’re sure to find
something you like.
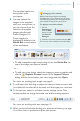
All you need to do is update the text and images to
suit your needs and your poster is ready to print!
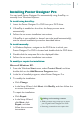
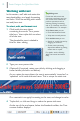
We’ll begin by opening a design template from the
Startup Wizard.
The Startup Wizard is displayed
by default when you launch
Poster Designer Pro, but you
can access it at any time from
the File menu.
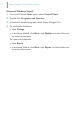
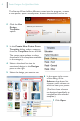
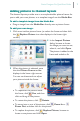
To open a design template:
1 On the File menu, click New from
Startup Wizard.