
Quick Start Guide

Poster Designer Pro QuickStart Guide
3
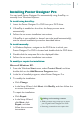
Installing Poster Designer Pro
You can install Poster Designer Pro automatically using AutoPlay, or
manually from Windows Explorer.
To install using AutoPlay:
1 Insert the Poster Designer Pro DVD into your DVD drive.
2 If AutoPlay is enabled on the drive, the Setup process starts
automatically.
3 Follow the on-screen installation instructions.
If AutoPlay is not enabled (or doesn't start the install automatically),
use the manual installation procedure described below.
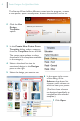
To install manually:
1 In Windows Explorer, navigate to the DVD drive in which your
Poster Designer Pro DVD is located and double-click the DVD drive.
2 Double-click the setup.exe file in the displayed folder.
3 Follow the on-screen installation instructions.
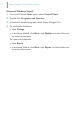
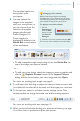
To modify or repair the installation:
Microsoft Windows XP:
1 From the Windows Start menu, select Control Panel, and then
double-click on the Add/Remove Programs icon.
2 In the list of installed programs, select Poster Designer Pro.
3 To modify the installation:
· Click Change.
· In the Setup Wizard, click Next, click Modify, and then follow the
on-screen instructions.
To repair the installation:
· Click Repair.
· In the Setup Wizard,
click Next, click
Repair, and then
follow the on-screen
instructions.
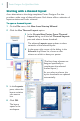
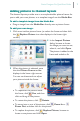
Adding and removing content
· Adding content may prompt you to insert
your original Poster Designer Pro DVD.
· Removing content does not require this.