
User's Manual
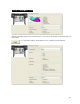
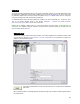
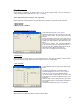
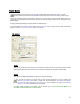
Table Of Contents
- Introduction / Requirements
- Installation
- Login
- Keycode Entry
- Hardware Configuration
- Printers / Queues
- The Configuration Wizard
- Create Queue
- Create Printer Cluster
- Preferences
- Menu Bar Options
- Reprocontrol.client main applications
- Filter Editor
- Functions and Structure of the Filter Editor
- Preview of the Filter Editor
- Histogram
- Tab Black and White Point (Color Mode without Color Management)
- Tab Postprocessing (Black & White Mode)
- Tab Gamma Correction (Color Mode without Color Management)
- Tab Enhancement (Color Mode with Color Management)
- Tab Special Filter (All Modes except of Black & White Mode)
- Tab Color Adjust (Color Mode with Color Management)
- Tab Color Exchange (Color Mode with Color Management)
- Functions and Structure of the Filter Editor
- Reprocontrol.WinDriver
- Reprocontrol.monitor
- Costtracker
- Reprocontrol.backup
30
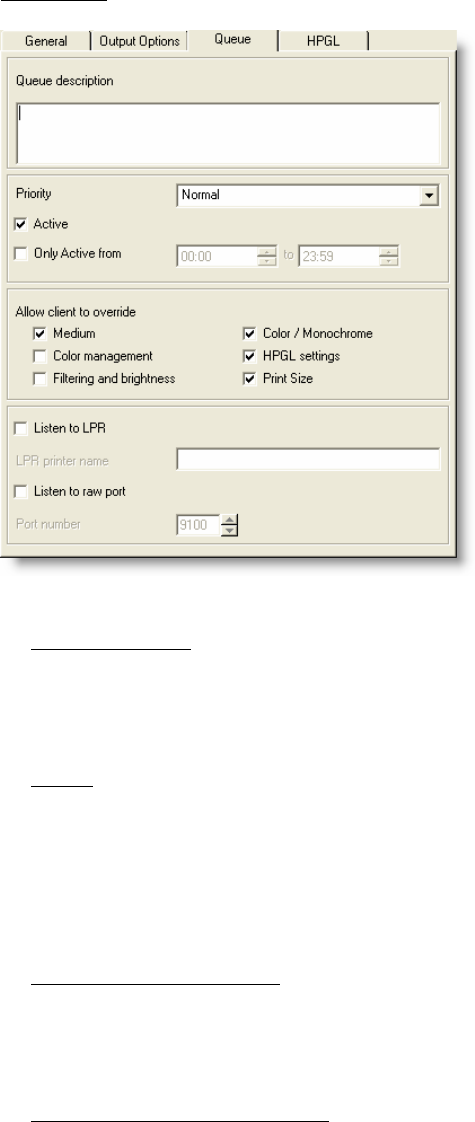
Tab Queue
Queue description
In this tab you can first enter a personal Q
UEUE DESCRIPTION which will be shown as pop up information in
the main window while pointing at the selected queue.
Priority
You can then set a P
RIORITY for the queue.
N
ORMAL means that the print jobs send to this queue will be processed in normal order.
H
IGH sets priority to a preferred level, whilst LOW sets a subordinate status. These low priority jobs do not
start processing unless higher rated jobs are finished.
De-/Activation of the Queue
Further you can manually activate/deactivate the queue. Simply check the box at A
CTIVE to activate the
queue. As default, it is already active.
Set Time Frame for Queue Activity
You can then define a range of time when the Queue will be active by checking the box at O
NLY ACTIVE
FROM
. Now enter the desired time frame.