
User's Manual

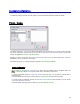
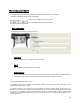
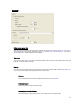
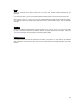
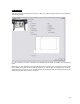
Table Of Contents
- Introduction / Requirements
- Installation
- Login
- Keycode Entry
- Hardware Configuration
- Printers / Queues
- The Configuration Wizard
- Create Queue
- Create Printer Cluster
- Preferences
- Menu Bar Options
- Reprocontrol.client main applications
- Filter Editor
- Functions and Structure of the Filter Editor
- Preview of the Filter Editor
- Histogram
- Tab Black and White Point (Color Mode without Color Management)
- Tab Postprocessing (Black & White Mode)
- Tab Gamma Correction (Color Mode without Color Management)
- Tab Enhancement (Color Mode with Color Management)
- Tab Special Filter (All Modes except of Black & White Mode)
- Tab Color Adjust (Color Mode with Color Management)
- Tab Color Exchange (Color Mode with Color Management)
- Functions and Structure of the Filter Editor
- Reprocontrol.WinDriver
- Reprocontrol.monitor
- Costtracker
- Reprocontrol.backup
17
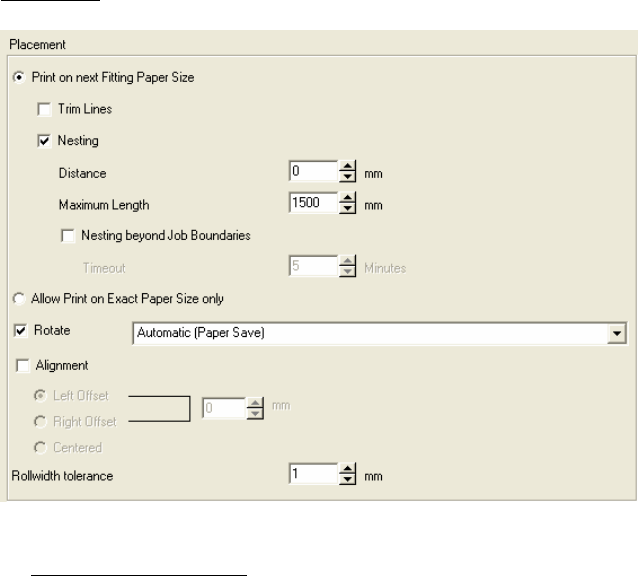
Placement
Define output paper size
First you may choose among two radio buttons whether the printer is A
LLOWed to PRINT ON THE EXACT
PAPER SIZE ONLY or the printer is allowed to PRINT ON THE NEXT FITTING PAPER SIZE. If you opt for
the last radio button, further settings become available:
Trim Lines
You may now select TRIM LINES which will appear between each copy of the same paper output. They will
help you to cut these copies manually.
Nesting
If
you want to print several copies, and at least two copies fit into the print width, enable N
EST MULTIPLE
COPIES to have the copies automatically printed next to each other.
Distance
You can d
etermine the size of the area left between copies under D
ISTANCE.
Maximum Length
Define the maximum length of nested copies.
Nesting beyond job boundaries
Activate this option to allow nesting of two or more print jobs on one paper output.