
Hardware Reference Manual


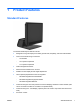
Table Of Contents
- Product Features
- Hardware Upgrades
- Tools Needed
- Warnings and Cautions
- Mounting the RP7 to a Wall or Swing Arm
- Installing the RP7 Adjustable Stand
- Routing Cables to External Devices
- Installing Optional Integrated USB Modules
- Installing an Optional HP Retail RP7 10.4” Customer Display
- Installing an Optional HP Retail RP7 VFD Customer Display
- Installing Additional Memory
- Removing and Installing a Hard Drive
- Replacing the Battery
- Using the USB Security Cover
- Securing the RP7 to a Counter Top
- Installing an External Security Lock
- Configuring the Software
- Troubleshooting
- Electrostatic Discharge
- Computer Operating Guidelines, Routine Care and Shipping Preparation
- Index
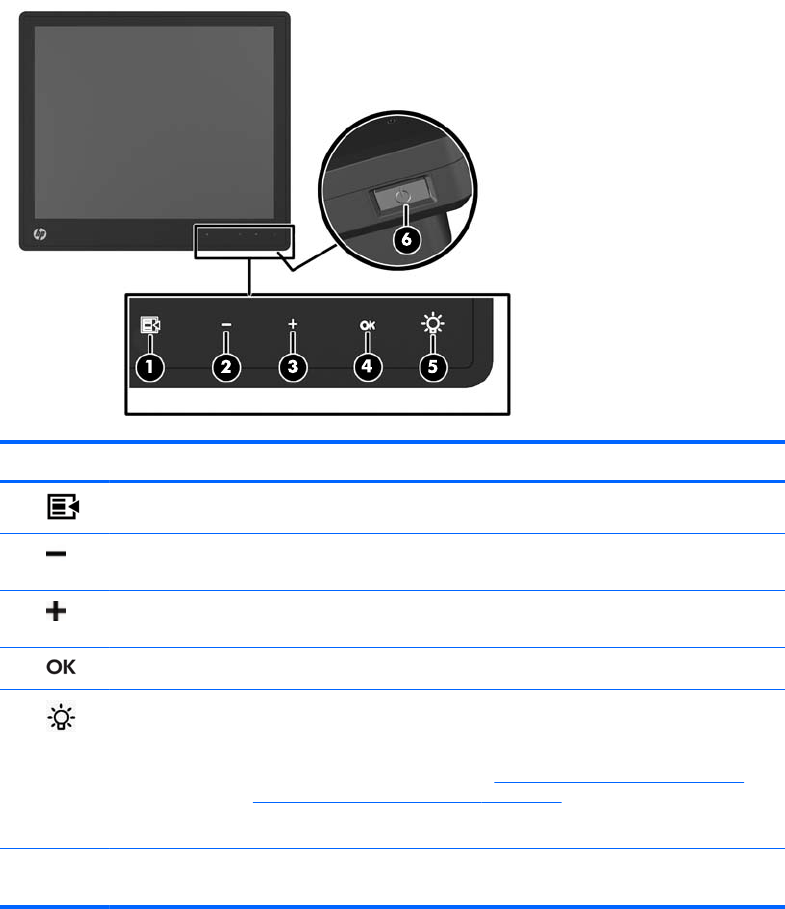
Front Panel Controls
Control Function
1
Menu Opens the On-Screen Display (OSD) main menu.
2
– (Minus) If the OSD menu is on, tap to navigate backward through the OSD menu
and decrease adjustment levels.
3
+ (Plus) If the OSD menu is on, tap to navigate forward through the OSD menu
and increase adjustment levels.
4
OK If the OSD menu is on, tap to select a menu item.
5
Power LED Green = Fully powered.
Flashing Green = Sleep mode
Red = PC error condition (refer to
Interpreting POST Diagnostic Front
Panel LEDs and Audible Codes on page 61 for more information).
Off = Power is off
6 Power Button Powers the system on and off, and sets the system to hibernate or sleep
mode.
Using the On-Screen Display Menu
Use the On-Screen Display (OSD) to adjust the screen image based on your viewing preferences. To
access the OSD, do the following:
1. If the system is not already on, press the Power button to turn on the unit.
2. To activate the OSD function, tap in the front bezel area just to the left of the power icon.
3. To access the OSD Menu, tap the Menu icon on the monitor’s front panel.
4. To navigate through the OSD Menu, tap the + (Plus) icon on the monitor’s front panel to scroll
up, or the – (Minus) icon to scroll in reverse.
4 Chapter 1 Product Features ENWW