
HP Designjet Z2100 Printing Guide [HP Raster Driver] - Create a digital album [Mac OS X]


This example uses Aperture
1. First recommendations:
• See the Media type functionality & features and choose the most appropriate media.
• It is essential you have the media type correctly calibrated with the printer and print mode,
consult the
Calibrate my printer document.
• In order to get a correct display, it’s also essential that you have the monitor calibrated,
consult the
Profile my monitor section.
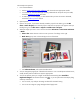
2. Open Aperture.
3. Open a new project, if you haven’t already created a project for this album, go to the File
menu > New Project, then name the project. Select the new project in the projects menu (on
the left), then go to the File menu > Import > Folders into a Project.
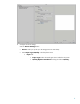
4. Select the images you want to use in the book and select File menu > New From Selection
> Book:
• Theme list: Select a theme in the list to see a preview of its design on the right.
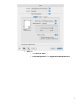
• Book Size pop-up menu: Choose the physical size of the book.
• Click Choose Theme, and rename the album book.
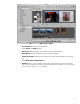
5. You can change the page layout if desired and customize it. You can add photo and text boxes;
modify the box positions and the text styles as appropriate.
6. You can let Aperture place your images into the book automatically (select Autoflow
Unplaced Images from the Book Actions menu
), or you can place them manually by drag
and drop. Furthermore:
• You can scale, crop and pan the image as desired for the best framing.
• You can set an image as a page background and apply wash.
2