
Reference Guide

hp psc 2500 series
chapter 6
66
fax
2 Press to scroll through the following report types:
– 1. Last Transaction: prints details of the last fax transaction.
– 2. Fax Log: prints a log of approximately the last 30 fax transactions.
– 3. Speed Dial List: prints a list of programmed speed-dial entries.
–4. Self-Test Report: prints a report to assist you in diagnosing print and
alignment problems. For more information, see print a self-test report
on page 95.
– 5. Fax Report Setup: prints the automatic fax reports as described in
generate automated reports on page 65.
3 After the report that you want is highlighted, press OK.
set up speed dialing
You can assign speed-dial entries to fax numbers you use often. This lets you dial
those numbers quickly by using the front panel. You can create up to 60
individual speed-dial entries (varies by model).
We recommend that you use the HP Director to set up speed-dial settings;
however, you can also use the front panel.
For information on sending a fax using speed dials, see send a fax using speed
dials on page 60.
Note: A speed-dial entry can only be associated with one phone number;
speed-dial groups are not supported.
This section contains the following topics:
• create speed-dial entries on page 66
• delete speed-dial entries on page 67
create speed-dial entries
You can create speed-dial entries for fax numbers that you use frequently.
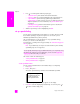
1 Press Setup.
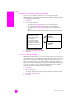
2 Press 2, then press 1.
This selects Speed Dial Setup and then selects Individual Speed Dial.
The first unassigned speed-dial entry appears on the display.
3 Press OK to select the displayed speed-dial entry. You can also press or
to select a another empty entry.
You can quickly and easily set up speed-dial entries from your computer by using
the HP Director software. For more information, see the onscreen hp photo &
imaging help that came with your software.
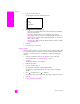
Speed Dial Setup
1. Individual Speed Dial
2. Delete Speed Dial
3. Print Speed Dial List