
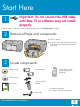
Setup Guide

8
9
7
6
HP All-in-One • 3
1
23
4
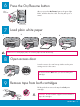
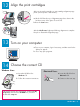
Press the On/Resume button
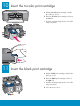
Open access door
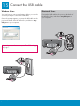
Remove tape from both cartridges
Lower the access door until it stops. Make sure the print
carriage moves to the center.
Pull the pink tab to remove the tape from both print
cartridges.
On/
Resume
After you press the On/Resume button, the green light
blinks, and then becomes solid. This may take up to a
minute.
Load plain white paper
CAUTION: To avoid paper jams, do not force paper too far into the tray.
CAUTION: Do not touch the copper-colored contacts or
retape the cartridges.
The device must be On before you can insert the print
cartridges.