User Manual
Table Of Contents
- Features
- Pointing devices and keyboard
- Using pointing devices
- Using the keyboard
- Using hotkeys
- Initiating Suspend
- Opening the Print Options window
- Displaying battery status
- Switching the screen image
- Opening the default e-mail application
- Opening the default Web browser
- Decreasing screen brightness
- Increasing screen brightness
- Turning wireless features on and off
- Muting and restoring speaker sound
- Decreasing speaker volume
- Increasing speaker volume
- Using hotkeys
- Using keypads
- Cleaning the TouchPad and keyboard
- Multimedia
- Power management
- Setting power options
- Using external AC power
- Using battery power
- Testing an AC adapter
- Shutting down the computer
- Drives
- External devices
- External media cards
- Memory modules
- Security
- Computer Setup
- Index

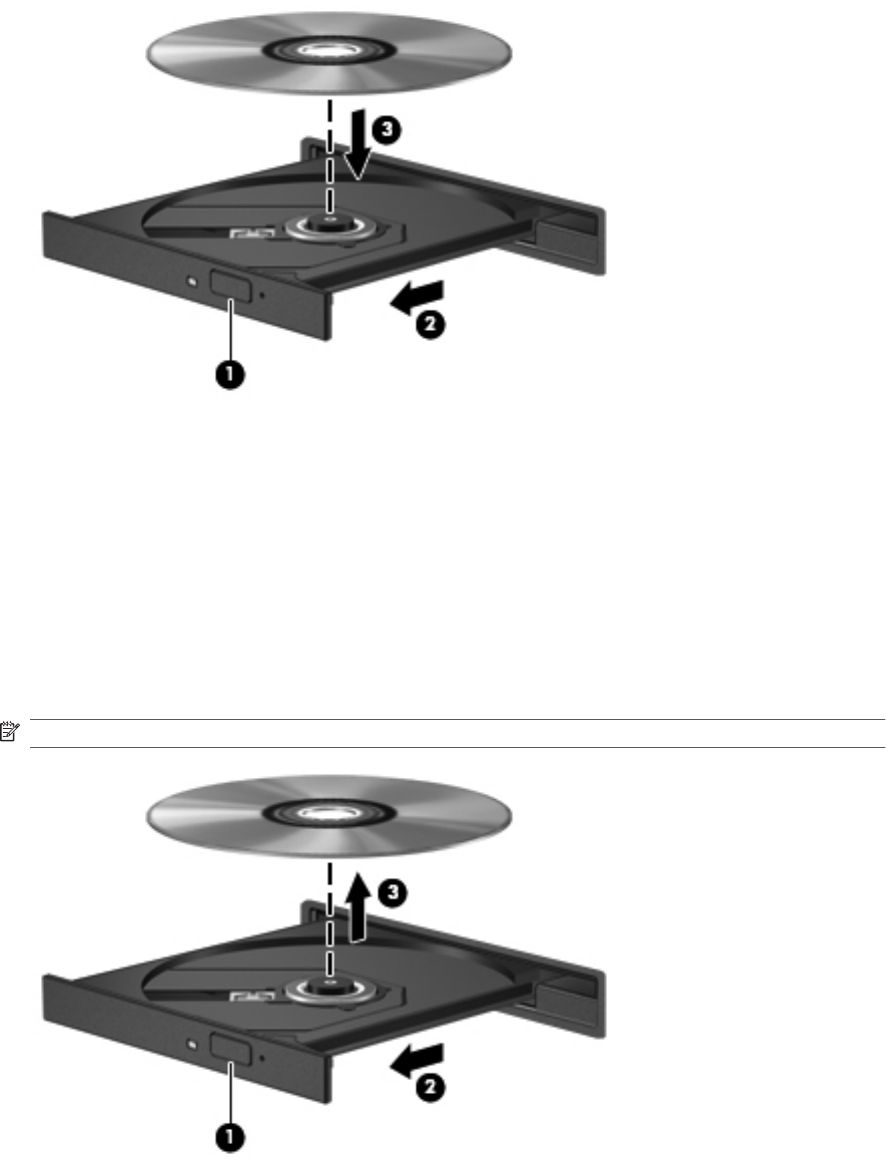
5. Gently press the disc (3) down onto the tray spindle until the disc snaps into place.
6. Close the disc tray.
Removing an optical disc (CD or DVD)
There are 2 ways to remove a disc, depending on whether the disc tray opens normally or not.
When the disc tray opens
1. Press the release button (1) on the drive bezel to release the disc tray, and then gently pull out the
tray (2) until it stops.
2. Remove the disc (3) from the tray by gently pressing down on the spindle while lifting the outer
edges of the disc. Hold the disc by the edges and avoid touching the flat surfaces.
NOTE: If the tray is not fully accessible, tilt the disc carefully as you remove it.
3. Close the disc tray and place the disc in a protective case.
Using optional external drives 47


