
Owner manual


Table Of Contents
- Welcome
- Getting to know your computer
- Networking
- Keyboard and pointing devices
- Multimedia
- Power management
- Shutting down the computer
- Setting power options
- Using battery power
- Using external AC power
- Drives
- External cards and devices
- Memory modules
- Security
- Backup and Recovery
- Computer Setup (BIOS) and Advanced System Diagnostics
- MultiBoot
- Troubleshooting and support
- Troubleshooting
- The computer is unable to start up
- The computer screen is blank
- Software is functioning abnormally
- The computer is on but not responding
- The computer is unusually warm
- An external device is not working
- The wireless network connection is not working
- The optical disc tray does not open for removal of a CD or DVD
- The computer does not detect the optical drive
- A disc does not play
- A movie is not visible on an external display
- The process of burning a disc does not begin, or it stops before completion
- Contacting customer support
- Labels
- Troubleshooting
- Cleaning your computer
- Specifications
- Electrostatic discharge
- Index
●
If a drive must be mailed, place the drive in a bubble-pack mailer or other suitable protective
packaging and label the package “FRAGILE.”
●
Avoid exposing a drive to magnetic fields. Security devices with magnetic fields include airport
walk-through devices and security wands. Airport conveyer belts and similar security devices
that check carry-on baggage use X-rays instead of magnetism and do not damage drives.
Replacing or upgrading the hard drive
CAUTION: To prevent information loss or an unresponsive system:
Shut down the computer before removing the hard drive from the hard drive bay. Do not remove the
hard drive while the computer is on, in the Suspend state, or in Hibernation.
If you are not sure whether the computer is off or in Hibernation, turn the computer on by pressing the
power button. Then shut down the computer through the operating system.
Removing the hard drive
1. Save your work and shut down the computer.
2. Disconnect AC power and external devices connected to the computer.
3. Remove the battery.
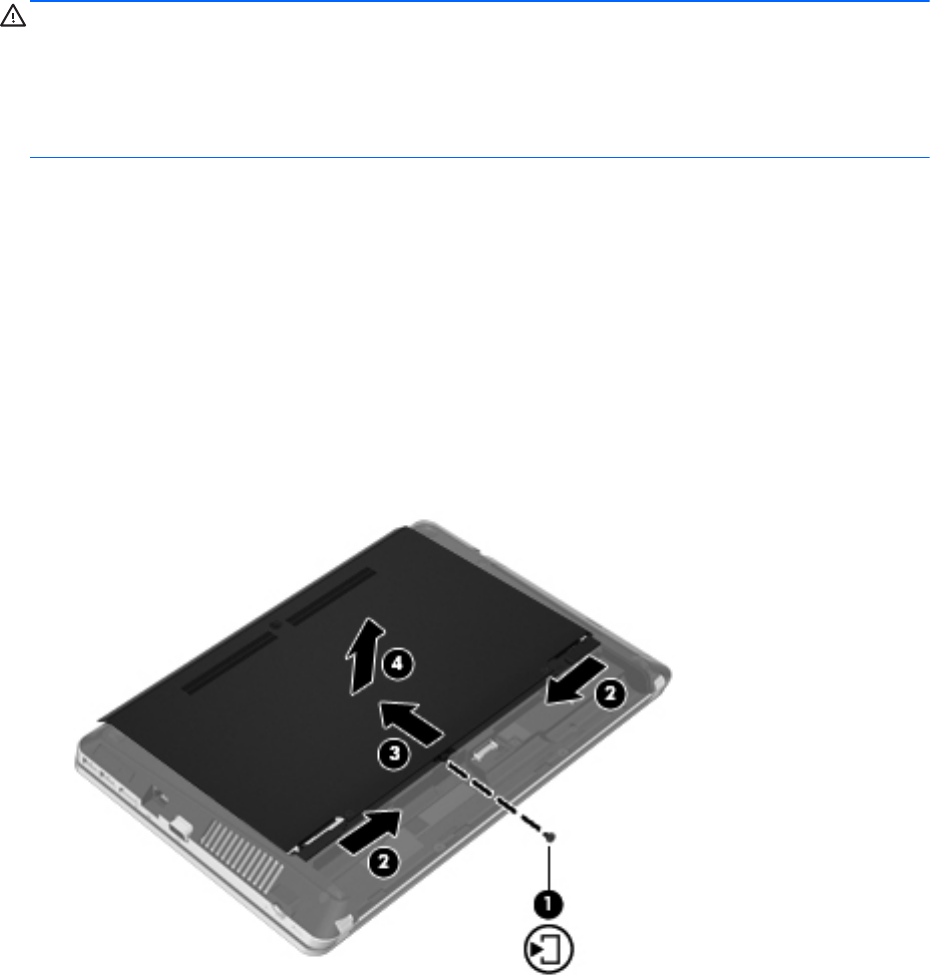
4. Remove the access cover screw (1).
5. Slide the access cover release latches in (2) to release the cover.
6. Slide the access cover in the direction shown on the image below (3), and then lift it away from
the computer (4).
7. Remove the four hard drive screws (1) from the hard drive.
8. Pull the hard drive tab to the right (2) to disconnect the hard drive.
Replacing or upgrading the hard drive 49