HP Pavilion dm4 Entertainment PC Maintenance and Service Guide
© Copyright 2011 Hewlett-Packard Development Company, L.P. Bluetooth is a trademark owned by its proprietor and used by Hewlett-Packard Company under license. Intel, Core, and Centrino are trademarks of Intel Corporation in the U.S. and other countries. Microsoft and Windows are U.S. registered trademarks of Microsoft Corporation. SD Logo is a trademark of its proprietor. The information contained herein is subject to change without notice.
Safety warning notice WARNING! To reduce the possibility of heat-related injuries or of overheating the computer, do not place the computer directly on your lap or obstruct the computer air vents. Use the computer only on a hard, flat surface. Do not allow another hard surface, such as an adjoining optional printer, or a soft surface, such as pillows or rugs or clothing, to block airflow.
iv Safety warning notice
Table of contents 1 Product description ........................................................................................................................................ 1 2 External component identification ................................................................................................................ 5 Top ....................................................................................................................................................... 5 TouchPad ..............
Grounding guidelines ......................................................................................................... 31 Electrostatic discharge damage ........................................................................ 31 Packaging and transporting guidelines ............................................. 32 Workstation guidelines ..................................................................... 32 Equipment guidelines .......................................................................
6 Specifications ................................................................................................................................................ 84 Computer specifications ..................................................................................................................... 84 35.56 cm (14.0 in) display specifications ............................................................................................ 85 Hard drive specifications ......................................
viii
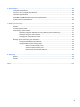
1 Product description Category Description Discrete UMA Product Name HP Pavilion dm4 Entertainment PC √ √ Processors Intel® Core™ i7 processor √ √ i5-2540M Dual-Core processor (2.6 GHz, SC turbo up to 3.3 GHz), 3 MB L3 cache, 35 W √ √ i5-2520M Dual-Core processor (2.5 GHz, SC turbo up to 3.2 GHz), 3 MB L3 cache, 35 W √ √ i5-2430M Dual-Core processor (2.4 GHz, SC turbo up to 3.0 GHz), 3 MB L3 cache, 35 W √ √ i5-2410M processor (2.3 GHz, turbo up to 2.
Hard drives Optical drives Customer-accessible and upgradable √ √ Supports up to 8 GB of system memory √ √ DDR3-1333MHz dual channel support √ √ Supports the following configurations: √ √ HP ProtectSmart Hard Drive Protection √ √ Supports the following 9.5 mm, 6.35 cm (2.
Wireless Integrated wireless local area network (WLAN) options by way of wireless module: √ √ Intel Centrino Wireless-N 1000 802.11b/g/n 1x2 with WiDi support √ √ Intel Centrino advanced wireless-N 1030 + Bluetooth® combo 802.11b/g/n 1x2 with WiDi support √ √ Intel Centrino Advanced–N + WiMAX 6150, 802.11 b/g/n with WiDi support √ √ Intel Centrino Advanced–N + WiMAX 6150 + Bluetooth 802.11 b/g/n with WiDi support √ √ Realtek RTL8191SE 802.11b/g/n 1x1 WiFi Adapter √ √ Ralink 5390GN 802.
Supports battery fast charge √ 9-cell (100 Whr) 3.0 Ah Li-ion battery √ √ 6-cell (62-Whr) 2.80Ah Li-ion battery √ √ 6-cell (55-Whr) 2.
2 External component identification Top TouchPad Component Description (1) TouchPad light Turns the TouchPad on and off. Quickly double-tap the TouchPad light to turn the TouchPad on and off. (2) TouchPad zone Moves the pointer and selects or activates items on the screen. (3) Left TouchPad button Functions like the left button on an external mouse. (4) Right TouchPad button Functions like the right button on an external mouse.
Lights Component (1) Description Power light ● White: Power is on. ● Blinking white: The computer is in the Sleep state. ● Off: The computer is off or in Hibernation. NOTE: Another power light is located on the left side of the computer. (2) (3) (4) (5) (6) 6 Mute light Wireless light Caps lock light TouchPad light Fingerprint reader light Chapter 2 External component identification ● Amber: Computer sound is off. ● Off: Computer sound is on.
Buttons Component (1) Description Power button ● When the computer is off, press the button to turn on the computer. ● When the computer is on, press the button briefly to initiate Sleep. ● When the computer is in the Sleep state, press the button briefly to exit Sleep. ● When the computer is in Hibernation, press the button briefly to exit Hibernation.
Keys Component 8 Description (1) esc key Displays system information when pressed in combination with the fn key. (2) fn key Executes frequently used system functions when pressed in combination with the esc key. (3) Windows logo key Displays the Windows Start menu. (4) Windows applications key Displays a shortcut menu for items beneath the pointer. (5) Action keys Execute frequently used system functions.
Front Component Description (1) Supports the following digital card formats: (2) Digital Media Slot Speakers (2) ● MultiMedia card ● Secure Digital (SD) card ● Secure Digital High Capacity (SDHC) Memory card (standard and large size) Produce sound. Right side Component (1) (2) Description Optical drive light Optical drive (select models only) ● On: The optical drive is being accessed. ● Off: The optical drive is idle. Reads and writes to an optical disc.
Left side Component (1) Description Security cable slot Attaches an optional security cable to the computer. NOTE: The security cable is designed to act as a deterrent, but it may not prevent the computer from being mishandled or stolen. (2) External monitor port Connects an external VGA monitor or projector. (3) Audio in (microphone) jack Connects an optional computer headset microphone, stereo array microphone, or monaural microphone.
Component (8) Description RJ-45 (network) lights ● White: The network is connected. ● Amber: The network is showing activity. (9) RJ-45 (network) jack Connects a network cable. (10) HDMI port Connects an optional video or audio device, such as a high-definition television, or any compatible digital or audio component. (11) USB port Connects optional USB devices.
Rear Component Description Vent Enables airflow to cool internal components. NOTE: The computer fan starts up automatically to cool internal components and prevent overheating. It is normal for the internal fan to cycle on and off during routine operation. Bottom Component Description (1) Battery bay Holds the battery. (2) Battery release latch Releases the battery from the battery bay. (3) Vents (5) Enable airflow to cool internal components.
3 Illustrated parts catalog Serial number location When ordering parts or requesting information, provide the computer serial number and model number located in the battery bay of the computer. ● Product name (1). This is the product name affixed to the front of the computer. ● Serial number (s/n) (2). This is an alphanumeric identifier that is unique to each product. ● Part number/Product number (p/n) (3). This number provides specific information about the product's hardware components.
Computer major components 14 Chapter 3 Illustrated parts catalog
Item Description Spare part number (1) 35.56 cm (14.0 in), SVA, high-definition (HD), BrightView LED display assembly NOTE: See Display assembly components on page 19 for more display assembly internal component spare part information. (2) For use in Dark Umber models 636941-001 For use in Steel Gray models 650675-001 Keyboards NOTE: For a detailed list of available keyboards, see Sequential part number listing on page 23.
Item (12) Description Spare part number For use in models equipped with discrete graphics 636939-001 Bluetooth module 537921-001 NOTE: The Bluetooth module cable is included in the Cable Kit, spare part number 608227-001. WLAN modules (not illustrated) Intel Centrino wireless-N 1000 802.
Item Description Spare part number Atheros AR9002WB-1NGB 802.11 b/g/n 1x1 WiFi and Bluetooth 2.1+EDR Combo Adapter (BT3.
Item (14) Description Spare part number 4 GB 621569-001 Battery 9-cell, 100 WHr (3.0 Ah) Li-ion 636631-001 6-cell, 62 WHr (2.80 Ah) Li-ion 593562-001 6-cell, 55 WHr (2.55 Ah) Li-ion 593554-001 (15) Base enclosure (includes modem cable and optical drive cable) 636937-001 (16) Hard drive (includes hard drive bracket) NOTE: The hard drive cable is included in the Cable Kit, spare part number 608227-001.
Display assembly components Item Description Spare part number (1) Display bezel 636938-001 (2) Webcam module 615744-001 (3) Display panel (35.56 cm (14.
Item Description Spare part number (4b) Antennas and cables (5) Display hinge covers 608210-001 (6) Display bracket 608214-001 (7) Display back cover For use in Dark Umber computer models 636936-001 For use in Steel Gray computer models 650674-001 Display Screw Kit (not illustrated; includes screws and screw covers) 608212-001 Plastics Kit Item 20 Description Spare part number Plastics Kit 636942-001 (1) Wireless/memory module mini-card compartment cover (includes captive screw) (
Mass storage devices Item Description (1) Optical drive (12.7 mm, SATA, fixed) (2) Spare part number DVD±RW SuperMulti DL Drive (select models only) 677742-001 Optical drive weight saver 660550-001 Hard drive (include hard drive bracket) NOTE: The hard drive cable is included in the Cable Kit, spare part number 608227-001.
Miscellaneous parts Description Spare part number AC adapters 90 W Smart AC adapter, RC/V 3W 609940-001 65 W Smart AC adapter, RC/V 3W 609939-001 Power cord, AC, 3 wire, black, 1.
Sequential part number listing Spare part number Description 449137-001 RTC battery 490371-001 Power cord, AC, 3-pin, black, 1.83 m, for use in North America 490371-021 Power cord, AC, 3-pin, black, 1.83 m, for use in Europe, the Middle East, and Africa 490371-031 Power cord, AC, 3-pin, black, 1.83 m, for use in the United Kingdom and Singapore 490371-061 Power cord, AC, 3-pin, black, 1.83 m, for use in Italy 490371-081 Power cord, AC, 3-pin, black, 1.
Spare part number Description 600370-001 Broadcom 4313/2070 802.
Spare part number Description 608222-121 Keyboard for use in English and French Canada 608222-131 Keyboard for use in Portugal 608222-141 Keyboard for use in Turkey 608222-161 Keyboard for use in Latin America 608222-171 Keyboard for use in Saudi Arabia 608222-201 Keyboard for use in Brazil 608222–251 Keyboard for use in Russia 608222-B31 Keyboard for use in Europe, the Middle East, and Africa 608222-BG1 Keyboard for use in Switzerland 608222-DH1 Keyboard for use in the Netherlands 608
Spare part number Description 631956-001 Intel Centrino advanced wireless-N 1030 + Bluetooth® combo 802.
Spare part number Description 642731-001 Fan/heat sink for use in UMA models in which the processor is soldered to the system board (includes replacement thermal material) 642732-001 System board for use in models equipped with HM65 UMA graphics memory; includes Intel Core i3-2330M processor 650674-001 Display back cover for use in Steel Gray computer models 650675-001 Display assembly, 35.56 cm (14.
28 Spare part number Description 678100-001 320 GB, 7200 rpm hard drive 678101-001 500 GB, 7200 rpm hard drive 678102-001 640 GB, 7200 rpm hard drive 678103-001 750 GB, 7200 rpm hard drive Chapter 3 Illustrated parts catalog
4 Removal and replacement procedures Preliminary replacement requirements Tools required You will need the following tools to complete the removal and replacement procedures: ● Flat-bladed screwdriver ● Magnetic screwdriver ● Phillips P0 and P1 screwdrivers Service considerations The following sections include some of the considerations that you must keep in mind during disassembly and assembly procedures.
Cables and connectors CAUTION: When servicing the computer, be sure that cables are placed in their proper locations during the reassembly process. Improper cable placement can damage the computer. Cables must be handled with extreme care to avoid damage. Apply only the tension required to unseat or seat the cables during removal and insertion. Handle cables by the connector whenever possible. In all cases, avoid bending, twisting, or tearing cables.
Grounding guidelines Electrostatic discharge damage Electronic components are sensitive to electrostatic discharge (ESD). Circuitry design and structure determine the degree of sensitivity. Networks built into many integrated circuits provide some protection, but in many cases, ESD contains enough power to alter device parameters or melt silicon junctions. A discharge of static electricity from a finger or other conductor can destroy static-sensitive devices or microcircuitry.
Packaging and transporting guidelines Follow these grounding guidelines when packaging and transporting equipment: ● To avoid hand contact, transport products in static-safe tubes, bags, or boxes. ● Protect ESD-sensitive parts and assemblies with conductive or approved containers or packaging. ● Keep ESD-sensitive parts in their containers until the parts arrive at static-free workstations. ● Place items on a grounded surface before removing items from their containers.
Equipment guidelines Grounding equipment must include either a wrist strap or a foot strap at a grounded workstation. ● When seated, wear a wrist strap connected to a grounded system. Wrist straps are flexible straps with a minimum of one megohm ±10% resistance in the ground cords. To provide proper ground, wear a strap snugly against the skin at all times. On grounded mats with banana-plug connectors, use alligator clips to connect a wrist strap.
Component replacement procedures This chapter provides removal and replacement procedures. There are as many as 75 screws, in 12 different sizes, that must be removed, replaced, or loosened when servicing the computer. Make special note of each screw size and location during removal and replacement. Serial number The serial number label, located in the battery bay of the computer, provides important information that you may need when contacting technical support. 34 ● Product name (1).
Computer feet Description Spare part number Rubber Feet Kit 608228-001 The computer feet are adhesive-backed rubber pads. The feet attach to the base enclosure in the locations illustrated below.
Battery Description Spare part number 9-cell, 100 WHr (3.0 Ah) Li-ion 636631-001 6-cell, 55 WHr (2.55 Ah) Li-ion 593554-001 6-cell, 62 WHr (2.80 Ah) Li-ion 593562-001 Before disassembling the computer, follow these steps: 1. Shut down the computer. If you are unsure whether the computer is off or in Hibernation, turn the computer on, and then shut it down through the operating system. 2. Disconnect all external devices connected to the computer. 3.
Memory module Description Spare part number 2 GB (PC3-10600 1333 MHz) 621565-001 4 GB (PC3-10600 1333 MHz) 621569-001 Before removing the memory module, follow these steps: 1. Shut down the computer. If you are unsure whether the computer is off or in Hibernation, turn the computer on, and then shut it down through the operating system. 2. Disconnect all external devices connected to the computer. 3.
5. Remove the module (2) by pulling it away from the slot at an angle. NOTE: Memory modules are designed with a notch (3) to prevent incorrect insertion into the memory module slot. Reverse this procedure to install a memory module.
RTC battery Description Spare part number RTC battery 449137-001 Before removing the RTC battery, follow these steps: 1. Shut down the computer. If you are unsure whether the computer is off or in Hibernation, turn the computer on, and then shut it down through the operating system. 2. Disconnect all external devices connected to the computer. 3. Disconnect the power from the computer by first unplugging the power cord from the AC outlet and then unplugging the AC adapter from the computer. 4.
WLAN module Description Spare part number Intel Centrino wireless-N 1000 802.11b/g/n 1x2 with WiDi support 593530-001 For use in Argentina, Bolivia, Brazil, Canada (French/English), Chile, Columbia, Costa Rica, Ecuador, El Salvador, Guadeloupe, Guatemala, Honduras, Mexico, Nicaragua, Panama, Paraguay, Peru, the United States, Uruguay, and Venezuela. Intel Centrino advanced wireless-N 1030 + Bluetooth combo 802.
Description Spare part number Realtek RTL8188CE 802.11b/g/n WiFi with Realtek CSRBC4 Bluetooth 2.
3. Remove the two Phillips M2.0×4.0 screws (2) that secure the WLAN module to the computer. (The edge of the module opposite the slot rises away from the computer.) 4. Remove the WLAN module (3) by pulling it away from the slot at an angle. CAUTION: To prevent an unresponsive system, replace the wireless module only with a wireless module authorized for use in the computer by the governmental agency that regulates wireless devices in your country or region.
Hard drive NOTE: All hard drive spare part kits include a hard drive bracket. NOTE: The hard drive cable is included in the Cable Kit, spare part number 608227-001. Description Spare part number 750 GB, 7200 rpm 678103-001 640 GB, 7200 rpm 678102-001 500 GB, 7200 rpm 678101-001 320 GB, 7200 rpm 678100-001 160 GB solid-state drive 608215-001 Hard drive mounting hardware 672516-001 Before removing the hard drive, follow these steps: 1. Shut down the computer.
5. Lift the hard drive out of the hard drive bay (2). 6. If it is necessary to replace the hard drive bracket (also called the protective cover), disconnect the hard drive cable (1) from the hard drive. 7. Remove the four Phillips M3.0×3.0 screws (2) and cover (3) only If the hard drive does not already have these components preassembled. Reverse this procedure to reassemble and install the hard drive.
Optical drive Description Spare part number DVD±RW SuperMulti DL Drive (select models only) 677742-001 Optical drive weight saver 660550-00 Before removing the optical drive, follow these steps: 1. Shut down the computer. If you are unsure whether the computer is off or in Hibernation, turn the computer on, and then shut it down through the operating system. 2. Disconnect all external devices connected to the computer. 3.
6. Firmly pull outward on the open tray (2) until the drive slides out. 7. Press the bezel release button (1), lift the bezel at an angle (2), and remove the bezel (3). 8. If it is necessary to replace the optical drive bracket, position the optical drive with the optical drive bracket toward you. 9. Remove the two Phillips M2.0×3.0 screws (1) that secure the optical drive bracket to the optical drive. 10. Remove the optical drive bracket (2).
Keyboard NOTE: For a detailed list of available keyboards, see Sequential part number listing on page 23. Description Spare part number Keyboard, standard 608222-xxx Keyboard, QuickWeb 663563-xxx Before removing the keyboard, follow these steps: 1. Shut down the computer. If you are unsure whether the computer is off or in Hibernation, turn the computer on, and then shut it down through the operating system. 2. Disconnect all external devices connected to the computer. 3.
7. Release the zero insertion force (ZIF) connector (3) to which the keyboard cable is attached and disconnect the keyboard cable (4) from the system board. 8. Remove the keyboard. Reverse this procedure to install the keyboard.
Top cover Description Spare part number Top cover, Dark Umber (includes TouchPad and bracket, button board, and cable) 636946-001 Top cover, Steel Gray (includes TouchPad and bracket, button board, and cable) 650676-001 Before removing the top cover, follow these steps: 1. Shut down the computer. If you are unsure whether the computer is off or in Hibernation, turn the computer on, and then shut it down through the operating system. 2. Disconnect all external devices connected to the computer. 3.
50 3. Remove the six Phillips M2.0x2.0 broadhead screws that secure the top cover to the base enclosure. 4. Turn the computer right-side up with the front toward you. 5. Open the display as far as possible. 6. Release the ZIF connector (1) to which the TouchPad button board cable is connected and then disconnect the cable from the system board (2). 7. Release the ZIF connector (3) to which the fingerprint reader board cable is connected and disconnect the cable from the system board (4).
8. Remove the four Phillips M2.0 x 4.0 screws that secure the base enclosure and lift the enclosure. 9. Lift the top cover from the base enclosure to access the power button cable.
10. Release the ZIF connector (1) to which the power button board cable is connected and disconnect the cable from the system board (2). Reverse this procedure to install the top cover.
Fingerprint reader board Description Spare part number Fingerprint reader board 608225-001 Before removing the fingerprint reader board, follow these steps: 1. Shut down the computer. If you are unsure whether the computer is off or in Hibernation, turn the computer on, and then shut it down through the operating system. 2. Disconnect all external devices connected to the computer. 3.
5. Remove the fingerprint reader board (5) from the top cover. Reverse the above procedure to install the fingerprint reader board. NOTE: To reinstall, place the board into the slot, and then place the bracket over it by setting the right side of bracket into the slots. Then replace the screw.
Power button board Description Spare part number Power button board (includes cable) 658706-001 Before removing the power button board, follow these steps: 1. Shut down the computer. If you are unsure whether the computer is off or in Hibernation, turn the computer on, and then shut it down through the operating system. 2. Disconnect all external devices connected to the computer. 3.
3. Remove the power button board (2). Reverse the above procedure to install the power button board. Display assembly Description Spare Part Number 35.56 cm (14.0 in), SVA, high-definition (HD), BrightView LED display assembly for use in Dark Umber models 636941-001 35.56 cm (14.0 in), SVA, high-definition (HD), BrightView LED display assembly for use in Steel Gray models 650675-001 Before removing the display assembly, follow these steps: 56 1. Shut down the computer.
c. Optical drive (see Optical drive on page 45) d. Top cover (see Top cover on page 49) Remove the display assembly: 1. Turn the computer display-side up, with the front toward you. 2. Open the display as far as possible. 3. Disconnect the display panel cable (1) from the system board. 4. Remove the wireless antenna cables from the hole (2) built into the base enclosure. CAUTION: Support the display assembly when removing the display screws in the following steps.
7. If it is necessary to remove the display brackets, remove the two Phillips M2.0×3.0 screws (1) that secure the brackets to the base enclosure, and the remove the brackets (2). 8. If it is necessary to replace any of the display assembly internal components, remove the following screw covers and screws. The display screw covers are included in the Display Screw Kit, spare part number 608212-001. (1) Two screw covers on the display bezel bottom edge (2) Two Phillips M2.5×5.0 screws 9.
10. Remove the display bezel (4). The display bezel is available using spare part number 636938-001. 11. If it is necessary to replace the webcam module, lift the webcam from the double-sided tape on the display back cover (1), disconnect the webcam cable (2) from the module, and remove the webcam. The webcam is available using spare part number 615744-001. 12. If it is necessary to replace the display panel, remove the two Phillips M2.0x3.5 screws (1) and the two Phillips M2.0x2.
13. Remove the cable from the routing path (3) along the bottom of the enclosure, disconnect the display panel cable from the HP logo light cable (4), and then lift the panel from the enclosure (5). The display panel is available using the spare part numbers 636941-001 or 650675-001. 14. If it is necessary to replace the display cable, follow these steps: a. Position the display panel upside down. b. Disengage the webcam cable from the glue securing it to the back of the display (1). c.
16. Use a tool to gently pry the display hinge covers (2) from the display. 17. Remove the four Phillips M2.5x3.0 screws (1) that secure the display brackets to the display. Remove the display brackets (2) from the display. The display bracket and hinge set are available using spare part number 608214-001. NOTE: Note the WLAN antenna routing path through the right hinge for replacement. The silver screws go on the outside of the hinges. 18.
20. Remove the wireless antennas and cables (3) from the display enclosure. The wireless antennas and cables are included in the Display Cable Kit, spare part number 608211-001. Reverse this procedure to reassemble and install the display assembly.
USB board Description Spare part number USB board (includes cable) 658707-001 Before removing the USB board, follow these steps: 1. Shut down the computer. If you are unsure whether the computer is off or in Hibernation, turn the computer on, and then shut it down through the operating system. 2. Disconnect all external devices connected to the computer. 3.
Reverse this procedure to install the USB board. NOTE: When reinstalling note that the screw goes into the upper hole. Power connector cable Description Spare part number Power connector cable (includes cable and connector) 608273-001 Before removing the power connector cable, follow these steps: 1. Shut down the computer. If you are unsure whether the computer is off or in Hibernation, turn the computer on, and then shut it down through the operating system. 2.
5. Remove the power connector (4) from the base enclosure. Reverse this procedure to install the power connector cable.
Bluetooth module NOTE: The Bluetooth module cable is included in the Cable Kit, spare part number 608227-001. Description Spare part number Bluetooth module 537921-001 Before removing the Bluetooth module, follow these steps: 1. Shut down the computer. If you are unsure whether the computer is off or in Hibernation, turn the computer on, and then shut it down through the operating system. 2. Disconnect all external devices connected to the computer. 3.
4. Remove the Bluetooth module and cable from the slot in the base enclosure (3), while noting the cable routing path atop the speaker (4). Reverse the above procedure to install the Bluetooth module.
Speaker assembly Description Spare part number Speaker assembly 608232-001 Before removing the speaker assembly, follow these steps: 1. Shut down the computer. If you are unsure whether the computer is off or in Hibernation, turn the computer on, and then shut it down through the operating system. 2. Disconnect all external devices connected to the computer. 3.
4. Lift the speaker assembly straight up (3) to remove it from the base enclosure. Reverse this procedure to install the speaker assembly.
System board NOTE: All system board kits include replacement thermal material. NOTE: System boards with the processor already installed, as well as without the processor, are available for this computer.
g. Display assembly (see Display assembly on page 56) h. USB board (see USB board on page 63) i. Power connector cable (see Power connector cable on page 64) j. Bluetooth module (see Bluetooth module on page 66) 1. Turn the computer upright with the left side toward you. 2. Disconnect the optical drive connector cable (1) from the system board. 3. Remove the three Phillips M2.5×5.0 screws (2) that secure the system board to the computer. 4.
Fan/heat sink assembly NOTE: All fan/heat sink assembly kits include replacement thermal material. Description Spare part number Fan/heat sink assembly for use in UMA models in which the processor is not soldered to the system board 636940-001 Fan/heat sink assembly for use in UMA models in which the processor is soldered to the system board 642731-001 Fan/heat sink assembly for use in models with discrete graphics 636939-001 NOTE: To properly ventilate the computer, allow at least a 7.
NOTE: Steps 1 through 4 apply to computers with discrete subsystem memory on the system board. Steps 5 through 7 apply to computers with UMA subsystem memory. 1. Turn the system board upside down. 2. Disconnect the fan cable from the system board. 3. Follow the sequence embossed on heat sink to loosen the six Phillips M2.5×7.0 captive screws (1) that secure the fan/heat sink assembly to the system board.
4. Remove the fan/heat sink assembly (2). The thermal material must be thoroughly cleaned from the surfaces of the fan/heat sink assembly (1), the processor (2) and the graphics processor (3) on the system board each time the fan/heat sink assembly is removed. Thermal pads and thermal paste must be installed on all surfaces before the fan/heat sink assembly is reinstalled. The following illustration shows the locations for thermal material on systems with discrete graphics subsystems.
5. Disconnect the fan cable from the system board. 6. Follow the sequence embossed on heat sink to loosen the four Phillips M2.5×7.0 captive screws (1) that secure the fan/heat sink assembly to the system board. NOTE: Due to the adhesive quality of the thermal material located between the fan/heat sink assembly and system board components, it may be necessary to move the fan/heat sink assembly from side to side to detach the assembly.
7. Remove the fan/heat sink assembly (2). The thermal material must be thoroughly cleaned from the surface of the processor component (1) and the fan/heat sink assembly (2) each time the fan/heat sink assembly is removed. Thermal pads and thermal paste must be installed on all surfaces before the fan/heat sink assembly is reinstalled. NOTE: Thermal pads and thermal paste are included with all fan/heat sink assembly, system board, and processor spare part kits.
Processor NOTE: All processor spare part kits include thermal material. Description Spare part number Intel Core i7 2620M processor, 2.7 GHz (SC turbo up to 3.40 GHz), 4 MB L3 cache 35 W 631252-001 Intel Core i5 2520M processor, 2.5 GHz, (SC turbo up to 3.2 GHz), 3 MB L3 cache 35 W 631253-001 Intel Core i5 2540M processor, 2.6 GHz, (SC turbo up to 3.33 GHz), 3 MB L3 cache 35 W 631255-001 Intel Core i5 2430M Dual-Core processor, 2.4 GHz, (SC turbo up to 3.
2. Lift the processor (2) straight up and remove it. NOTE: The gold triangle (3) on the processor must be aligned with the triangle icon (4) embossed on the processor socket when you install the processor. Reverse this procedure to install the processor.
5 Setup Utility Starting Setup Utility Setup Utility is a ROM-based information and customization utility that can be used even when your Windows operating system is not working. NOTE: The fingerprint reader cannot be used to access Setup Utility. The utility reports information about the computer and provides settings for startup, security, and other preferences. To start Setup Utility: ▲ Open Setup Utility by turning on or restarting the computer.
4. When a confirmation prompt with your language selected is displayed, press enter. 5. To save your change and exit Setup Utility, use the arrow keys to select Exit > Exit Saving Changes, and then press enter. Your change goes into effect immediately. Navigating and selecting in Setup Utility Because Setup Utility is not Windows based, it does not support the TouchPad. Navigation and selection are by keystroke. ● To choose a menu or a menu item, use the arrow keys.
3. When the Setup Confirmation is displayed, press enter. 4. To save your change and exit Setup Utility, use the arrow keys to select Exit > Exit Saving Changes, and then press enter. The Setup Utility default settings go into effect when the computer restarts. NOTE: Your password, security, and language settings are not changed when you restore the factory default settings. Exiting Setup Utility You can exit Setup Utility with or without saving changes.
Setup Utility menus The menu tables in this section provide an overview of Setup Utility options. NOTE: Some of the Setup Utility menu items listed in this chapter may not be supported by your computer. Main menu Select To do this System information ● View and change the system time and date. ● View identification information about the computer. ● View specification information about the processor, memory size, system BIOS, and keyboard controller version (select models only).
Select To do this Action Keys Mode Enable/disable action keys. Boot Options Set the following boot options: ● f10 and f12 Delay (seconds)―Set the delay for the f10 and f12 functions of Setup Utility in intervals of 5 seconds each (0, 5, 10, 15, 20). ● CD-ROM boot―Enable/disable boot from CD-ROM. ● Floppy boot―Enable/disable boot from diskette. ● Internal Network Adapter boot―Enable/disable boot from Internal Network Adapter.
6 Specifications Computer specifications Dimensions Factor Metric U.S. Depth 22.8 cm 8.98 in Width 34.8 cm 13.7 in Height (front to rear) 2.5 to 3.2 cm 0.98 to 1.26 in Weight (lowest weight configuration) < 2.00 kg 4.42 lbs Input power Operating voltage 18.5 V dc @ 4.74 A – 90 W Operating current 4.74 A Temperature Factor Metric U.S.
35.56 cm (14.0 in) display specifications Dimensions Active diagonal size 35.56 cm (14.00 in) Active area 309.399 x 173.952 Resolution 1366 × 768 (HD) Weight 320 g (0.71 lbs) Contrast ratio 500:1 (typical) Luminance 200 nits (typical) Luminance uniformity 1.4 (typical) 1.6 (max) Lifetime (1/2 luminance) 12,000 hours Backlight LED Response time 8 ms (typical) Surface treatment BV Total power consumption 2.8 W Viewing angle SVA 35.56 cm (14.
Hard drive specifications 750 GB* 640 GB* 500 GB* 320 GB* Dimensions Height 9.5 mm Width 70 mm Weight 101 g Interface type SATA Transfer rate 100 MB/sec Security ATA security Seek times (typical read, including setting) Single track 1.0 ms 1.0 ms 1.0 ms 1.5 ms Average 14.0 ms 14.0 ms 14.0 ms 12.0 ms Maximum 22.0 ms 22.0 ms 22.0 ms 22.
DVD±RW SuperMulti Double-Layer Drive specifications Applicable disc Read CD-DA, CD+(E)G, CD MIDI, CD-TEXT, CD-ROM, CD-ROM XA, MIXED MODE CD, CD-I, CD-I Bridge (Photo-CD, Video CD), Multisession CD (Photo-CD, CD-EXTRA, Portfolio, CD-R, CD-RW), CD-R, CD-RW, DVDROM (DVD-5, DVD-9, DVD-10, DVD-18), DVD-R, DVD-RW, DVD+R, DVD +RW, DVD-RAM Write CD-R and CD-RW, DVD+R, DVD+RW, DVD-R, DVD-RW, DVD-RAM Random access time DVD < 230 ms CD < 175 ms Cache buffer 2 MB Data transfer rate 24X CD-ROM 3,600 KB/sec 8
System resource specifications You can use Device Manager to get a graphical view of the system resources that control how the devices work on the computer. System resources you can access from Device Manager are direct memory access (DMA) channels, input/output (I/O) ports, interrupt request (IRQ) lines, and memory addresses. If two devices require the same resource and create a device conflict, you can manually change the resource settings in Device Manager to be sure each setting is unique.
7 Backup and recovery ● Restore ● Creating restore media ● Performing a system restore ● Backing up and recovering your information Your computer includes tools provided by the operating system and HP to help you safeguard your information and restore it if ever needed.
Restore In the event of hard drive failure, to restore your system to its factory image you will need a set of recovery discs or a recovery flash drive that you can create using HP Recovery Manager. HP recommends that you use this software to create either a set of recovery discs or a recovery flash drive immediately after software setup.
Performing a system restore HP Recovery Manager software allows you to repair or restore the computer to its original factory state. HP Recovery Manager works from recovery discs or a recovery flash drive, or from a dedicated recovery partition (select models only) on the hard drive. NOTE: A system restore needs to be performed if the computer hard drive has failed or if all attempts to correct any functional computer issues fail.
Restoring using the restore media 1. If possible, back up all personal files. 2. Insert the first recovery disc into the optical drive on your computer or an optional external optical drive, and then restart the computer. – or – Insert the recovery flash drive into a USB port on your computer, and then restart the computer. NOTE: If the computer does not automatically restart in HP Recovery Manager, the computer boot order needs to be changed. 3. Press f9 at system bootup. 4.
Backing up and recovering your information It is very important to back up your files and keep any new software in a safe place. As you add new software and data files, continue to create backups on a regular basis. How completely you are able to recover your system depends on how recent your backup is. NOTE: A recovery from your most recent backup needs to be performed if the computer has a virus attack or if any major system components fail.
Using Windows Backup and Restore Guidelines: ● Be sure that the computer is connected to AC power before you start the backup process. ● Allow enough time to complete the backup process. Depending on file sizes, it may take over an hour. To create a backup: 1. Select Start > Control Panel > System and Security > Backup and Restore. 2. Follow the on-screen instructions to schedule and create a backup. NOTE: Windows® includes the User Account Control feature to improve the security of the computer.
Using Windows system restore points A system restore point allows you to save and name a snapshot of your hard drive at a specific point in time. You can then recover back to that point if you want to reverse subsequent changes. NOTE: Recovering to an earlier restore point does not affect data files saved or e-mails created since the last restore point. You also can create additional restore points to provide increased protection for your files and settings.
8 Recycling Battery When a battery has reached the end of its useful life, do not dispose of the battery in general household waste. Follow the local laws and regulations in your area for computer battery disposal. Display WARNING! The backlight contains mercury. Exercise caution when removing and handling the backlight to avoid damaging this component and causing exposure to the mercury. CAUTION: The procedures in this chapter can result in damage to display components.
Perform the following steps to disassemble the display assembly: 1. Remove all screw covers (1) and screws (2) that secure the display bezel to the display assembly. 2. Lift up and out on the left and right inside edges (1) and the top and bottom inside edges (2) of the display bezel until the bezel disengages from the display assembly. 3. Remove the display bezel (3).
98 4. Disconnect all display panel cables (1) from the display inverter and remove the inverter (2). 5. Remove all screws (1) that secure the display panel assembly to the display enclosure. 6. Remove the display panel assembly (2) from the display enclosure. 7. Turn the display panel assembly upside-down. 8. Remove all screws that secure the display panel frame to the display panel. 9.
10. Remove the display panel frame (2) from the display panel. 11. Remove the screws (1) that secure the backlight cover to the display panel. 12. Lift the top edge of the backlight cover (2) and swing it outward. 13. Remove the backlight cover. 14. Turn the display panel right-side up.
15. Remove the backlight cables (1) from the clip (2) in the display panel. 16. Turn the display panel upside-down. WARNING! The backlight contains mercury. Exercise caution when removing and handling the backlight to avoid damaging this component and causing exposure to the mercury. 17. Remove the backlight frame from the display panel.
18. Remove the backlight from the backlight frame. 19. Disconnect the display panel cable (1) from the LCD panel. 20. Remove the screws (2) that secure the LCD panel to the display rear panel. 21. Release the LCD panel (3) from the display rear panel. 22. Release the tape (4) that secures the LCD panel to the display rear panel. 23. Remove the LCD panel. 24. Recycle the LCD panel and backlight.
Index A AC adapter spare part numbers 22 action keys identifying 8 action keys mode 83 administrator password 82 audio in (microphone) jack, identifying 10 audio, product description 2 audio-out (headphone) jack, identifying 10 B backing up customized window, toolbar, and menu bar settings 93 personal files 93 base enclosure, spare part number 18 battery removal 36 spare part numbers 18, 26, 36 battery bay 12 battery light 9 battery release latch 12 bezel illustrated 19 spare part number 19, 59 Bluetooth c
esc key, identifying 8 Ethernet, product description 2 external media cards, product description 3 external monitor port 10 F f11 91 fan always on 82 fan/heat sink assembly removal 72 spare part number 15, 72 feet locations 35 spare part number 35 fingerprint reader board removal 53 spare part number 15, 25, 53 fingerprint reader light, identifying 6 fingerprint reader, identifying 7 fn key, identifying 8 G graphics, product description grounding equipment and methods 33 1 H hard drive precautions 30 prod
processor product description 1 removal 77 spare part numbers 15, 25, 77 product description audio 2 camera 2 display panel 1 Ethernet 2 external media cards 3 graphics 1 hard drives 2 keyboard 3 memory module 1 microphone 2 operating system 4 optical drives 2 pointing devices 3 ports 3 power requirements 3 processors 1 product name 1 security 4 serviceability 4 wireless 3 product name 1 R recovering from the dedicated recovery partition 91 recovering from the recovery discs 92 recovery discs 90 recovery, s