
Installation and Upgrade Guide

* these patches at a future time by use of the PRODUCT UNDO PATCH command.
Do you want to continue? [YES]
If you answer YES (the default), the recovery data sets are deleted and the OpenVMS upgrade
continues.
Deleting RECOVERY DATA SET 001 ...
If you answer NO, the recovery data sets are not deleted and the OpenVMS upgrade aborts.
Do you want to continue? [YES] NO
%PCSIUI-I-USERABORT, operation terminated by user request
You chose to retain recovery data on the target system disk.
The OpenVMS upgrade cannot continue.
Please correct the situation that prevents you from deleting the
recovery data and then retry the upgrade.
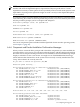
6.3.6 Specifying the Volume Label
After you specify the target disk and, if applicable, check for recovery data, the procedure informs
you of the volume label currently assigned to the target disk you specified and asks whether you
want to keep that label. As shown in the following example, if you choose not to keep the label,
you are prompted for a new label. The OpenVMS operating system uses the volume label to
identify and reference the disk. Make sure the label you use is unique; problems occur if the
same label is used by different disk volumes.
DKB400: is now labeled I64SYS.
Do you want to keep this label? (Yes/No) [Yes] NO
Enter volume label for target system disk: [I64SYS] I640831H1
You can accept the default label assigned by the system or specify a different volume label. (The
label name has a limit of 12 characters that can include A to Z, 0 to 9, the dollar sign ($), hyphen
(-), and underscore(_) characters).
NOTE: OpenVMS requires that the volume labels for all disks on your system or OpenVMS
Cluster have unique labels. If a disk that has the same label as the system disk is mounted, various
OpenVMS components will not function as intended or a node might crash during boot.
If you change the volume label for a disk in an OpenVMS Cluster, be sure to change the command
that mounts the disk on other nodes in the cluster; otherwise, the disk will not mount on those
nodes once they are rebooted.
6.3.7 Specifying the On-Disk Structure Level
If the target disk is currently initialized with On-Disk Structure Level 2 (ODS-2), the procedure
informs you and gives you the option to convert the disk to On-Disk Structure Level 5 (ODS-5),
as in the following example. If the target disk is currently initialized with ODS-5, the upgrade
continues without displaying information about the disk structure. You are not asked whether
to convert the system disk's structure or whether to enable hard links.
NOTE: If your disk was initialized with ODS-5, and hard links was not enabled but now you
want to enable hard links, you can enable them prior to the upgrade by using the following
commands as shown:
$ SET VOLUME/VOLUME_CHARACTERISTICS=HARD_LINKS SYS$SYSDEVICE
$ ANALYZE DISK_STRUCTURE/REPAIR SYS$SYSDEVICE
The target system disk is currently at On-Disk Structure Level 2
(ODS-2). It can be converted to On-Disk Structure Level 5 (ODS-5).
6.3 Performing the Upgrade 101