HP Insight Control for VMware vCenter Server User Guide Abstract This document contains detailed instructions for configuring and using HP Insight Control for VMware vCenter Server. The intended audience is system administrators who are experienced in virtual and physical IT infrastructure administration and understand server virtualization, storage, and networking concepts.
© Copyright 2012 Hewlett-Packard Development Company, L.P. Confidential computer software. Valid license from HP required for possession, use or copying. Consistent with FAR 12.211 and 12.212, Commercial Computer Software, Computer Software Documentation, and Technical Data for Commercial Items are licensed to the U.S. Government under vendor's standard commercial license. The information contained herein is subject to change without notice.
Contents 1 Overview..................................................................................................6 2 Configuring Insight Control for vCenter..........................................................7 Configuring the Server Module for vCenter..................................................................................8 Onboard Administrator Single Sign-On..................................................................................8 Associating the VMware host to iLO.............
Using the Insight Control Deployment Wizard........................................................................31 Using the Storage Module for vCenter.......................................................................................32 Navigating the HP Insight Management tab with the Storage Module.......................................32 Managing datastores....................................................................................................33 Managing VMs............................
Troubleshooting the Server Module for vCenter...........................................................................84 Server summary data is not displayed for host.......................................................................84 Health status or information is missing for specific hosts or clusters............................................84 Auto-login not working for URLs provided for managed nodes by Insight Control for vCenter........
1 Overview HP Insight Control for VMware vCenter Server (Insight Control for vCenter) includes the core Insight Control capabilities for VMware vCenter Server, the HP Insight Control Server Module for vCenter (Server Module for vCenter), and the HP Insight Control Storage Module for vCenter (Storage Module for vCenter). Insight Control for vCenter is delivered as a single integrated application. The application consists of three modules.
2 Configuring Insight Control for vCenter Insight Control for vCenter is managed as a plug-in in the vCenter Server environment. Several settings can impact the interaction between Insight Control for vCenter and vCenter Server.
Configuring the Server Module for vCenter After you install the Server Module for vCenter, you can manage Server Module features on the Home Settings page in the vSphere Client. To access the Home Settings page: 1. Navigate to the vSphere Client home page. 2. Under Administration, click the HP Insight Management Administration icon. The GUI Theme Selection page appears by default. The home page allows you to access the following server administration pages through a drop-down list.
Manual association You can manually associate the host to iLO using either the VMware Power Management settings or the Insight Control for vCenter Host Properties page. Manual association is supported in all versions of Insight Control for vCenter. Using the VMware Power Management settings 1. 2. 3. In the vSphere user interface, select the host to be associated, and then click the Configuration tab. In the Software section, click Power Management. Click the Properties link.
To access the Storage Administrator Portal: 1. Start the Storage Administrator Portal using one of the following methods: • From the Start menu—Select Start→HP Insight Control for vCenter→Storage Administrator Portal for vCenter. • From the Desktop—Double-click the Storage Administrator Portal for vCenter icon on the Desktop. The Storage Administrator Portal login screen appears. 2. Enter the user name and password, and then click OK.
Adding HP P4000 arrays To add an HP P4000 array (also called a management group): 1. Log in to the Storage Administrator Portal. For instructions, see “About the Storage Administrator Portal” (page 9). 2. Click Add. The Add Storage Array or Management Server (1 of ...) page appears. 3. Select HP P4000 in the Type list, and then click Next. The Add HP P4000 (2 of 4) page appears. 4.
the P6000 Command View management server or the P6000 EVA. For instructions on adding P6000 EVAs separately, see “Adding HP P6000 EVAs” (page 12). NOTE: General references to HP P6000 Command View can also refer to earlier versions of HP Command View EVA. P6000 is the new branding for the EVA product family. To add a P6000 Command View management server: 1. Log in to the Storage Administrator Portal. For instructions, see “About the Storage Administrator Portal” (page 9). 2. Click Add.
To add P6000 EVAs separately: 1. Log in to the Storage Administrator Portal. For instructions, see “About the Storage Administrator Portal” (page 9). 2. Click Add. The Add Storage Array or Management Server (1 of ...) page appears. 3. Select HP P6000 EVA in the Type list, and then click Next. The Add HP P6000 EVA (2 of 3) page appears. The Array Name list shows all available P6000 EVAs.
IMPORTANT: You must install version 1.1.2.0 of the MSA SMI-S proxy provider to add support for the MSA in your VMware environment. Earlier versions of the MSA SMI-S proxy provider are not supported by the Storage Module for vCenter. For installation instructions, see the MSA SMI-S proxy provider documentation. P6000 Command View and the MSA SMI-S proxy provider cannot coexist on the same server. 3. Log in to the Storage Administrator Portal.
8. Click Finish. The P2000 G3 MSA System is added to the Configured Arrays and Management Servers list. Adding HP P9000 arrays To add an HP P9000 array: 1. Verify that a command device from the P9000 array is presented to the host running the Storage Module for vCenter. Make sure that the security is disabled for the command device. 2. Log in to the Storage Administrator Portal. For instructions, see “About the Storage Administrator Portal” (page 9). 3. Click Add.
• Array Model—Array model • Array Firmware—Array firmware version • Array Identifier—Array identifier ◦ P4000—Management group name ◦ 3PAR—Array serial number ◦ P6000 EVA—Array WWNN ◦ P2000/MSA2000—Array serial number ◦ P9000/XP—Array serial number • Managers/Managing—Management servers for listed arrays, or arrays managed by listed management servers • Storage Pool—Available storage pools • Access—Access setting for each storage pool Modifying configured arrays and management servers
NOTE: When working with P6000 EVAs, this step is required for P6000 Command View management servers only. The host name, user name, and password are not required when modifying P6000 EVAs. • For XP and P9000 arrays: Enter the new Remote Web Console host name or IP address, user name, and password. • For 3PAR arrays: Enter the new management server host name or IP address, user name, and password. The next Modify management server or array type page appears. 4.
Configuring the VMware VASA provider If you want to use the VASA functionality in the vSphere Client, add the Storage Module for vCenter to the vendor providers list and add a CA-signed certificate. Adding the Storage Module for vCenter to the vendor providers list To add the Storage Module for vCenter to the vendor providers list: 1. Navigate to the Home page in the vSphere Client. 2. Click Storage Providers in the Administration section. The Vendor Providers page opens. 3. Click Add.
5. 6. 7. Enter the following information in the Certificate Info section: • Country • State • Locality • Organization • Common Name – The fully qualified vCenter Server name. If desired, enter the following information in the Optional Certificate Info section: • Organizational Unit • Email • Surname • Given Name Click Generate. The certificate signing request is generated (see “Certificate request” (page 19)). Figure 3 Certificate request 8. 9.
3 Using Insight Control for vCenter This chapter describes the processes for accessing and using the software. Accessing Insight Control for vCenter After completing the installation and configuration procedures, you can access Insight Control for vCenter using the vSphere Client: 1. Start the vSphere Client. 2. When prompted, enter the IP address/host name, user name, and password to sign in to the vCenter Server.
Figure 4 Sample Overview page The top of the HP Insight Management pages show: • The consolidated status of the managed HP component. The most severe status of a component is displayed. Moving your cursor over the status icon shows the status overview. Click More for details about the status of the components. • The name and a brief description of the selected server. • A Tasks icon. Moving your cursor over the Tasks icon shows a list of tasks currently being performed.
vary based on your configuration and the selected VMware component. Portlets show information such as: • Server/Host/Cluster Information • Networking • Infrastructure • Software/Firmware • Storage • News Feed (a list of recent events) • Tasks For detailed information about portlet items, select the item in the navigation list or click More at the bottom of the portlet.
• ◦ Software/Firmware ◦ News Feed ◦ Cluster ◦ Tasks Host/Server management ◦ Consolidated status summary ◦ Overview ◦ Host Information ◦ Networking ◦ Software/Firmware ◦ Infrastructure ◦ News Feed NOTE: For information about navigating the HP Insight Management tab with the Storage Module for vCenter, see “Navigating the HP Insight Management tab with the Storage Module” (page 32). Depending on the context of the page, links are available to launch HP tools, as needed.
Cost Advantage = (number of hours the server was down) × (power cost) × (average power) Entering the Power Cost will only calculate the Cost Advantage if all of the requirements in this section are applicable for the cluster. If the requirements are not met by the cluster, the cost advantage is always zero. Managing clusters To access the overview summary for the cluster level, select a cluster in the inventory tree, and then select the HP Insight Management tab if necessary.
For more information, see “Navigating the HP Insight Management tab with the Storage Module” (page 32). Cluster Overview page The top of the Cluster Overview page shows: • At the top left of the page, a consolidated status displays, which is determined by aggregating all status information for the host. Moving your cursor over the status icon shows a list of the icon meanings. Click More at the bottom of the list or select Status from the navigation list for details about the status of the components.
Viewing infrastructure information for a cluster To view infrastructure information about a selected cluster: 1. Select a cluster in the inventory tree. 2. Click the HP Insight Management tab. The Overview page opens by default. The Infrastructure portlet lists the enclosure name, rack name, and power and fan status information. 3. For more information, select Infrastructure from the navigation list or click More at the bottom of the portlet.
2. Click the HP Insight Management tab. The Overview page opens by default. The News Feed portlet displays a list of recent events. 3. For more details, select News Feed from the navigation list or click More at the bottom of the News Feed portlet. The details include object status, timestamp and a brief message. Viewing cluster information To view a list of recent events for the selected cluster: 1. Select a cluster in the inventory tree. 2. Click the HP Insight Management tab.
• A Tasks icon. Moving your cursor over the Tasks icon shows a list of tasks currently being performed. You can click More at the bottom of the list or select Tasks from the navigation list to monitor long-running tasks. • A Navigation drop-down list used to display different views and level of detail. Overview is the default. • An Actions drop-down list that you use to perform actions on the server/host.
3. For more details, select Infrastructure from the navigation list or click More at the bottom of the Infrastructure portlet. The details include information about the server enclosure, including power, airflow, and thermal information; interconnects, power supplies, and OA logs. Viewing host server information To view information about the host server: 1. Select a host in the inventory tree. 2. Click the HP Insight Management tab. The Overview page opens by default.
• The switches in the network diagram are color-coded according to the colors of the switch bays at the back of the enclosure. • The switch ports in the network diagram are displayed with icons that show the shape of the port on the physical Virtual Connect switch. Figure 7 Virtual Connect Network Diagram Viewing host software and firmware NOTE: Firmware information is available for ESXi systems only. To view firmware information and/or update firmware for the selected server: 1.
IMPORTANT: To use the Manage Smart Components tabbed page, you must first download smart components from the http://www.hp.com website for your systems. The downloaded smart component files can then be uploaded to Insight Control for vCenter using the Software/Firmware page. To upload files from the host system: 1. From the Actions menu, select Firmware. 2. Click Manage Smart Components. 3. Select the Smart Component file update you want to distribute.
Prerequisites Before using the wizard, you must have installed the following: • HP Insight Control for vCenter • HP RDP from the HP Insight Rapid Deployment website. • HP Deployment Connector (included with Insight Control for vCenter) NOTE: If you try to use the HP Insight Control Deployment Wizard without installing the Deployment Connector, the wizard prompts you to download and install it. Follow the on-screen instructions.
Managing datastores To access the Overview page for a datastore, select a datastore in the inventory tree, and then click the HP Insight Management tab. From the Overview page, you can do the following: • Access the News Feed, Storage, and Software/Firmware portlets. For more information, see “Accessing storage information on the Overview page” (page 33). • Perform provisioning operations from the Actions drop-down menu. For more information, see “Provisioning storage” (page 59). • View the News Feed.
For more information about the News Feed, see “Using the Server Module for vCenter” (page 22). • Software/Firmware—Select a host, cluster, VM, or datastore, and then click the More link in the Software/Firmware portlet to view software and firmware information, including read-only information about the storage associated with the selected component. See Figure 9 (page 34).
Figure 11 Storage portlet After you click the More link in the Storage portlet: ◦ Click the Summary tab for storage overview information, or click one of the additional tabs for detailed information. ◦ Click Back at the bottom of any detailed information tab to return to the Summary page. ◦ Click the Storage icon configured arrays. ◦ Click the Refresh icon to refresh the Storage Module for vCenter data that is displayed in the vSphere Client.
◦ “Viewing storage information for a VM” (page 47) ◦ “Viewing detailed storage information” (page 48) ◦ “Managing servers” (page 27) ◦ “Managing clusters” (page 24) ◦ “Managing datastores” (page 33) ◦ “Managing VMs” (page 33) Refreshing Storage Module for vCenter data After installation, the Storage Module for vCenter collects information about the VMware environment and HP storage arrays configured in the VMware environment and Storage Administrator Portal.
NOTE: Previously gathered data is displayed in the GUI during a data refresh. You can change the automatic data refresh settings or manually refresh the data. For more information, see “Manually refreshing the data” (page 37).
2. Click the Refresh link in the top right corner of the Storage Administrator Portal. The Storage Administrator Portal displays the options shown in Figure 16 (page 38). Figure 16 Manual data refresh options—Storage Administrator Portal 3. 4. Click OK to continue the data refresh. Optional: Click Check Refresh Progress to update the elapsed time and estimated time remaining. See Figure 14 (page 36).
Restarting a data refresh using the Storage Administrator portal 1. Click the Refresh link in the top right corner of the Storage Administrator Portal. The Storage Administrator Portal displays the options shown in Figure 17 (page 39). Figure 17 Restart data refresh options 2. Click Restart. Changing the automatic data refresh settings You can change the default data refresh settings by editing the standalone.xml file. 1. Open the standalone.
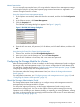
Figure 18 Storage Module for vCenter tabs When working with the information in the storage tables: • Click Export Table to export the information in a tab to a .csv file. When prompted to browse to a download folder, select a folder, and then click OK. • Enter a value in the text box below a column heading to filter the list by a specific value. • Click the divider between columns and drag to resize a column. • Click a column heading to sort the data by the selected column.
Figure 19 Adding and removing columns • Customize the tables as needed. The following changes are saved in cookies and are retained across page reloading and vSphere Client sessions: ◦ Resized column widths ◦ Sorting criteria for one or multiple columns ◦ Information about hidden columns Viewing storage information for a host To view storage information for a host: 1. Navigate to the Hosts and Clusters Inventory view. 2. Select a host in the inventory tree.
5. Click the Summary tab. The Summary tab displays information about HP storage and includes a graphical representation of that information. For details about the colors used on this page, click Show Legend. See Figure 20 (page 42).
Figure 21 Viewing HP Storage Array details The following information is displayed for each array: HP Storage Provisioned to Host • Volumes—Number of volumes presented to the selected host from the array • Used—Amount of storage used by the host from the array • Total—Total amount of storage presented to the selected host from the array • Free pool capacity—Amount of available storage in the selected array. The number reflects the difference between configured storage and used storage.
Figure 22 Viewing datastore details Viewing detailed information Click the Storage Volumes, Virtual Disks, HBAs, Paths, Replications, or VMs to Volumes tab to view detailed information about the selected host.
Provisioned from Cluster to Virtual Machines • Current storage inventory—Number of datastores, RDMs, and unused volumes provisioned to VMs • Cluster Provisioned Capacity—Total amount of storage available to the cluster, including HP storage, local storage, and unmanaged disks • Cluster Used Capacity—Amount of storage used by the cluster • Cluster Available Capacity—Amount of unused storage available to the cluster • Datastores overprovisioned—The number of over-provisioned datastores • VMDK/RDM P
Viewing detailed information Click the Storage Volumes, Virtual Disks, HBAs, Paths, Replications, or VMs to Volumes tab to view detailed information about the selected cluster.
The following information is displayed for each array: • Volumes—Number of volumes presented to the selected datastore from the array • Used—Amount of storage used by the datastore from the array • Total—Total amount of storage presented to the selected datastore from the array • Free pool capacity—Amount of HP storage available in storage pools Datastores This section lists the selected datastore. Move the cursor over the status bar to view storage information. See Figure 22 (page 44).
Provisioned by Virtual Machine • Current storage inventory—Number of datastores, RDMs, and unused volumes provisioned by the selected VM • Virtual Machine Provisioned Capacity—Amount of storage provisioned by VMDKs or RDMs • Virtual Machine Used Capacity—Total amount of storage used by the VM • Virtual Machine Available Capacity—Amount of storage available to the VM HP Storage Arrays This section lists the arrays that provide storage to the selected VM.
Figure 23 Detailed information tabs Viewing storage volumes The Storage Volumes tab is displayed in the HP Insight Management tab for selected hosts, clusters, VMs, and datastores.
◦ P2000/MSA2000—System name ◦ P9000/XP—Array serial number • Array Type—HP array type • Datastore/RDM—Datastore name or the associated .
value assumes all unallocated space is formatted the same as this volume. For all other volume types, no value is displayed. ◦ P9000/XP—P9000 or XP Thin Provisioning pool capacity. • Array Disk Emulation Type (P9000 and XP arrays only)—LDEV emulation type. • Replicated—Specifies whether the disk is replicated Viewing virtual disks The Virtual Disks tab is displayed in the HP Insight Management tab for selected hosts, clusters, VMs, and datastores. See Figure 25 (page 51).
Figure 26 HBAs tab This tab displays the following information: • Host Names—Host name or cluster host names • Type—HBA type • VMware Device Identifier—HBA identifier assigned by VMware • WWN/IQN—HBA WWN NOTE: • No HBA WWN address is available for P2000/MSA2000 SAS arrays. Label—HBA identifier assigned by VMware Viewing paths The Paths tab is displayed in the HP Insight Management tab for selected hosts, clusters, VMs, and datastores. See Figure 27 (page 52).
• • • ◦ P2000/MSA2000—Volume name ◦ P9000/XP—Emulation type and LDKC:CU:LDEV (for example, HP OPEN-V-CVS (00:04:3F)) Array Name ◦ P4000—Management group name ◦ 3PAR—Array display name ◦ P6000 EVA—Array display name ◦ P2000/MSA2000—System name ◦ P9000/XP—Array serial number Host HBA Port WWN/IQN ◦ P4000—IQN assigned to the host ◦ 3PAR (FC)—WWN for the host port on the host end of this path ◦ 3PAR (iSCSI)—IQN assigned to the host ◦ P6000 EVA—WWN for the host port on the host end of t
• • ◦ P2000/MSA2000—Port on the array controller used for this path ◦ P9000/XP—Port number Host Group ◦ P4000—Name configured for the host's IQN in the management console ◦ 3PAR—Name of the host object containing the host WWN for this path ◦ P6000 EVA—Name of the host object containing the host WWN for this path ◦ P2000/MSA2000—Nickname of the host with the host WWN for this path ◦ P9000/XP—Name of the host group containing the HBA WWN on the array port for this path Host Access ◦ P4000—H
• • Preferred Path ◦ P4000—Not applicable ◦ 3PAR—Not applicable ◦ P6000 EVA—Specifies whether the path uses a port on the controller that is configured as the preferred path for the vdisk (Yes, No, No preference) ◦ P2000/MSA2000—Not applicable ◦ P9000/XP—Not applicable Active Path—Specifies whether the path is active or in standby status If a path is active and then goes offline, a standby path takes over.
• Replication Group ◦ P4000—Not applicable ◦ 3PAR—Remote Copy group name ◦ P9000/XP—Replica group ID ◦ P6000 EVA—Data replication group name • Datastore/RDM Type—Datastore/RDM type (Datastore or RDM) • Datastore Name—Datastore name Viewing all VMs associated with a host or cluster The VMs to Volumes tab is displayed for selected hosts, clusters, VMs, and datastores. See “View All tab” (page 56).
◦ P2000/MSA2000—Volume name ◦ P9000/XP—Emulation type and LDKC:CU:LDEV (for example, HP OPEN-V-CVS (00:04:3F)) • Array Disk Type—Array disk type • Array Name ◦ P4000—Management group name ◦ 3PAR—Array display name ◦ P6000 EVA—Array display name ◦ P2000/MSA2000—System name ◦ P9000/XP—Array serial number • Array Type—HP array type • Array Disk Total Capacity—Total amount of storage available to the datastore • Array Disk Allocated Capacity—Size of the virtual disk on the array • Array
P6000 EVA—Host mode assigned to the P6000 EVA host object ◦ P2000/MSA2000—Name of the host's profile ◦ P9000/XP—Host mode assigned to the host group • Host Name—Host name • Current Owner—Specifies whether the host is the current owner of the selected VM • Host HBA Port WWN • ◦ P4000—IQN assigned to the host ◦ 3PAR (FC)—WWN for the host port on the host end of this path ◦ 3PAR (iSCSI)—IQN assigned to the host ◦ P6000 EVA—WWN for the host port on the host end of this path ◦ P2000/MSA2000
4 Provisioning storage The Storage Module for vCenter supports storage provisioning for P4000, P6000 EVA, and P2000 G3 MSA arrays. You can perform storage provisioning operations such as adding a new datastore, deleting or expanding an existing datastore, creating new VMs, or cloning existing VMs. For P6000 EVA, provisioning operations are supported for thick-provisioned virtual disks.
Viewing the audit log The Storage Module for vCenter provides an audit log for provisioning operations. The audit log, provisionAuditLog.txt, is available in the following directory: install directory/Storage/JBoss/standalone/log. Adding a new datastore You can add a new datastore to a host or cluster that meets the following prerequisites. Hosts • The host must exist in the vSphere Client. • In an FC environment, the SAN must be zoned between the storage pools and the host.
Figure 30 Add Datastores – Specify Storage window 3. Enter the following information: • Quantity: Enter the number of datastores to create. • Datastore Capacity: Enter the capacity for the new datastores. NOTE: The actual value used by the software might be slightly more than specified in order to accommodate the VMware overhead. • Storage Pools: Select a storage pool to use for the new datastores. This window lists the configured storage pools with Full Access on arrays that support provisioning.
If there is not enough space available in the selected storage pool, a message is displayed in the Warnings box. • 4. RAID Level: Select a RAID level for the new datastores. The wizard lists all RAID levels supported by the selected storage pool. Click Next. The Add Datastores – Specify New Names window opens. See Figure 32 (page 62). Figure 32 Add Datastores – Specify New Names window 5. Enter the following information: • New Datastore Names: Enter the base name for the new datastores.
Figure 33 Add Datastores – Review and Validate window (before validation) 7. Click Next to validate that it is possible to create the datastores. The Review and Validate window is updated with icons showing the success or failure of the validation processes. A green icon indicates success, and a red icon indicates failure. If a validation step fails, a message is displayed in the Warning and Validation Results box. Correct the problem, and then click Retry to repeat the validation step.
8. Click Next to view a summary of the requested actions. The Summary window opens. See Figure 35 (page 64). Figure 35 Add Datastores – Summary window 9. Click Finish to create the specified datastores. You can view the progress of the task in the Recent Tasks pane at the bottom of the vSphere Client window. TIP: No manual data refresh is necessary. When a provisioning operation is complete, the Storage Module for vCenter data is refreshed automatically.
Figure 36 Expand Datastore window 3. Enter the requested new capacity in the Requested Datastore Capacity box. The following rules apply when expanding datastores: • A datastore can be expanded only if it is located on a single disk on an array that supports provisioning by the Storage Module for vCenter. • The requested capacity cannot exceed the total capacity of the storage pool. • The requested capacity cannot be less than or equal to the original datastore capacity.
2. Use one of the following methods to specify a datastore to delete: • Right-click a datastore and select HP Insight Management→Delete Datastore. • Select a datastore in the inventory tree, click Storage Tools in the HP Management pane, and then click the Delete Datastore link. • Right-click a datastore in any Storage Module for vCenter table and select Delete Datastore. The Storage Module for vCenter prompts you to confirm the delete request. 3. Click Delete to confirm the request.
NOTE: When VMware converts a VM to a template, all RDMs are converted to empty virtual disks (VMDKs). Therefore, VMs created from this template will not have associated RDMs. For more information, see Virtual Disk Compatibility Modes in the VMware vSphere Online Library. • If a cluster is used to initiate the VM creation, all hosts in the cluster must be zoned to the storage, and hostgroups must be configured. To create one or more VMs from a template: 1. Start the vSphere Client. 2.
4. Click Next. The Create Virtual Machines – Specify Storage window opens. See Figure 39 (page 68). Figure 39 Create Virtual Machines – Specify Storage window 5. Enter the following information: • Quantity: The number of datastores to create to support the new VMs. This value must be less than or equal to the number of new VMs. • Datastore Capacity: The minimum capacity for each new datastore. The datastore capacity value is approximate.
Figure 40 Create Virtual Machines – Specify Names window 7. Enter the following information: • VM Names: Enter the base name for the new VMs. The # symbol is required and represents the numeric sequence for the new names. In the generated VM names, the # symbol is replaced with a number. The default values are as follows: Number Default start value for numeric sequence 1–9 1 10–99 01 100–999 001 The Generated Names box shows the names of the VMs that will be created.
Figure 41 Create Virtual Machines – Review and Validate window (before validation) 9. Click Next to validate that it is possible to create the VMs. The Create Virtual Machines – Review and Validate window is updated with icons showing the success or failure of the validation processes. A green icon indicates success, and a red icon indicates failure. If a validation step fails, a message is displayed in the Warning and Validation Results box.
10. Click Next to view a summary of the requested actions. The Summary window opens. See Figure 43 (page 71). Figure 43 Create Virtual Machines – Summary window 11. Click Finish to create the specified VMs and datastores. You can view the progress of the task in the Recent Tasks pane at the bottom of the vSphere Client window. TIP: No manual data refresh is necessary. When a provisioning operation is complete, the Storage Module for vCenter data is refreshed automatically.
2. Use one of the following methods to start the Clone Virtual Machine wizard: • Select Actions→Clone VM on the HP Insight Management page for a host or cluster. • Right-click a VM and select HP Insight Management→Clone VM. • Right-click a VM in any Storage Module for vCenter table, and then select Clone VM. The Clone Virtual Machine – Clone Parameters window opens. See Figure 44 (page 72). Figure 44 Clone Virtual Machine – Clone Parameters window 3.
Figure 45 Clone Virtual Machine – Specify New Names window 5. Enter the following information: • New VM Names: Enter the base name for the new VMs. The # symbol is required and represents the numeric sequence for the new names. In the generated VM names, the # symbol is replaced with a number. The default values are as follows: Number Default start value for numeric sequence 1–9 1 10–99 01 100–999 001 The Generated Names box shows the names of the VMs that will be created.
Figure 46 Clone Virtual Machine – Review and Validate window (before validation) 7. Click Next to validate that it is possible to create the cloned VMs. The Review and Validate window is updated with icons showing the success or failure of the validation processes. A green icon indicates success, and a red icon indicates failure. If a validation step fails, a message is displayed in the Warning and Validation Results box. Correct the problem, and then click Retry to repeat the validation step.
8. Click Next to view a summary of the requested actions. The Summary window opens. See Figure 48 (page 75). Figure 48 Clone Virtual Machine – Summary window 9. Click Finish to create the specified VMs. You can view the progress of the task in the Recent Tasks pane at the bottom of the vSphere Client window. TIP: No manual data refresh is necessary. When a provisioning operation is complete, the Storage Module for vCenter data is refreshed automatically.
5 Viewing hardware alert notifications This chapter describes the Insight Control for vCenter hardware alert events and alarms. Insight Control for vCenter events Insight Control for vCenter loads events from Onboard Administrator, HP SNMP agents, and HP CIM providers into vCenter Server, enabling administrators to view and manage them from the vSphere Client Tasks & Events tab. This provides administrators with a single, heterogeneous view of all host system events within the managed environment.
Enclosure name: Interconnect in bay number status changed to other. Enclosure name: Interconnect in bay number: inserted Enclosure name: Interconnect in bay number: removed Power supply events Enclosure name: Power supply in bay number status changed to OK. Enclosure name: Power supply in bay number status changed to other. Enclosure name: Power supply in bay number: inserted Enclosure name: Power supply in bay number: removed Fan events Enclosure name: Fan in bay number status changed to OK.
Enclosure name: Power subsystem status changed to degraded. Fan zone events Enclosure name: Fan zone number status changed to unknown. Enclosure name: Fan zone number status changed to degraded. vCenter Server event category: error Blade events Enclosure name: Blade in bay number status changed to non-recoverable error. Enclosure name: Blade in bay number status changed to predictive failure. Enclosure name: Blade in bay number status changed to error.
HP SNMP agent and HP CIM provider events HP Insight Control for vCenter registers with HP SNMP agents and HP CIM providers to receive traps from HP SNMP agents and indications from HP CIM providers as they occur. Events created based on these traps and indications fit into the defined vCenter Server categories.
Alarm icon When an alarm occurs, an icon appears to the right of the vSphere Client window along the bar above the vSphere Client tabs or on the host icon in the inventory tree. To view the alarm in the Alarms tab, click the icon. The Alarms tab displays a list of all alarms.
6 Troubleshooting Before troubleshooting issues with Insight Control for vCenter, you must do the following: • Verify that the correct user name and password are entered for vCenter Server. • Verify that the software is installed and configured as described in the HP Insight Control for VMware vCenter Server Installation Guide. • View the log files. For instructions, see “Viewing the log files” (page 81). Viewing the log files The Insight Control for vCenter hpserver.
Action: • Ensure that a host, cluster, datastore, or VM is selected in the left pane of the vSphere Client window. • Use the arrows to scroll through the vCenter Server tabs and locate the HP Insight Management tab. The HP Insight Management tab might be collapsed by vSphere Client due to lack of space on the GUI. • Verify network connectivity between the systems running Insight Control for vCenter, vCenter Server, and the vSphere Client.
Figure 49 Internet Explorer script error: Permission denied Action: Close the window, add the vCenter host to the Internet Explorer list of trusted sites, and then start the vSphere Client again. Stale or corrupt cache or cookies results in GUI anomalies Possible cause: Insight Control for vCenter uses the VMware plug-in architecture, which uses an embedded Internet Explorer component to display the Insight Control for vCenter GUI.
Troubleshooting the Server Module for vCenter This section includes troubleshooting information specific to the Server Module for vCenter. For general Insight Control for vCenter troubleshooting, see “Troubleshooting Insight Control for vCenter” (page 81). For troubleshooting information specific to the Storage Module for vCenter, see “Troubleshooting the Storage Module for vCenter” (page 87). Server summary data is not displayed for host Possible cause 1: iLO is not associated with the host system.
• Verify that either the global credentials or the credentials specific to each iLO, Onboard Administrator, and VMware host are configured properly. • Ensure that the initial polling cycle is complete. This may take a few moments, depending on the settings. Auto-login not working for URLs provided for managed nodes by Insight Control for vCenter Possible cause: A valid user name and password are not configured, or an SSO certificate (for SSO to Onboard Administrator) is not installed.
Cost Advantage field not showing values Possible cause: The managed vCenter Server cluster is not a DPM-configured cluster, or the power cost value is not configured. Action: Verify the cluster type and power cost setting. • Verify that the cluster is DRS-enabled. This feature applies only to DRS-enabled clusters with DPM configured. • Verify that the power cost value is configured correctly. For more information, see “Setting the power cost for a cluster” (page 23).
Error No Virtual Connect information is available for this host occurs The following scenarios can cause this error: • Servers are not blade servers. • The Virtual Connect credentials are not valid. • Other errors occurred while retrieving Virtual Connect data. For more information, see the Insight Control for vCenter logs. For information about accessing the logs, see “Viewing the log files” (page 81).
6. 7. 8. Save and close the file. Restart the HP Insight Control Storage Module for vCenter Service. Restart the vSphere Client. Port conflict occurs when trying to configure P6000 Command View and MSA proxy provider for use with Storage Module for vCenter Possible cause: P6000 Command View and the MSA2000 G2 SMI-S proxy provider cannot coexist on the same server because they use the same ports to communicate.
P9000 virtual disk information missing from Storage Overview page Possible cause: The hostgroup name for the ports on the array exceeds 16 characters. Action: Rename the hostgroup on the array to a name that is up to 16 characters, and then initiate a manual data refresh. When the refresh process is complete, information will be displayed for the P9000 virtual disks.
Storage Administrator Portal information cannot be exported Possible cause: The required ActiveX controls are disabled.
7 Support and other resources This chapter describes the support available for Insight Control for vCenter.
HP authorized resellers For the name of the nearest HP authorized reseller, see the following sources: • In the United States, see the HP U.S. service locator website: http://www.hp.com/service_locator • In other locations, see the Contact HP worldwide website: http://www.hp.
8 Documentation feedback HP is committed to providing documentation that meets your needs. To help us improve the documentation, send any errors, suggestions, or comments to Documentation Feedback (docsfeedback@hp.com). Include the document title and part number, version number, or the URL when submitting your feedback.
A Firewall port requirements To achieve full functionality, an Insight Control for vCenter server requires that the firewall ports selected or configured during the installation of Insight Control for vCenter 7.0 server are opened (inbound/outbound). The system on which the software package is installed needs to route via a firewall to Onboard Administrators/ Virtual Connects. Insight Control for vCenter uses outbound pings to determine if entities are available. Therefore, ICMP ping must be enabled.
Glossary CIM Common Information Model. CLI Command-line interface. An interface comprised of various commands which are used to control operating system responses. datastore A storage location for VM files in the VMware environment. DNS Domain name system. DPM Distributed power management. DRS Distributed Resource Scheduler. ESX An enterprise-level virtualization product offered by VMware. EVA Enterprise Virtual Array. FC Fibre Channel.
SPOCK Single Point of Connectivity Knowledge website. SPOCK is the primary portal used to obtain detailed information about supported HP storage product configurations. SSO Single Sign-On. SUM Software Update Manager. UID Unit Identification Light. VASA VMware Aware Storage APIs. VDS Microsoft Virtual Disk Service. The Windows service that manages storage through the HWPs. VM Virtual Machine. VMDK Virtual Machine Disk Format. VMFS Virtual Machine File System.
Index Symbols 3PAR storage system adding, 11 A accessing HP Insight Control for vCenter, 20 adding arrays 3PAR storage system, 11 MSA2000 G2, 13 P2000 G3 MSA System, 14 P4000, 11 P6000 EVA, 12 P9000, 15 XP, 15 adding management servers P6000 Command View, 11 administration, 7 alarm conditions, 79 alarms troubleshooting, 76, 79 alert notification hardware, 76 arrays modifying, 16 removing, 17 viewing, 15 auto-login failure, 85 B blade events, 76, 77, 78 C CA-signed certificate VASA provider, 18 certificat
HP Insight Management tab not available, 81 HP SIM events, 79 I iLO logs, 31 IML, 31 infrastructure cluster, 26 Insight power management plug-in, 85 Integrated Management Log see IML interconnect events, 76, 77, 78 Internet Explorer ActiveX, 90 cache, 83 pop-up blocker, 59 security settings, 59 temporary files, 87 troubleshooting, 82, 90 L logs, 31 iLO, 31 Onboard Administrator, 31 M management servers modifying, 16 removing, 17 viewing, 15 modifying arrays, 16 management servers, 16 MSA2000 G2 adding ar
refreshing data, 36 troubleshooting, 81 using, 32 storage volumes viewing, 49 volumes deleting, 66 vSphere Client slow response, 82 T XP tables customizing, 39 thermal events, 77, 78 troubleshooting datastore block size, 90 duplicate LUNs, 89 exporting data, 90 GUI anomalies, 83 Internet Explorer, 82, 90 missing HP Insight Management tab, 81 missing server data, 84 MSA data, 88 P2000 G3 MSA errors, 90 P2000 G3 MSA virtual disks, 90 P9000 data, 89 port conflicts, 88 refresh time, 87 replicated LUNs, 89 S